11
INSTALLATION AND CONNECTION
5. Ensure before starting adhesive work
that the temperature of materials to
be glued and the adhesive sealant is
between +5 °C and +40 °C. Prepare
all necessary fastening elements and
tools.
6. Prepare the tube of adhesive sealant
in accordance with the instructions
enclosed with the tube.
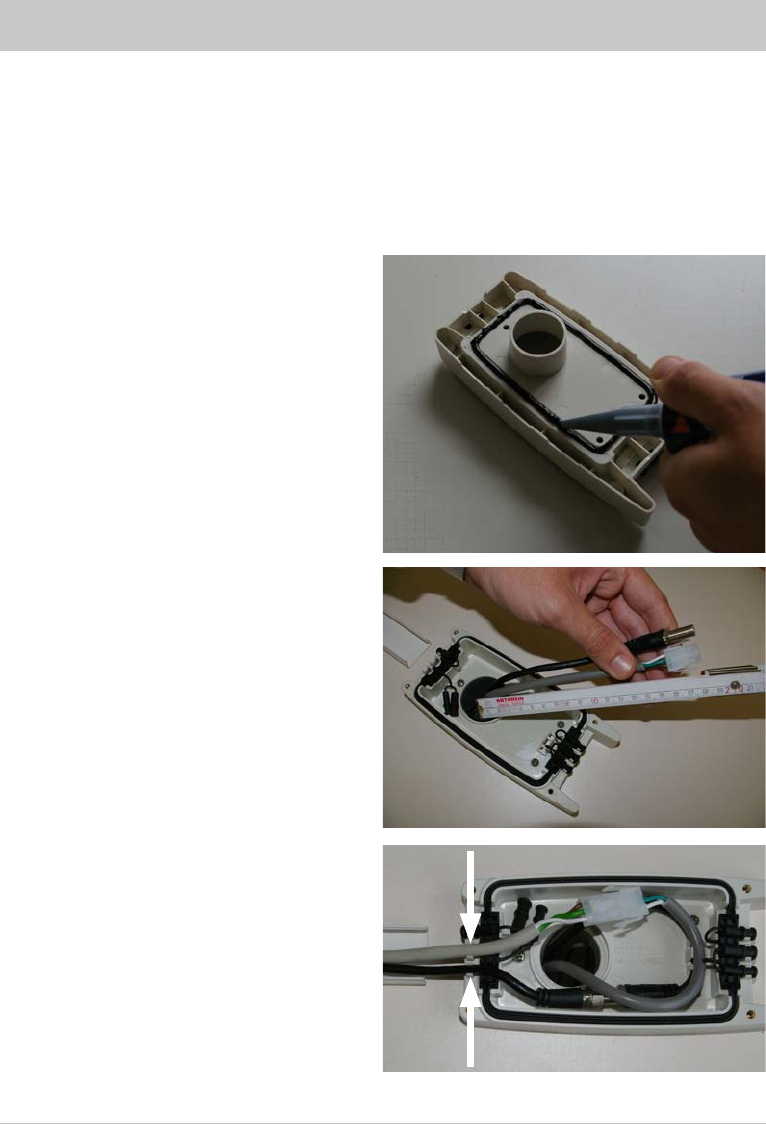
7. Apply the sealant all round and
evenly in the channel provided on the
underside of the casing (see illustration
on the right).
Avoid skin contact under all
circumstances!
Note also that the sealing contour
must be continuous and complete!
8. Now screw the casing lower half into
place, using the three self-tapping
screws provided.
9. Allow the cable ends to project
approx. 180 mm from the interior of
the vehicle and secure them with
plugs (see illustration on the right).
10. Now connect the cables and clip
them on the cable attachment
points provided (see illustration on
the right).
to the substrate.
If the coat of paint is already loose or peeling, it must be removed down to a stable layer in the area
to which the adhesive will bond. If you have any doubts concerning the adhesive characteristics,
consult a paint and lacquer specialist, or the manufacturer of your vehicle.
Under certain circumstances, it may be necessary for you to improve the adhesive properties of the roof
surface by pre-treatment with a cleaning agent available from specialist dealers (e.g. Sika
®
Cleaner) or a
primer (e.g. Sika
®
Primer).


