


H
ORIZON
NAVIGATION
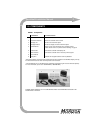
6NavMate® Installation Manual
3.4 Mount components and tuck cables
1) Controller mounting
Mount the controller to the vehicle using the brackets provided. The controller must
be firmly attached to the vehicle for the system to function properly. Do not
overtighten. Do not mount the controller upside down. The controller must be
mounted level to within 5 degrees with the vehicle parked safely on reasonably level
ground. Use a bubble level to verify. Follow the rules under the “SAFTY
INFORMATION AND PRECAUTIONS” on page 3.
Using a utility knife, slit the carpeting as necessary. Use double-sided tape to secure
the brackets underneath the carpet. The two L-shaped mounting brackets may be
reversed for mounting to the floor.
NOTE: Upon removal of the controller, reverse procedure and seal carpet slit with
double-sided tape.
2) GPS antenna mounting
The GPS antenna must be mounted in a place that provides good visibility to the sky.
If a clear view cannot be obtained inside the vehicle due to a vertical windshield (e.g.,
some delivery trucks), the antenna may be mounted outside the vehicle (The antenna
has a magnet inside). Using double-sided tape, mount the GPS antenna to the
instrument panel or package shelf. Plug the antenna cable into the controller.
3) Display Unit Mounting
Mount the display unit using the vehicle-specific bracket or flex mount. Do not
overtighten. See www.panavise.com for details.
4) Tuck all cables into the vehicle sill. Make sure the cables are not pinched or sharply
bent.
3.5 Setup, Initialize, and Calibrate
The GPS should initialize in 7-15 minutes. You do not need to be present during this
time. Take this opportunity to fill out the warranty registration for the system, and
place the User Manual and CD-ROM case in the vehicle glove compartment.
When GPS is ready GPS icon on the map screen will change from Red to Green.
1) Drive the vehicle approximately 10-15 miles to allow the system to find its current
location and calibrate for the speed signal pulse rate and the gyroscope. Verify the
VSS connection. (Make sure that the vehicle icon is moving.)
2) After a few miles of driving, verify that the vehicle icon position is close to the actual
vehicle position. Make several turns and verify that the system recognizes them.
3) The system is now ready for use. Please remember that the system is “rough
calibrated” and that over the next 30 miles of driving the system will fine tune its
calibration.