63-2493—1
4
ML6275 SPRING RETURN DIRECT COUPLED ROTARY ACTUATOR
INSTALLATION
When Installing this Product…
ᕡ Read instructions carefully. Failure to follow them could
damage the product or cause a hazardous condition.
ᕢ Check ratings and description given in the specifications
to make sure the product is suitable for your application.
ᕣ Installer must be a trained, experienced service
technician.
ᕤ After installation is complete, check out product operation
as provided in these instructions.
CAUTION
1. Disconnect power before installation to prevent
electrical shock or equipment damage.
2. Never turn motor output hub by hand or wrench.
3. Do not install actuator in areas with acid fumes or
other deteriorating vapors that might attack the
metal parts of the actuator.
4. Do not install actuator in areas with escaping gas
or other explosive vapors that could be ignited by
a spark from the actuator or attached accessories.
Location
Install the actuator in any location free from acid fumes or
other deteriorating vapors that might attack the metal parts of
the actuator. Make sure the location is not subject to
escaping gas or other explosive vapors that could
accidentally be ignited by a spark from the actuator or its
attached parts.
Install the actuator in a location that allows enough clearance
for mounting accessories and for servicing.
Mounting
The ML6275 Direct Coupled Actuator is designed to operate
a damper by driving the damper shaft either cw or
ccw depending on damper design. All actuators are
shipped in the fully closed position.
The ML6275 Direct Coupled Actuator is designed for single-
point mounting when using an adapter bracket. Single-point
mounting is typically used when the actuator is mounted on
the damper frame.
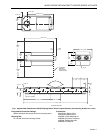
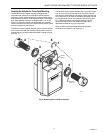
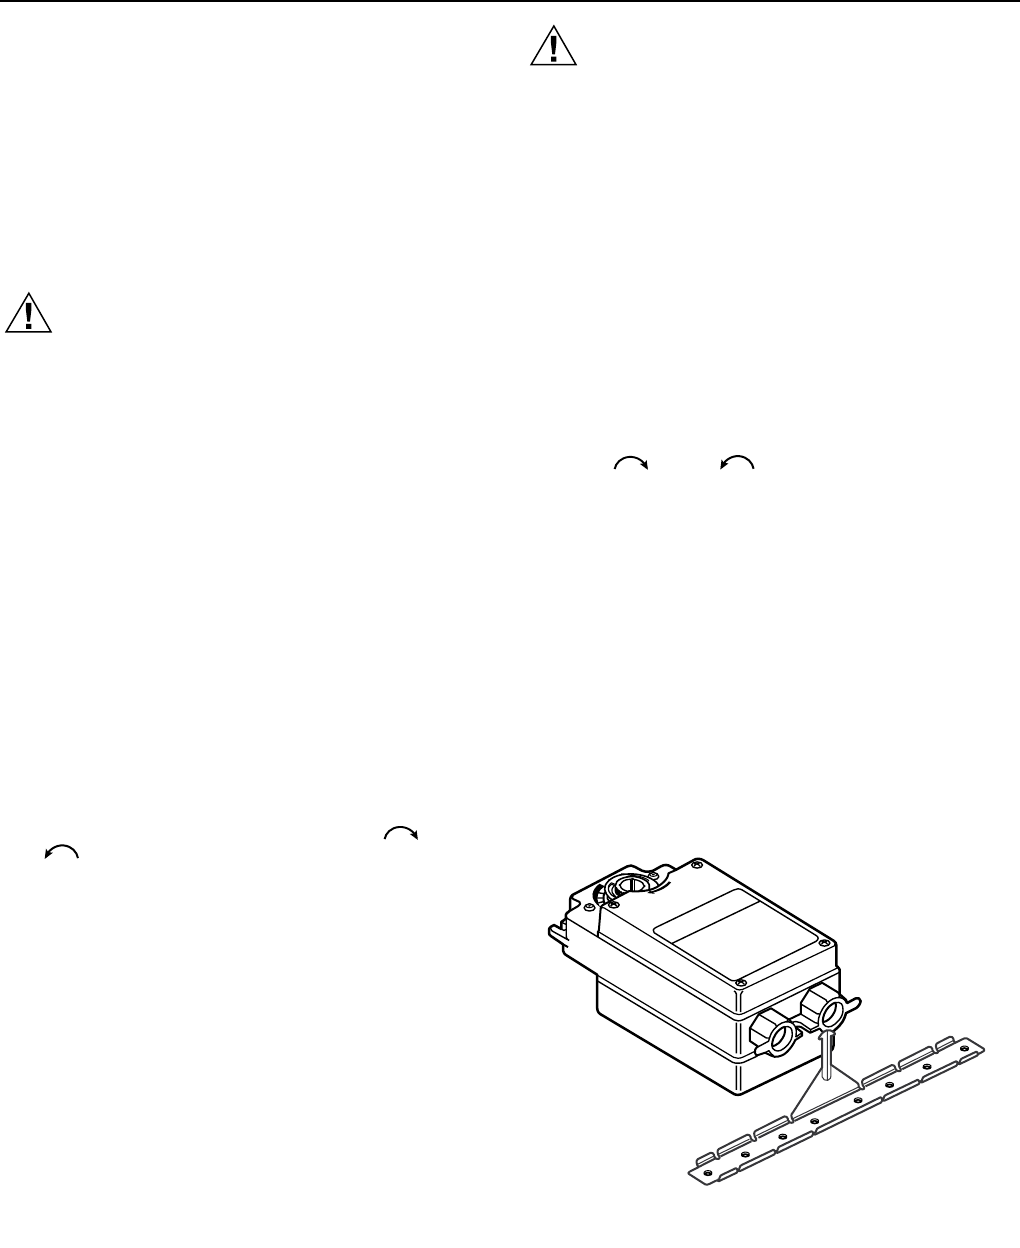
A mounting bracket (see Fig. 1) is provided with some models
to aid in installing the actuator. The bracket can be bent to any
shape to support the actuator at the correct height.
The ML6275 Direct Coupled Actuator can also be three-point
mounted using the two front gear housing slots and the
adapter bracket. Two screws are secured through the two
front gear housing slots and the adapter bracket positioned to
secure the rear of the actuator. Three point mounting is used
for foot mounting the actuator or internally mounting the
actuator in the duct when direct shaft coupling is not possible.
6
0
3
0
9
0
M9386
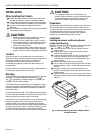
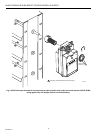
Fig. 2. Installing mounting bracket on ML6275 Direct
Coupled Actuator.
CAUTION
Do not use the actuator as a shaft bearing. The
actuator must be used only to supply rotational torque.
To prevent damage to the actuator, avoid any side
loads to the actuator output coupling bearings.
Preparation
Before installing the ML6275 on the damper shaft, determine
the opening direction of the damper shaft to determine the
correct spring return rotation and correctly connect the wiring.
The ML6275 can be mounted to provide clockwise or
counterclockwise spring return. Reverse the actuator if
necessary to provide the desired spring action.
Installation
Installing the Actuator and Mounting Bracket
(Single Point Mounting)
When the direction of the damper shaft rotation is determined
(either cw or ccw ), proceed as follows:
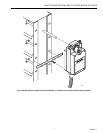
ᕡ Place the ML6275 Direct Coupled Actuator over the
damper shaft.
ᕢ Position the actuator for best access to the actuator
damper shaft locking screw.
ᕣ Install the mounting bracket (see Fig. 2) and adjust it to
support the actuator at the correct height. Mark the
screw holes for installing the mounting bracket on the
damper housing.
ᕤ Remove the mounting bracket and actuator.
ᕥ Drill or center punch the starting holes for the mounting
bracket screws (or use no. 10 self-tapping sheet metal
screws).
ᕦ Place the actuator and mounting bracket back into
position over the damper shaft and install the mounting
bracket screws.
ᕧ Tighten the two 8 mm by 12 mm long set screws firmly
against the damper shaft (maximum tightening torque is
100 lb-in.).


