C-VS-2400-CHGR_INST_12-07
2
Always!
Read all instructions before installing any Havis-Shields Equipment Corp products.
Check for obstructions (Wire, brake lines, fuel tank, etc.) before drilling any holes!
Use hardware provided with install kit
For product support, visit the Install Instructions Section of our website at
http://havis.com/Installation/Installation.html, email technicalsupport@havis.com or call 1-800-
524-9900.
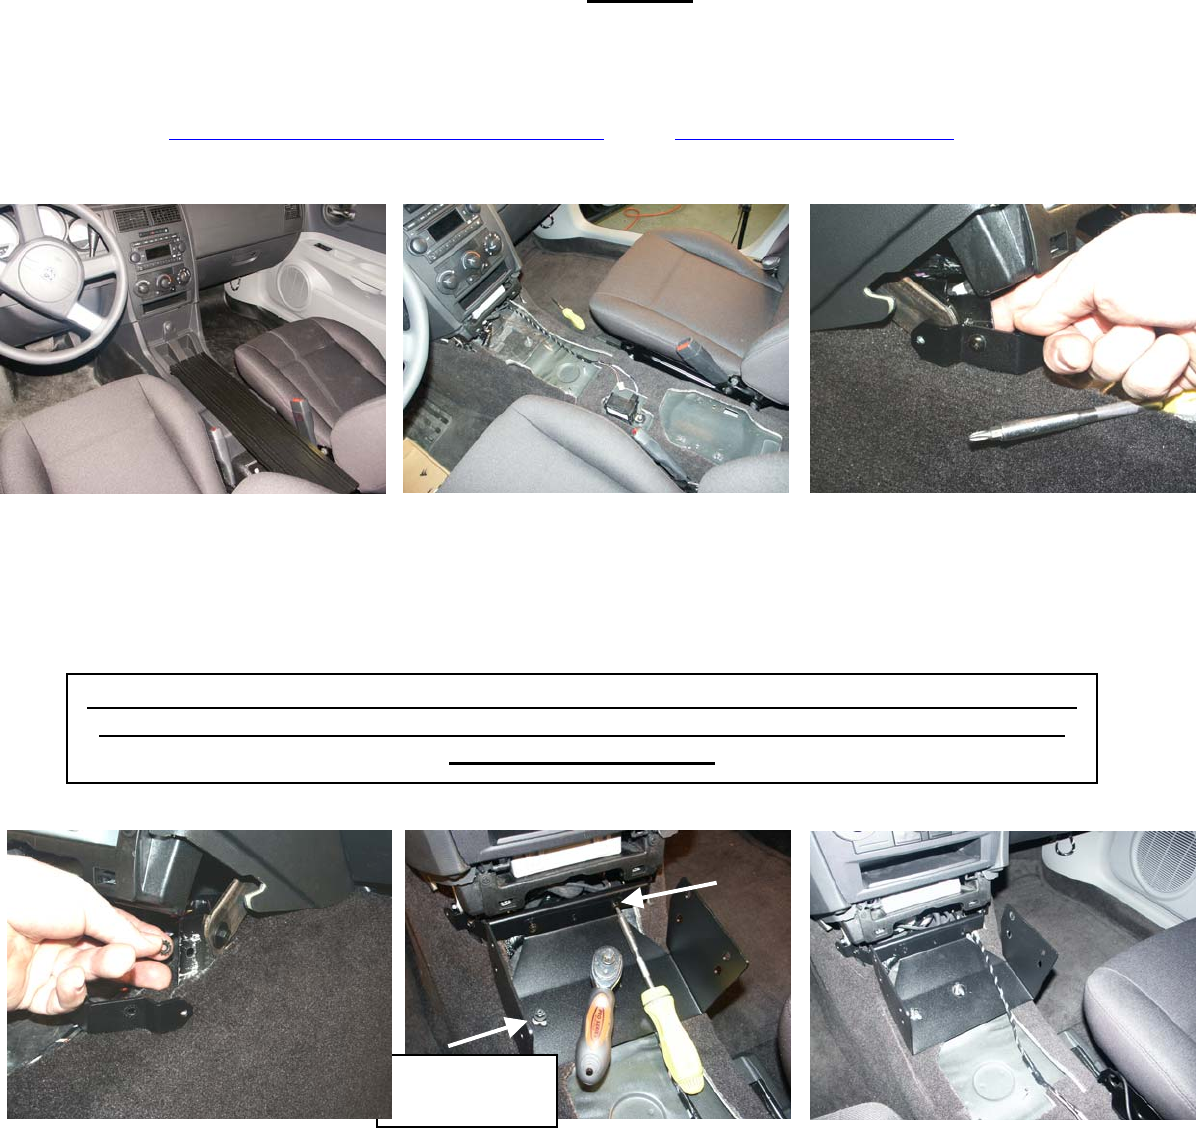
2006-2007 Charger OEM Setup
Remove OEM track/plate &
plastic trim covering
Loosely attach, (driver side 1st),
front support bracket to OEM
b
racket located under radio controls.
Use #10 x ½” screw & keps nut
(Item 2, 7, 8, 9)
Attach passenger side, and tighten
hardware on both sides
(Item 2, 7, 8, 9)
Attach front floor bracket to front
support bracket and floor of vehicle
using #10 x ½” machine screws,
washers, and reuse OEM floor nuts or
supplied 6mm nuts and fender washers
(Item 2, 4, 7, 9)
OEM or 6mm
hardware
Note. To avoid crushing harness
route cable over top of floor
bracket
Note: Due to some sli
g
ht di
ff
erences on the OEM
f
loor mount bracket, tabs with mountin
g
hole ma
y
need to be bent slightly to accommodate the console front support bracket. Bending these tabs can
easily be done using pliers.


