


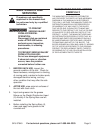

Page 5For technical questions, please call 1-800-444-3353.SKU 67649
Hitch Ball Installation
Install a properly sized and properly
rated hitch ball into the hole at the top of
the Weight Distribution Head (2).
Secure in place using the washer(s) and
nut(s) provided with the hitch ball.
Weight Distribution
Head (2) Installation
Determine the required ball height:1.
Divide tongue weight by 200 for tow a.
vehicles with overload springs, divide it
by 100 for vehicles without overload
springs and multiply the result to
calculate tow vehicle ‘squat’:
_______ lb. Tongue wt.
200 (if tow vehicle has overload springs)
–:
OR
100
(if tow vehicle has no overload springs)
= _______
X 1/8”
= _______ ” tow vehicle ‘squat’
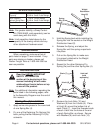
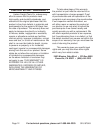
Position trailer parallel b.
to the ground on a
at, level surface and
measure the distance
from the ground to the
top of the ball cup
and write it here:
_________ ” coupler height
Add the distance found in step 1a to c.
the distance from step 1b to get the
required ball height:
______ ” tow vehicle ‘squat’ (step 1a)
+ ______ ” coupler height (step 1b)
= ______ ” required ball height
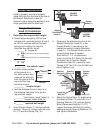
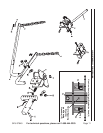
Insert Square Shank (1) into tow vehicle 2.
receiver. Secure it in place with the Lock
Pin (17) and the Spring Clip (18).
LOWEST
SETTING
HIGHEST
SETTING
Weight
Distribution
Head (2)
Square
Shank (1)
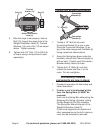
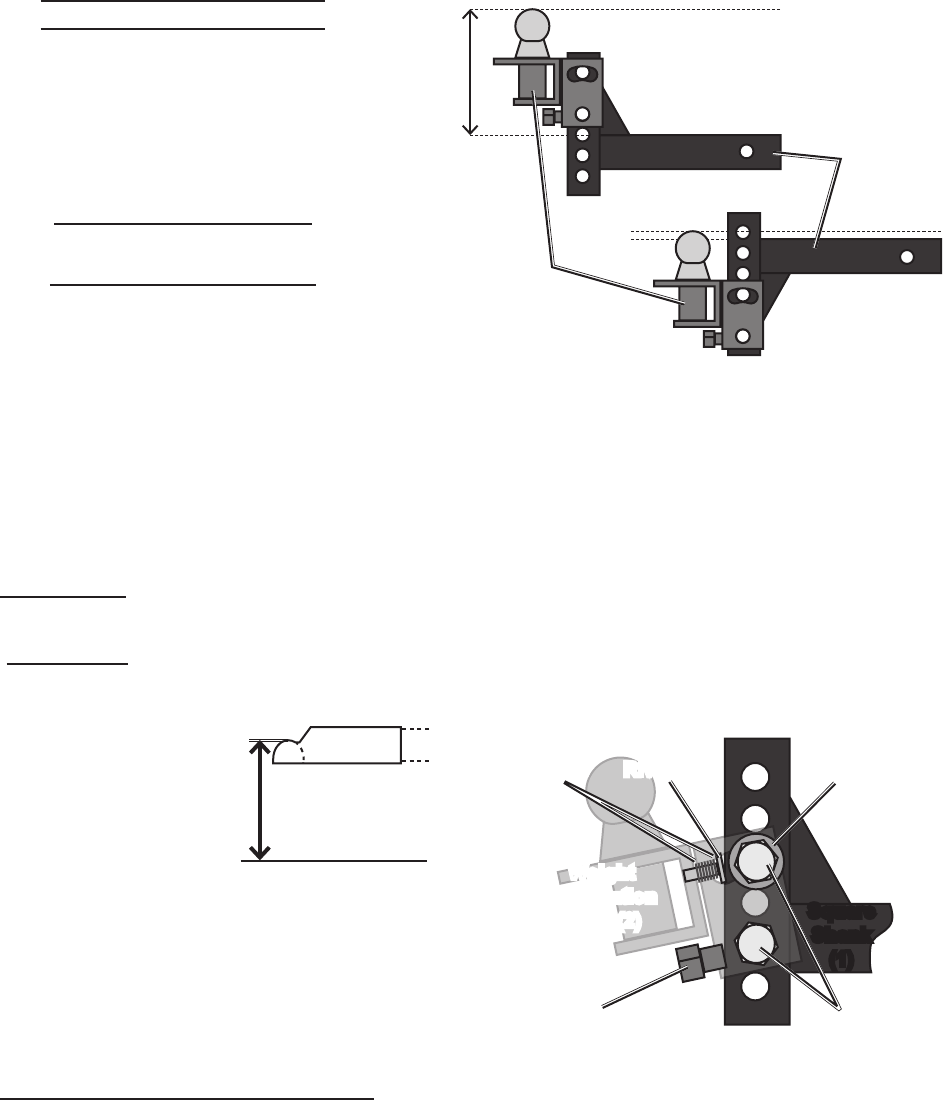
3. Determine the attachment point of the
Weight Distribution Head (2) to the
Square Shank (1) according to the
needed connection height calculated
in step 1c. The Square Shank can be
turned upside-down if needed.
Each hole is 1-1/4” of adjustment.
Insert one of the 3/4” Bolts (16) through
the lower hole to hold the Weight
Distribution Head (2) in place for now.
Thread a 3/4” Nut (12) onto the Bolt, but
do not tighten it yet.
Weight
Distribution
Head (2)
Angle Set
Bolt (2c)
Spacing
Washers
(13)
Spacing
Rivet (14)
Toothed
Washer
(15)
Bolts (16)
Square
Shank
(1)
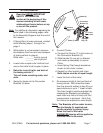
4. Adjust the Spring Bars’ (4) angle using
the Spacing Rivet (14) and from 0 to 7
Spacing Washers (13) until the Spring
Bars tilt downward slightly (10-13°).
Loosen the Angle Set Bolt (2c) before
adding/removing Spacing Washers (13)
and tighten afterwards.
Ground
Coupler
Coupler
Height