


Page 6 For technical questions, please call 1-800-444-3353. SKU 67649
Bolt (16)
Weight Distribution
Head (2)
Toothed
Washer (15)
Square
Shank (1)
Nut (12)
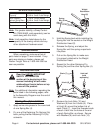
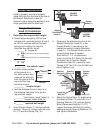
5. After the angle is set properly, insert a
Bolt (16) through the upper hole in the
Weight Distribution Head (2), Toothed
Washers (15), and a Nut (12) as shown
above. Tighten securely.
Tighten both 3/4” Nuts (12) to 260 ft-lb 6.
of torque using a torque wrench (sold
separately).
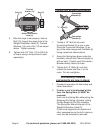
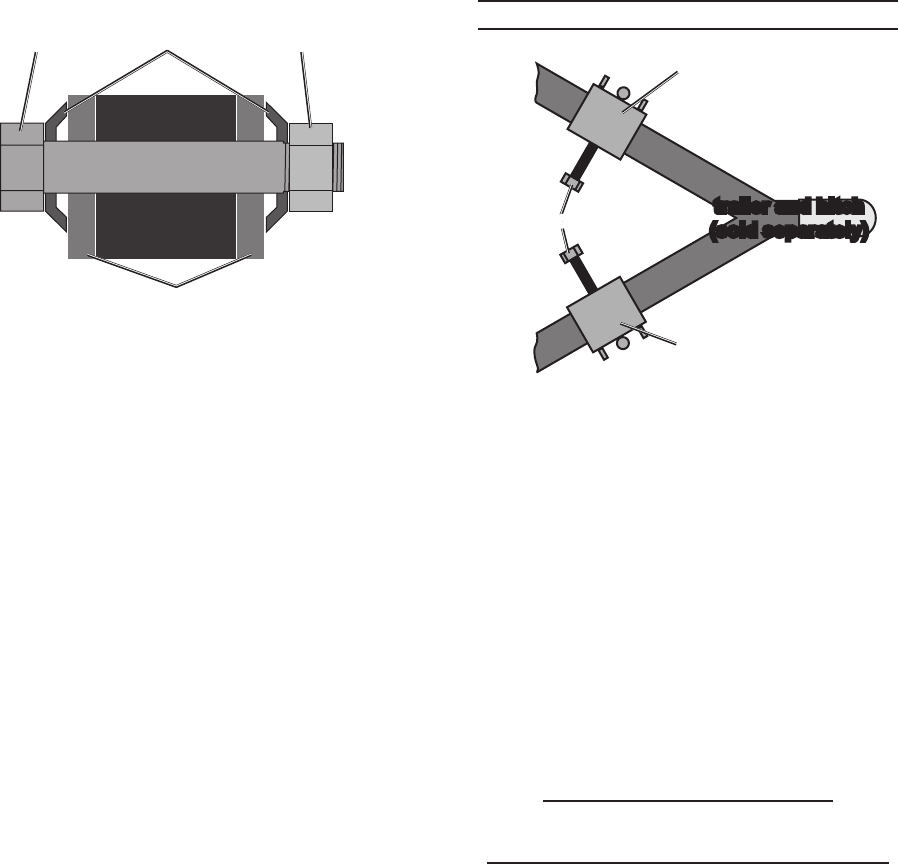
Connection Bracket Installation
Connection
Bracket (3)
Connection
Bracket (3)
trailer and hitch
(sold separately)
1
/
2
” Bolts (6)
1. Thread a 1/2” Bolt (6) into each
Connection Bracket (3) a turn or two.
Place the Connection Brackets (3) on
top of the trailer tongue with the Bolts (6)
facing inwards as shown above.
Swing the Spring bars down under the
2.
brackets, and pull the Chains straight up
with no twist. Position each Connection
Bracket directly above its chain.
Tighten the 1/2” Bolts (6) until they 3.
contact the trailer and then 1/4 turn
more. Do not overtighten.
Permanently installed
components are now in place:
Proceed to operation for nal setup and 1.
trailer attachment.
If trailer is not to be attached at this 2.
time, the Spring Bars (4) MUST be
removed:
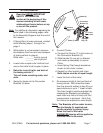
Hold onto the Spring Bar while prying the
Retaining Pin Spring (2a) back, pulling
the Bar Retaining Pin (2b) outwards.
The Spring Bar should drop out of the
Weight Distribution Head (2).
Check local regulations to determine if
other components can be left in place or
must also be temporarily removed.