If you are experiencing interference from other collars or
handheld devices in the area, you might need to change the ID
for the dog.
1
Select Dog List.
2
Select a dog.
3
Select Show Info.
4
Select > Change ID.
5
Select an available ID.
If another handheld device is tracking this dog, for best results,
remove the dog from the device, and use the track and train
codes (Adding a Dog Using the Track and Train Codes) or
share wirelessly over ANT+ (Sharing a Dog Wirelessly) to add
the dog again.
Setting Dog Alerts
You can adjust how the handheld device alerts you to certain
actions of the dog.
1
Select Setup > Dogs > Dog Alerts.
2
Select an alert.
3
Select the handheld device action for the specific alert.
4
Repeat steps 2 and 3 as needed.
Removing a Dog
1
Select Dog List.
2
Select a dog.
3
Select Remove.
Fitting the Collar on Your Dog
Before you can put the collar on the dog, you must pair the
handheld device and collar (Adding a Dog Over MURS/VHF),
and acquire satellite signals (Acquiring Satellite Signals).
1
Position the collar with the VHF whip antenna pointing up,
the GPS antenna facing up, and the LEDs facing forward.
2
Place the collar around the middle of the dog's neck.
3
Tighten the strap so it is snug around the dog's neck.
NOTE: The collar should fit tightly and should not be able to
rotate or slide on the dog's neck. The dog must be able to
swallow food and water normally. You should observe your
dog's behavior to verify the collar is not too tight.
4
If the strap is too long, cut off the excess, leaving at least
3 in. (7.62 cm) to spare.
Enabling Bark Detection
NOTE: This feature is not available in all areas.
Select Setup > Dogs > Bark Detection.
A barking icon appears on the dog tracking page and the map
page.
When the dog collar device is active and properly fitted on the
dog (Fitting the Collar on Your Dog), it detects barks
automatically. After bark detection is enabled, you can set up a
bark alert (Setting Dog Alerts).
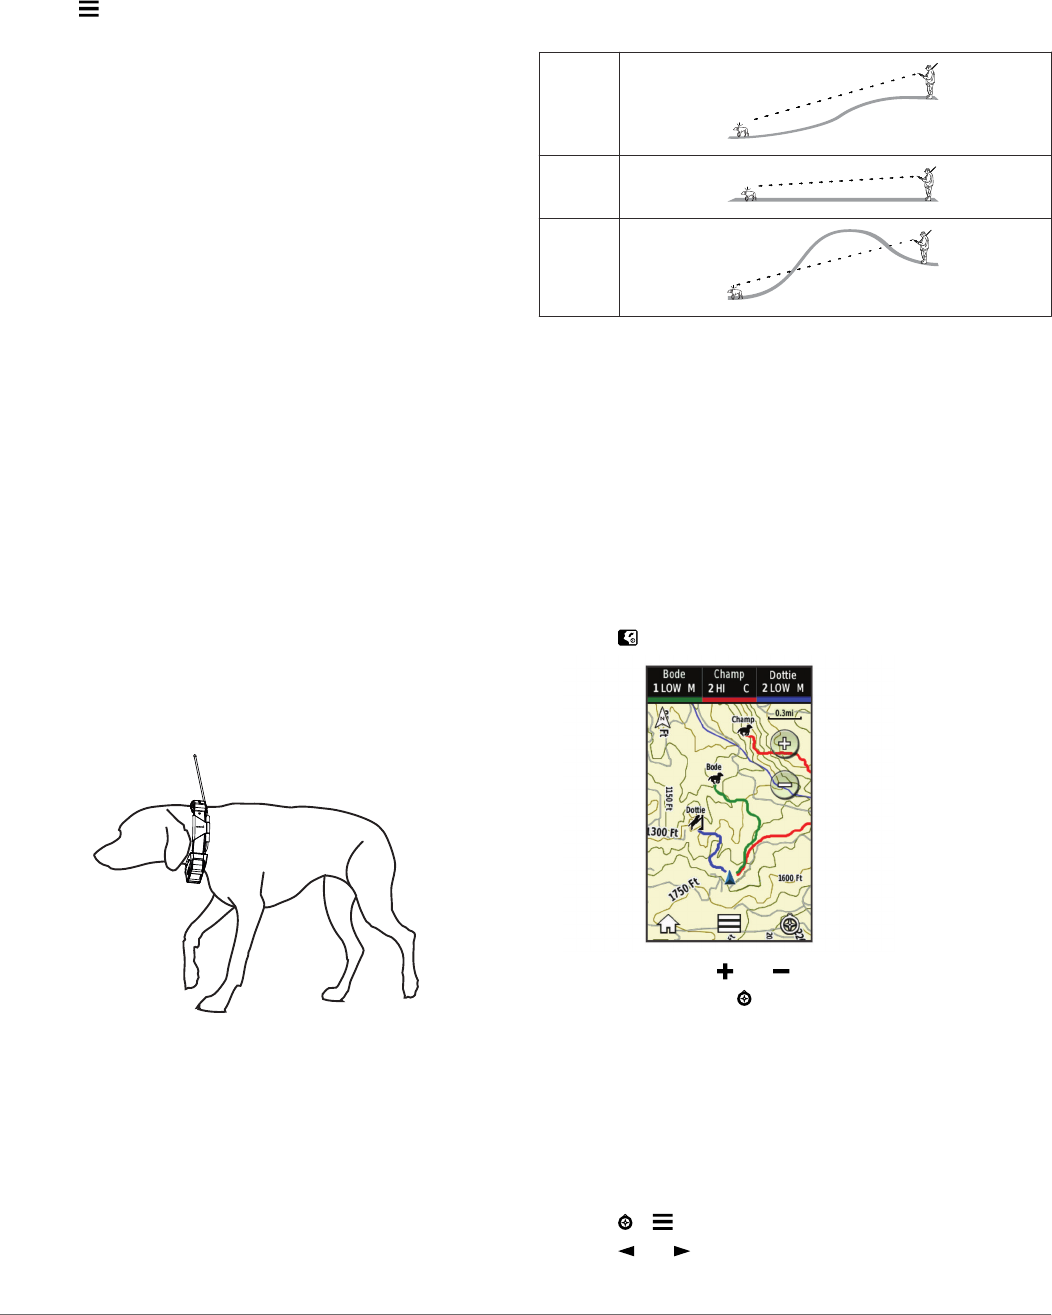
Communication with the Collar
You should keep an unobstructed line of sight between your
handheld device and the dog collar device to produce the best
communication signal. To achieve the best line-of-sight
conditions, you should move to the highest elevation point in
your area (for example, on the top of a hill).
Best
Good
Poor
Dog Tracking
The handheld device allows you to track your dog, using the
tracking compass or map. The map displays your location and
your dog's location and tracks. The compass pointer indicates
the direction of the dog's current location.
Tracking Your Dog on the Map
Before you can track a dog or contact on the map, you must
add them to the handheld device (Adding a Dog Over
MURS/VHF and Adding a Contact Using MURS/VHF).
You can view the dog's location and other contacts' locations on
the map.
1
Select .
2
If necessary select and to zoom in and out of the map.
TIP: If necessary, select to track the dog using the dog
tracking compass (Dog Tracking Compass).
Tracking and Training One Dog at a Time
NOTE: This feature applies only to dog collar devices with
training features.
When you are tracking and training multiple dogs, you can
enable the device to display only one dog at a time, and you
can ensure the dog being viewed on the compass is the dog
being trained.
1
Select > > List Sync On.
2
Select and to cycle through the dogs.
4 Dog Tracking


