


3
Call 1-866-576-8388 for missing parts or assembly help
DO NOT RETURN TO STORE
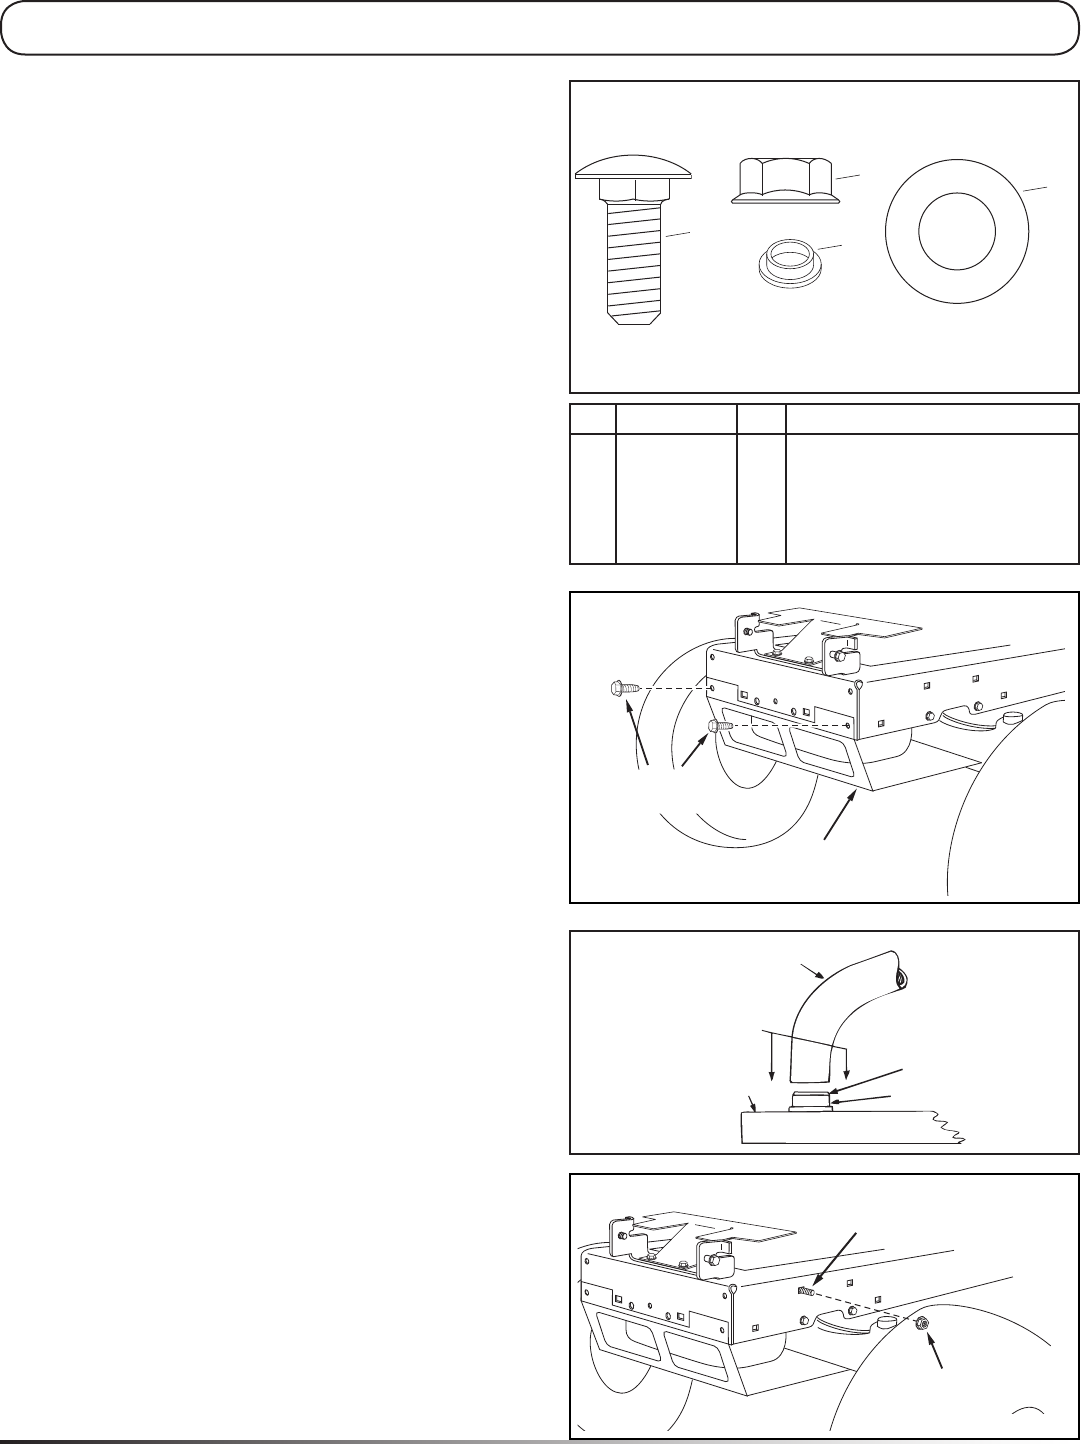
HARDWARE SHOWN FULL SIZE
EXCEPT WHERE NOTED
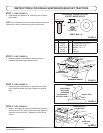
PARTS BAG "A"
B
A
C
D
(not full size)
Ref. Part Qty. Description
A 43350 4 Carriage Bolt, 3/8-16 x 1"
B 44072 4 Whizlock Nut, 3/8"
C R19171616 4 Washer, 1/2" x 1"
D 44742 2 Plug
65932 1 Bumper
NOTE: Place cardboard or a mat on work surface to prevent
scratching of parts removed from carton and tractor.
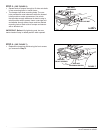
STEP 2: (SEE FIGURE 3)
Remove tractor hood. (Refer to tractor manual.) •
Remove the browning shield as shown. •
FIGURE 3
REMOVE
BROWNING SHIELD
REMOVE
FRONT SCREWS
INSTRUCTIONS FOR SINGLE SUSPENSION BRACKET TRACTORS
STEP 1: (SEE FIGURE 2)
Open parts bag labelled " • A" and verify that all parts
are present.
FIGURE 2
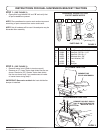
STEP 3: (SEE FIGURE 4)
Place plug on a work bench or solid table and push •
end of bumper down onto plug. Repeat for second
plug.
FIGURE 4
PLUG
SHORT STEP
BUMPER
PUSH DOWN
WITH EVEN
PRESSURE
WORK BENCH
OR SOLID TABLE
STEP 4: (SEE FIGURE 5)
Insert a carriage bolt into the second mounting hole •
from the front of the tractor frame and fully tighten a
whizlock nut onto the bolt. Repeat on other side of
tractor.
WHIZLOCK
NUT
CARRIAGE BOLT
AND WASHER
FIGURE 5