


Notice: Modifications made to the engine,
transaxle, exhaust, intake, or fuel system of your
vehicle or the replacement of the original tires with
other than those of the same Tire Performance
Criteria (TPC) can affect your vehicle’s emission
controls and may cause this light to come on.
Modifications to these systems could lead to costly
repairs not covered by your warranty. This may
also result in a failure to pass a required Emission
Inspection/Maintenance test. See Accessories
and Modifications on page 5-3.
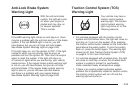
This light should come on, as a check to show you it is
working, when the ignition is on and the engine is
not running. If the light does not come on, have it
repaired. This light will also come on during a
malfunction in one of two ways:
• Light Flashing — A misfire condition has been
detected. A misfire increases vehicle emissions
and may damage the emission control system on
your vehicle. Diagnosis and service may be
required.
• Light On Steady — An emission control system
malfunction has been detected on your vehicle.
Diagnosis and service may be required.
If the Light is Flashing
The following may prevent more serious damage to
your vehicle:
• Reducing vehicle speed
• Avoiding hard accelerations
• Avoiding steep uphill grades
• If you are towing a trailer, reduce the amount of
cargo being hauled as soon as it is possible
If the light stops flashing and remains on steady,
see “If the Light Is On Steady” following.
If the light continues to flash, when it is safe to do so,
stop the vehicle. Find a safe place to park your vehicle.
Turn the key off, wait at least 10 seconds and restart
the engine. If the light remains on steady, see “If the
Light Is On Steady” following. If the light is still flashing,
follow the previous steps, and see your dealer for
service as soon as possible.
If the Light Is On Steady
You may be able to correct the emission system
malfunction by considering the following:
Did you recently put fuel into your vehicle?
If so, reinstall the fuel cap, making sure to fully
install the cap. See Filling the Tank on page 5-8.
3-32