


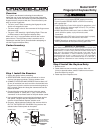


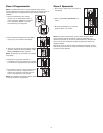
Tips for Success
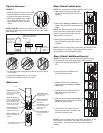
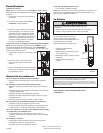
CORRECT
1. Make sure finger is clean and dry. Place
finger flat above the sensor strip with
the top knuckle above the sensor.
2. Swipe finger straight down keeping
firm contact with the sensor.
The
swipe should be a slow, constant
speed.
SPECIAL NOTES: Use the same finger for every swipe. It is
important to swipe finger slowly and firmly as this is the reason
most swipes fail.
Swipe finger straight down
keeping firm contact with
Start swipe with
the sensor.
the top knuckle
above the
sensor strip.
Sensor Strip
Sensor Strip
The scan
should end
at the tip of
finger.
INCORRECT
• Do not bend finger during swipe as this will only scan the tip
of your finger.
• Swipe finger straight down, not at an angle.
• Swipe flat, not tilted or rolled to one side.
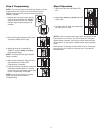
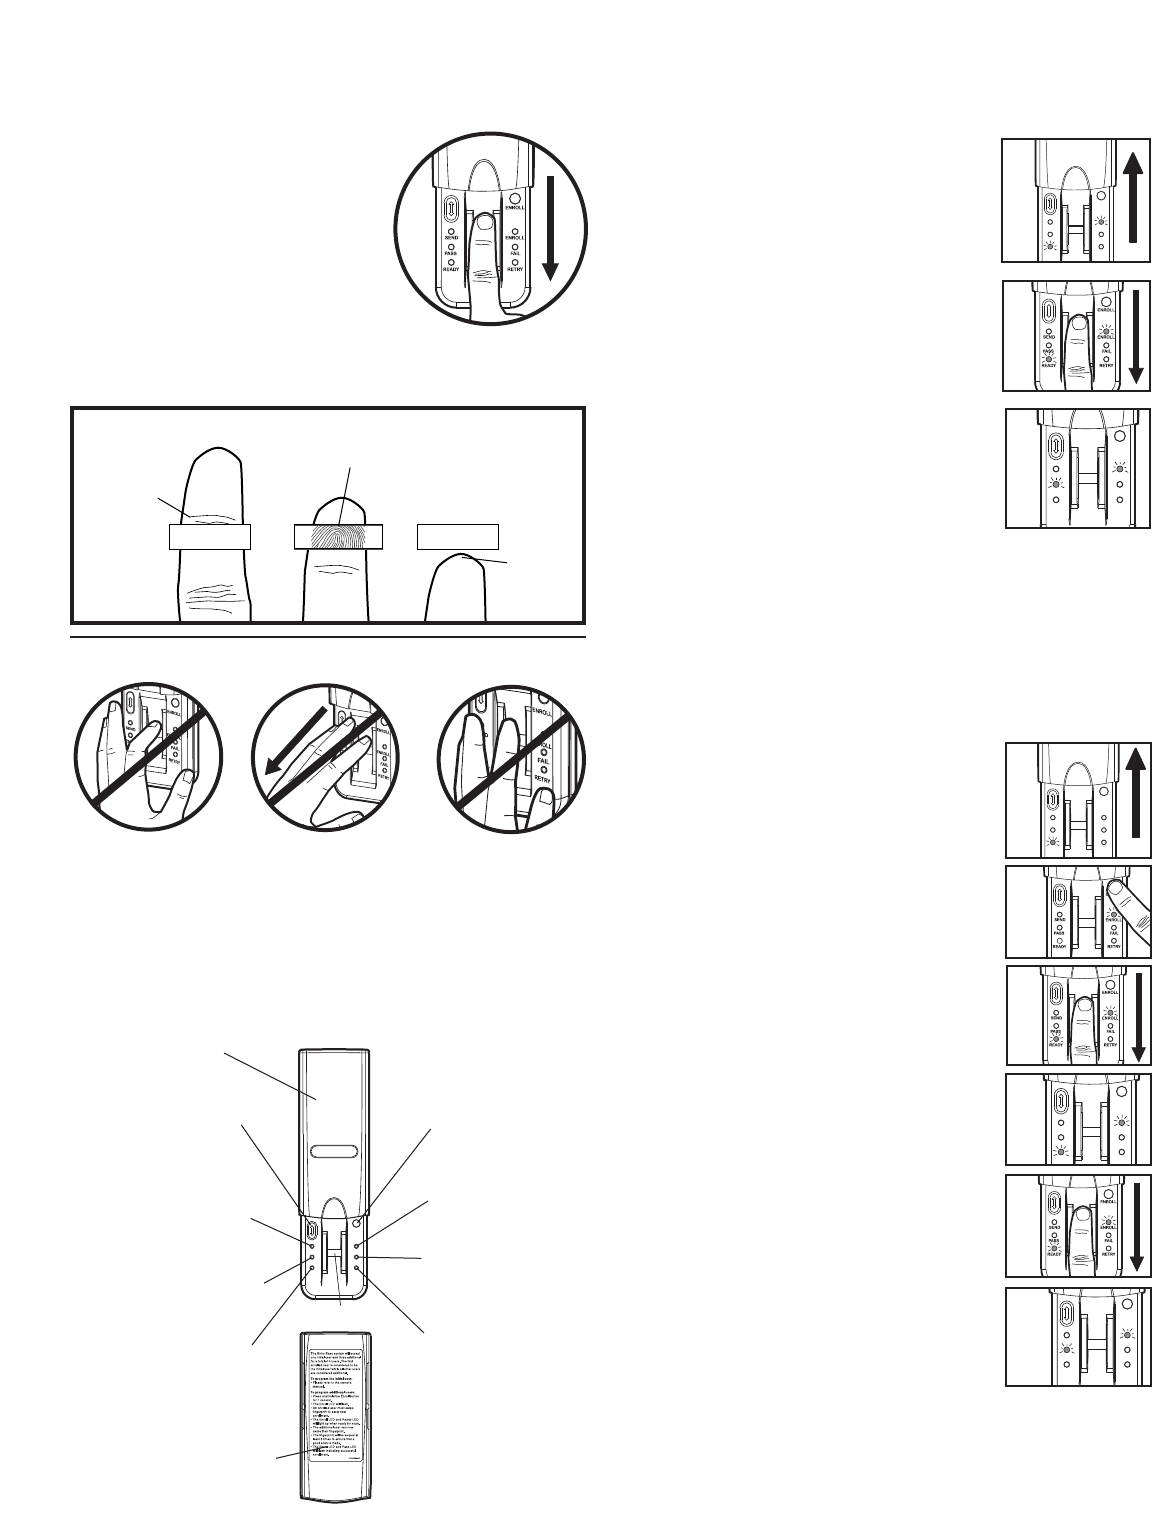
Reference
Cover
Resend button: When
pressed the door will stop if
Enroll button: W
hen
mo
ving up or reverse if
pressed the unit will go
moving down.
into Enroll mode.
Send LED (yellow): Lit
after a passed fingerprint
Enroll LED (yellow):
scan and indicates that the
Lit when the unit is in
Resend button is active
Enroll mode.
and can be used to stop
ENROLL
SEND
ENROLL
Fail LED (red): Lit when
or reverse door travel.
PASS FAIL
READY RETRY
a scanned fingerprint
Pass LED (green): Lit when
does not match a
a scanned fingerprint
stored print
.
Sensor Strip
matches a stored print.
Retry LED (yellow): Lit
w
hen another s
wipe is
Ready LED (green): Lit
required.
when unit is ready to scan
fingerprint.
Extra directions are located
on the inside of cover.
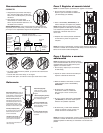
Step 3 Enroll Initial User
NOTE: The unit requires 3 passed swipes to enroll a user.
1. Open cover to turn unit on. Wait until
Enroll LED and Ready LED are lit (not
1
flashing).
ENROLL
SEND
ENROLL
PASS FAIL
READY RETRY
2. Swipe finger slowly and firmly down the
2
sensor strip until three passed swipes are
made.
NOTE: The Pass LED will light for a passed
swipe. The Retry LED will light if another
swipe is needed. Swipe slowly and with
more pressure if this occurs.
3
ENROLL
3. After the third passed swipe, the Enroll
SEND
ENROLL
and Pass LED will flash. Enrollment is
PASS
READY
FAIL
RETRY
complete.
NOTE: If cover is already open, press either the Resend or the
Enroll button to turn unit on. If the Ready LED is lit refer to
Factory Reset in the Erase/Reset section.
Step 4 Enroll Additional User(s)
NOTE: The device can store up to four fingerprints at a time.
An enrolled user must swipe finger first to enroll new user.
1. Open cover and wait until Ready LED
1
is lit.
ENROLL
SEND
ENROLL
PASS FAIL
READY RETRY
2. Press and hold Enroll button until
Enroll LED starts to flash.
2
3. While the Enroll LED is flashing an
3
enrolled user must slowly and firmly
swipe finger.
4. The Enroll LED and Ready LED will
4
ENROLL
light when ready for new user to
swipe finger.
SEND
ENROLL
PASS FAIL
READY RETRY
5. New user should swipe finger slowly and
5
firmly down the sensor strip until three
passed swipes are made.
6. The Enroll LED and Pass LED will
6
ENROLL
flash when new user is enrolled. Unit
SEND
ENROLL
will return to Ready mode.
PASS FAIL
READY RETRY
NOTE: If cover is already open, press either the Resend or the
Enroll button to turn unit on. The Pass LED will light for a
passed swipe. The Retry LED will light if another swipe is
needed.
2