9
Note: if you get a Windows “AutoPlay” popup when you connect your D-Tour,
click “Open Folder to View Files”, then double click a .btk (trip data) file). On
Mac®, double click the “D-Tour” icon in your Applications folder to launch the
application.
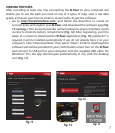
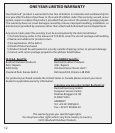
• Enter the User Name (email address) and Password you used when setting up
your account, then select “LOGIN” (Fig. 18). This will enable all your trip data
to be stored within your online account, so it will be automatically backed up,
and accessible to you from any computer.
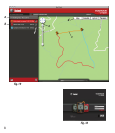
USING THE D-TOUR APP-Basic Features (Fig. 19)
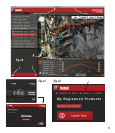
• After the D-Tour app opens, you will see one or more gray folders on the
left (a) below “My Downloaded Tracks”, each labeled with a date. Each folder
contains information on the trips taken in a 24 hour period.
• Click the folder to open it and view the individual trips (b) you made on that
date (the duration of each trip is based on the time elapsed between the
starting and stopping of a new trip recording when you held down the TRIP
button).
• The route you traveled for each trip is shown as a colored line (c) on a map.
Four types of maps are available-click on the name of a map type (d) to
change the view:
MAP-a “road map” style view, complete with road names.
SATELLITE-an aerial photo of the area.
HYBRID-a combination of the first two maps.
TERRAIN-this is a topographic map showing elevation data for the area.
• The zoom slider and position arrow pad allow you to zoom in/out and move
around on the map (e).
• Click on the name of a trip to highlight it on the map. You can hide any trip by
clicking on the “eye” icon next to it’s name (f).
• To change the name of a folder (from the default date to something like
“Canyon Trip Day 1”), right click on its name. You can also right click on a trip
within the folder to rename it.


