9490-A T2 Instruction Manual
Page 6 of 12
Transport T
Hitch Mount Bicycle Rack
Assembl
&
Use
Rack Maintenance and Care
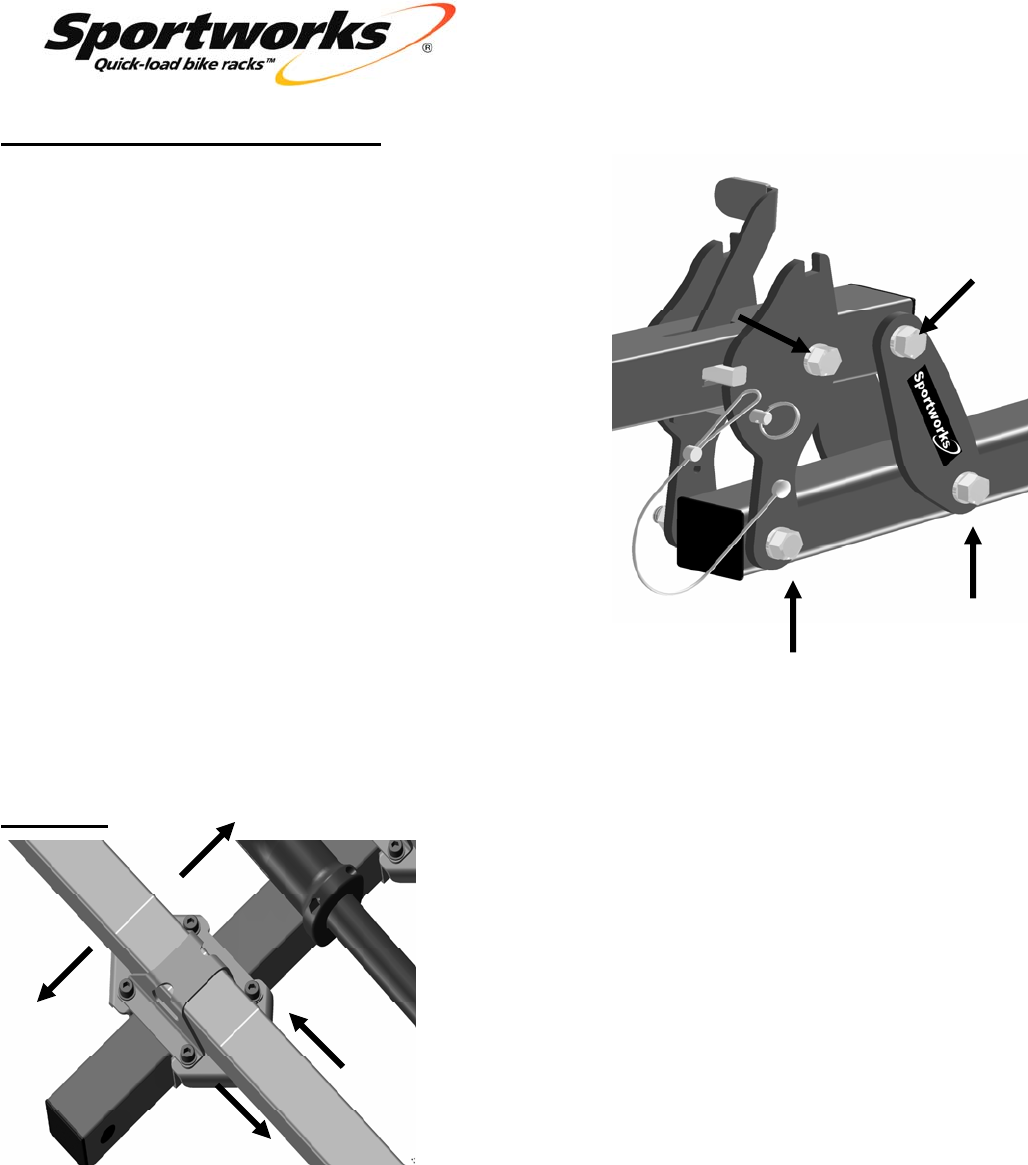
1) 4-Bar Link Folding Mechanism
• Periodically tighten bolts in 4 bar link on the
hitch base to ensure a stable connection.(
Fig
P
.) You should feel some resistance when
folding the rack up and down.
2) Hitch Receiver Connection
• Make sure to check and tighten the anti-
wobble hitch bolts periodically to ensure a
stable connection. (
See Fig B, pg 2.)
3) Support Arm Rotation Friction
• Check and tighten the plastic wingnuts (See
Fig A., pg 1)
at the base of the support arm.
The arm should rotate easily, but should not
fall under its own weight. The arm should
snap into place when stowed and should
require some effort to rotate the arm up
.
4) Cleaning your rack
• Frequently clean the rack of dirt and road grime including wiping down the teeth on
the support arm while extended. It is especially important to clean road salt from
the rack as this can promote rust over time.
Fit Tips
1) Bike Interference with each other or with the car.
A.
Pitch – Distance between bikes
• To adjust pitch, loosen all 4 bracket bolts and slide
the tray in or out. Re-tighten bolts to secure tray
.
(See Step 2 on pg. 2.)
B. Offset – Side to Side Distance
• To adjust offset, loosen all 4 bracket bolts and slide
tray left or right. Re-tighten bolts to secure tray
. (See
Step 2 on pg. 2 for directions on tightening bracket bolts.)
Note: Do not slide tray past offset limit
marks on either side of the bracket or
failure may occur. See Fig D. pg 2.
2) For ground clearance issues see Accessories on page 9.
3) Retrofitting your rack to another hitch size – 1 ¼” or 2”
• Swap out the hitch base with the other size by removing the bottom two hitch bolts seen
in fig P at the top of the page. For part numbers on hitch assemblies see Accessories on
page 6&7
. Call your dealer to purchase the proper part.
A) Pitch
B) Offset
Figure P.
1) 4-Bar Link Bolts
Figure Q.
