1
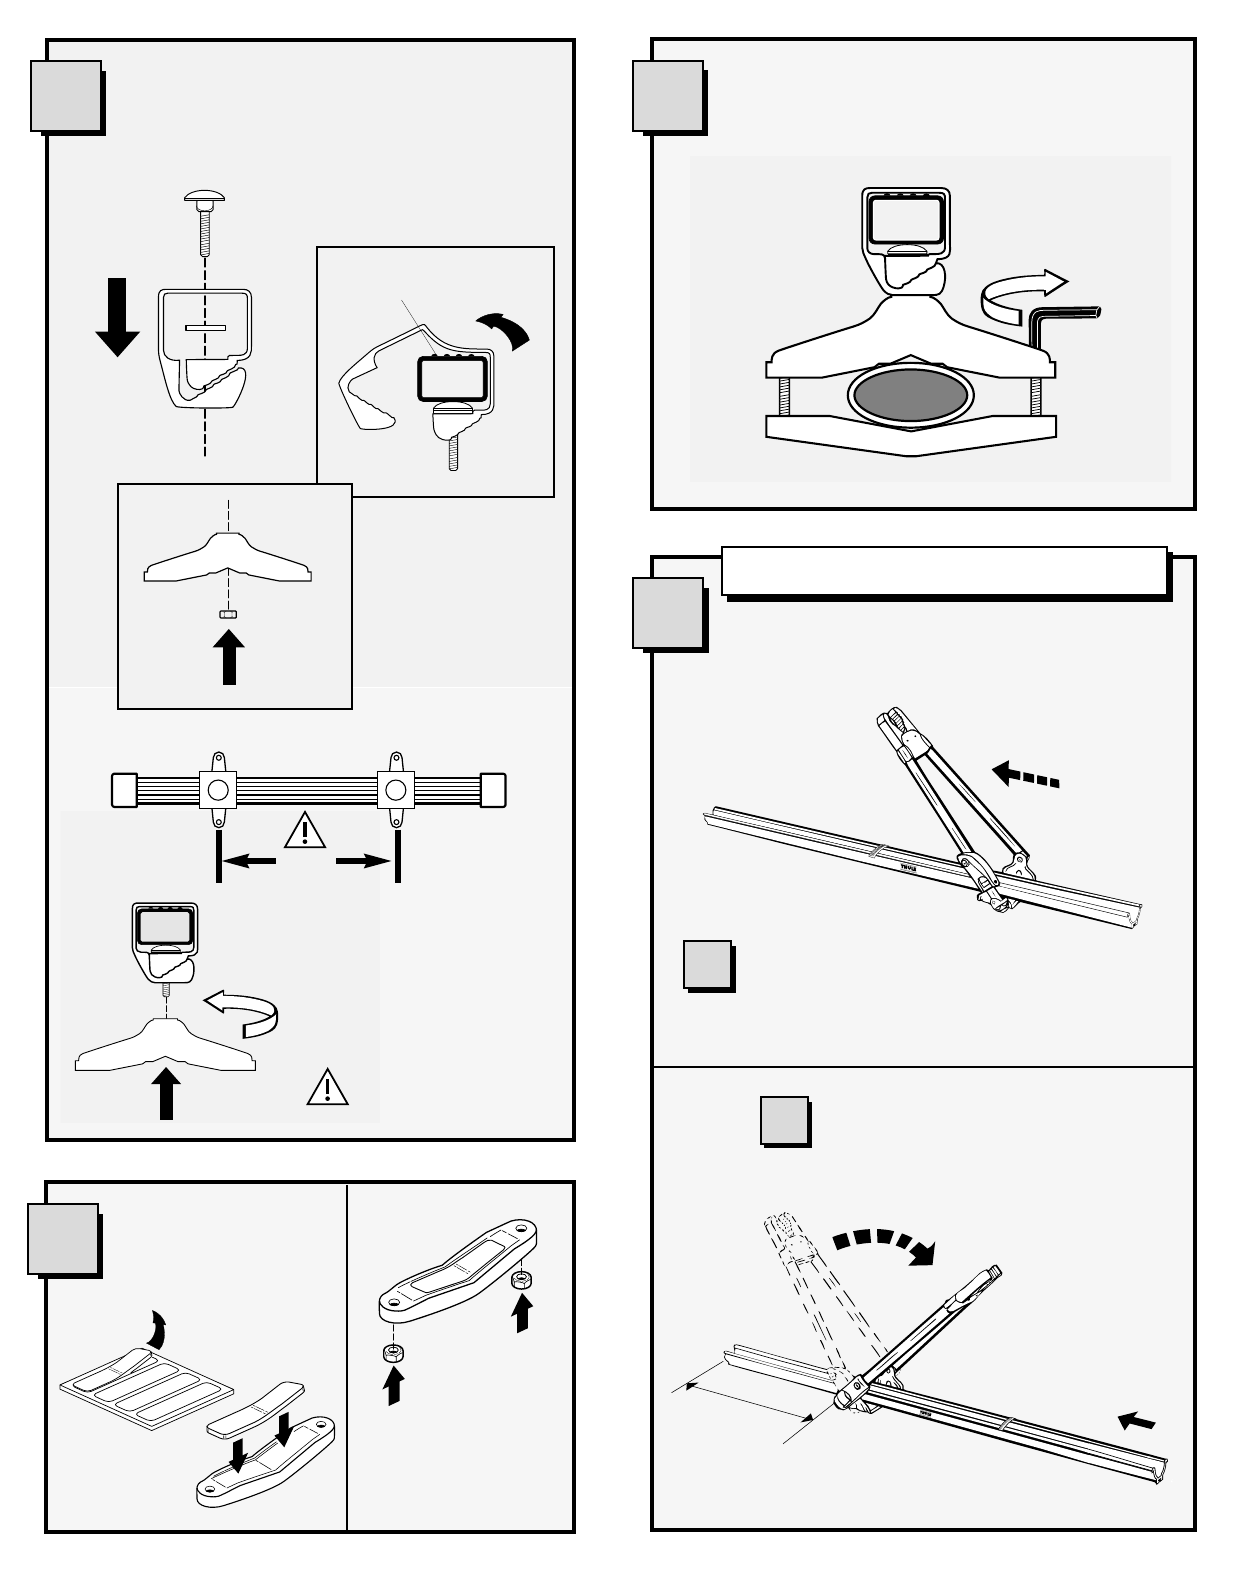
PREASSEMBLY
2
• Assemble bolts,
square washers,
and clamp-ons.
• Attach clamp-ons to
included load bar.
• Thread top mounting
clamps onto bolts.
Do not
overtighten.
• Apply rubber pads to
bottom mounting clamp.
• Press nuts into bottom
mounting clamps.
3
PREASSEMBLY
• Attach bar assembly to front of rack.
• Assemble bolts and
bottom mounting
clamp for front bar.
21”
minimum
• Ribs on bar face up.
• Press nuts into top
mounting clamps.
• Tighten snugly.
4
FOR DRIVER’S SIDE MOUNTING
• Loosen down tube holder assembly on
bottom of tray with hex key and slide
down to the opposite end of tray.
• Carrier has been assembled for passenger side
mounting. If you wish to mount carrier on the
opposite side of vehicle follow steps A and B.
A
B
• Position front edge of down tube holder
plate 12” (30.5cm) from the end of the tray
and re-tighten.
5
CARRIER INSTALLATION
6
• Install carrier onto bar by sliding it into position. Pull the
mounting lever/T-bolt assembly up and out of the way
to make sliding onto the load bars easier.
6
FRONT AND REAR HARDWARE
• Open handle.
• Fasten carrier to the load bars by engaging T-bolt and
L-clamp (as illustrated) and turning the mounting lever
clockwise. Close the mounting lever back down on the
mounting plate. There should be firm pressure when
closing the lever. If it is too tight, release tension by
pulling the lever back up and turning it counter clock-
wise. If it is too loose, pull the lever back up and tight-
en the lever clockwise. Close mounting lever.
2
3
1
• Buckle on same
side as lock.
• Loosly thread top
mounting clamp and
spacer onto rear of tray.
A
B
C
• Slide T bolt into
channel under
wheel tray.
• Slide strap into
tray channel.
ATTACH TO RACK
FrontBack
24” min.
D
• Align endcap tabs.
• Snap onto tray.
FRONT
REAR
• Assemble bolts
and bottom
mounting clamp
for rear bar.
• Tighten snugly.
• Install lock.
7
• Tighten top mounting
clamp to tray.
