32 English
SETTINGS
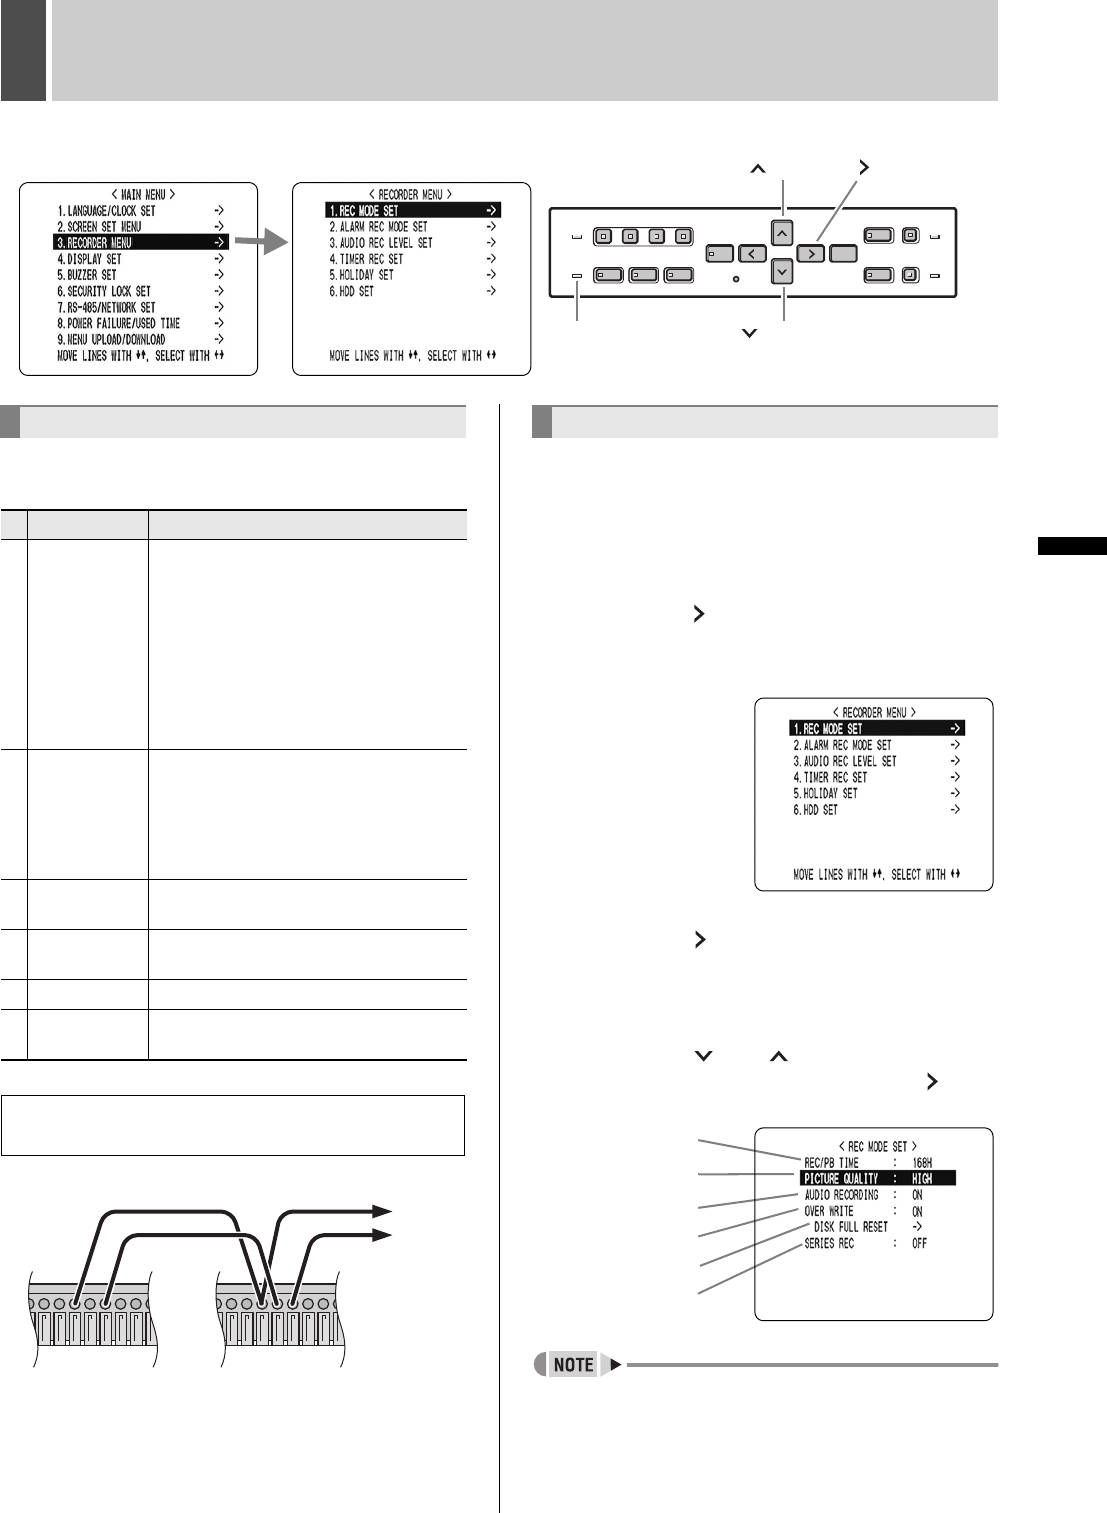
3 RECORDER MENU
The <RECORDER MENU> screen lets you make the
following recording-related settings:
Connect the control terminals by cables as shown below.
Terminal No.
8: COMMON
9: SERIES REC IN
10: NON REC OUT/SERIES REC OUT
1 Press the [MENU] button.
The [MENU] button lights, and the <MAIN MENU> screen
is displayed.
2 Select “3. RECORDER MENU”, and
press the [ ] button.
The <RECORDER MENU> screen is displayed, with the
cursor positioned on “1. REC MODE SET”.
3 Press the [ ] button.
THE <REC MODE SET> screen is displayed, with the
cursor positioned on “PICTURE QUALITY”.
4 Press the [ ] or [ ] buttons to select
the desired item, then press the [ ]
button.
z “REC/PB TIME” changes automatically according to the
“PICTURE QUALITY” set.
<MAIN MENU> <SUB MENU>
[ ] button [ ] button
[ ] buttonFULL indicator
Setting items
Item Description
1
REC MODE
SET
z Changes the recording image quality.
z Turns audio recording ON/OFF.
z Sets whether to stop recording or to
record over previously recorded images,
when the hard disk becomes full.
z When multiple digital video recorders
are connected, sets recording to
continue automatically on the second
and subsequent hard disks when the
first hard disk becomes full.
2
ALARM REC
MODE SET
z Turns alarm recording ON/OFF.
z Sets the amount of time to record for
when an alarm is generated.
z Sets alarm trigger
z Sets the operation to perform when the
camera image is interrupted.
3
AUDIO REC
LEVEL SET
Sets audio sensitivity level for each
channel. Set high value for high sensitivity.
4
TIMER REC
SET
Sets timer recording.
5 HOLIDAY SET Lets you set specific work days as holidays.
6 HDD SET
Initializes the hard disk, or used when
adding a hard disk.
To record in series when multiple digital video
recorders are connected
1st DVR 2nd DVR
To 3rd
DVR
REC MODE SET
(1)
(2)
(3)
(4)
(5)
(6)
e00_l8hbc_hd_6.book Page 32 Wednesday, July 30, 2003 2:34 PM


