Page 9
JIG SAW MOUNTING (Cont'd)
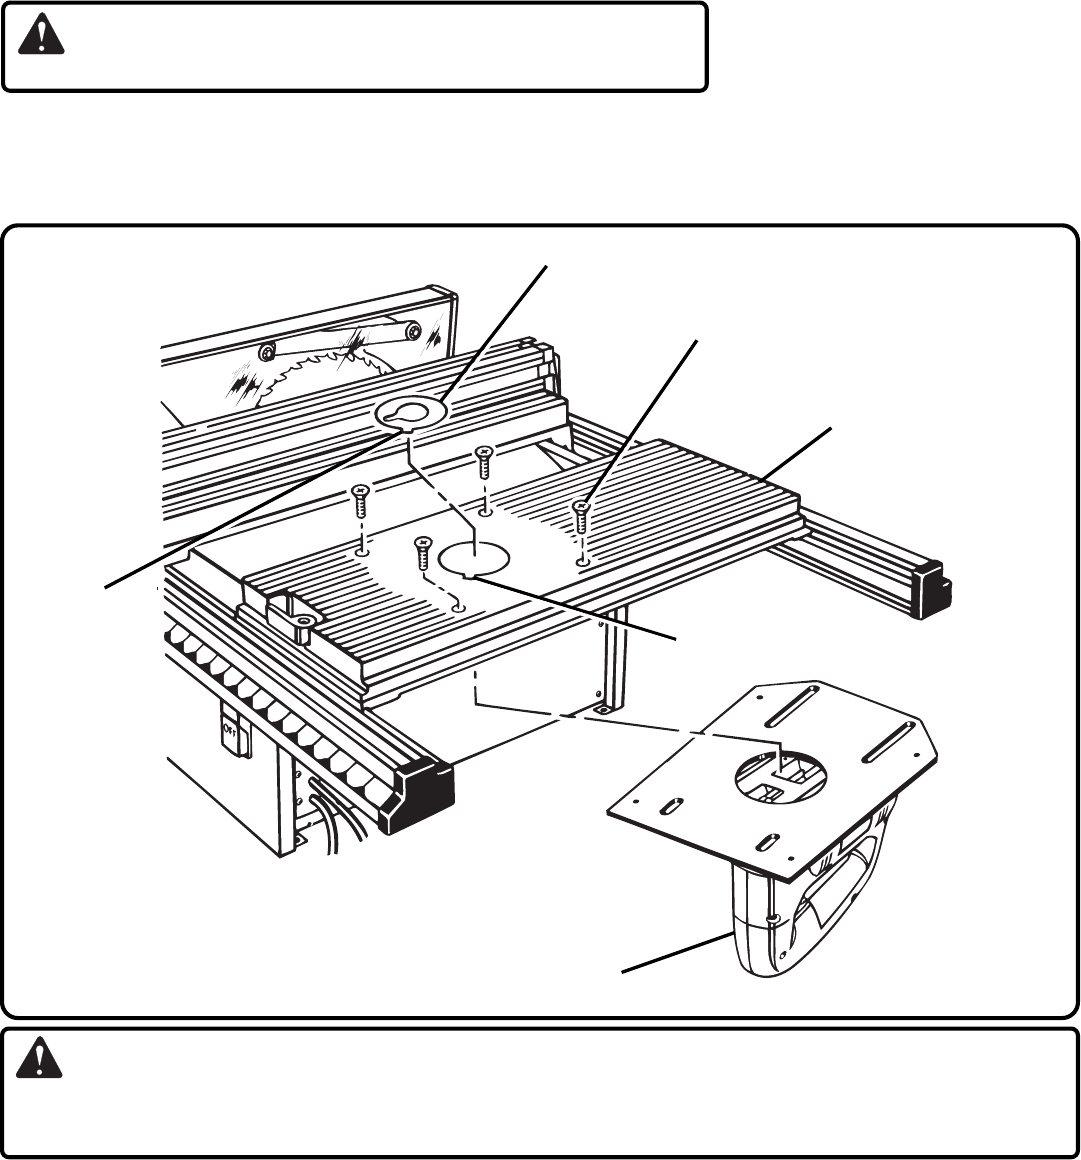
TO ASSEMBLE MOUNTING PLATE WITH JIG SAW ATTACHED TO ACCESSORY TABLE
See Figure 12.
1. Place mounting plate under accessory table as shown in figure 12. Note: If desired you can remove accessory table,
attach mounting plate with jig saw, then reassemble complete assembly to your saw.
2. Secure mounting plate to accessory table using the four #1/4-20 x 1/2 in. flat head screws provided.
3. Tighten screws securely.
INSTALLING SAW BLADE
Follow the instructions in the operator's manual of your jig saw for this procedure. Install the blade and tighten it securely.
CAUTION:
Check to make sure it is not striking the accessory table or any metal surface.
TO ASSEMBLE THROAT PLATE
See Figure 12.
Orient the throat plate as shown in figure 12, align tab with slot in accessory table, then place throat plate in recessed area
of accessory table. Recheck the saw blade to make sure it will not strike the throat plate.
Fig. 12
REMEMBER:
The motor cord of your BT3000 saw should be unplugged from receptacle on side of cabinet; and the power supply
cord of your router or jig saw should be plugged into receptacle. This will allow your router or jig saw to be controlled
by the master switch of your saw.
THROAT PLATE
#1/4-20 SCREWS
ACCESSORY TABLE
SLOT
JIG SAW WITH MOUNTING PLATE ATTACHED
TAB


