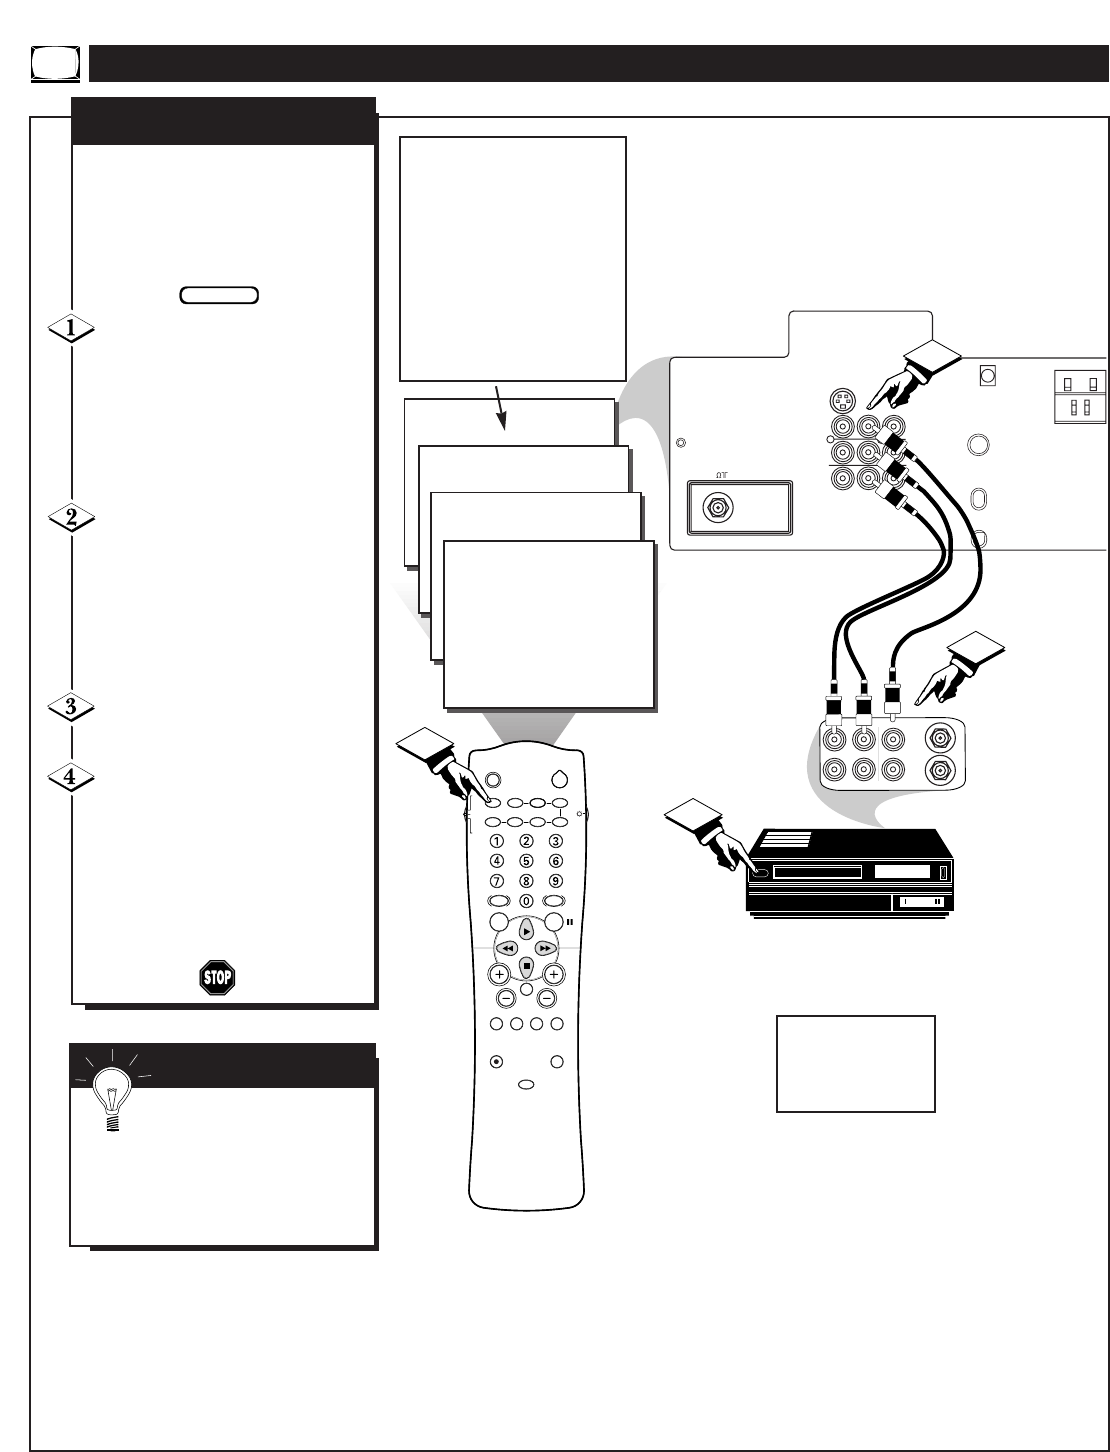
The TV’s Audio/Video Input jacks
are for direct picture and sound
connections between the TV and
a VCR (or similar device) that
has Audio/Video Output jacks.
Connect the VIDEO (yellow)
CABLE to the VIDEO IN jack
on the back of the TV. Then con-
nect the AUDIO (red and white)
CABLES to the AUDIO (left and
right) IN jacks on the rear of the
TV.
Connect the VIDEO (yellow)
CABLE to the VIDEO OUT jack
on the back of the VCR. Then
connect the AUDIO (red and
white) CABLES to the AUDIO
(left and right) OUT jacks on the
rear of the VCR.
Turn the VCR and the TV
ON.
Use the A/V button on the
remote to select the AV 1 chan-
nel.
With the VCR ON and a prere-
corded tape inserted, press the
PLAY button to view the tape
on the television.
AUDIO IN
(RED/WHITE)
VCR
(EQUIPPED WITH VIDEO AND
AUDIO OUTPUT JACKS)
SMART HELP
Remember, with the
TV/VCR/ACC switch in the
VCR position, pressing the
(CLOCK) TV/VCR button will
allow you to toggle between the
VCR mode and the TV mode.
VIDEO IN
(YELLOW)
HOW TO USE THE AUDIO/VIDEO INPUT JACKS
BACK OF VCR
AUDIO/VIDEO INPUTS
BACK OF TV
NOTE: Repeatedly pressing the AV
button on the remote will toggle the
picture source from the current chan-
nel (Tuner A or B), to the SVID-R
connection, to the AV 1 connection,
to the AV 2 connection.
This also applies to the Multi Media
button on the remote. Repeatedly
pressing the Multi Media button will
toggle the picture source from the
current channel (Tuner A or B), to
the MM 1 (SVID-R) connection, to
the MM 2 (AV 1) connection, to the
MM 3 (AV 2) connection.
IF YOU ARE USING A
MONO DEVICE, USE
ONLY THE AUDIO
R/MONO JACK.