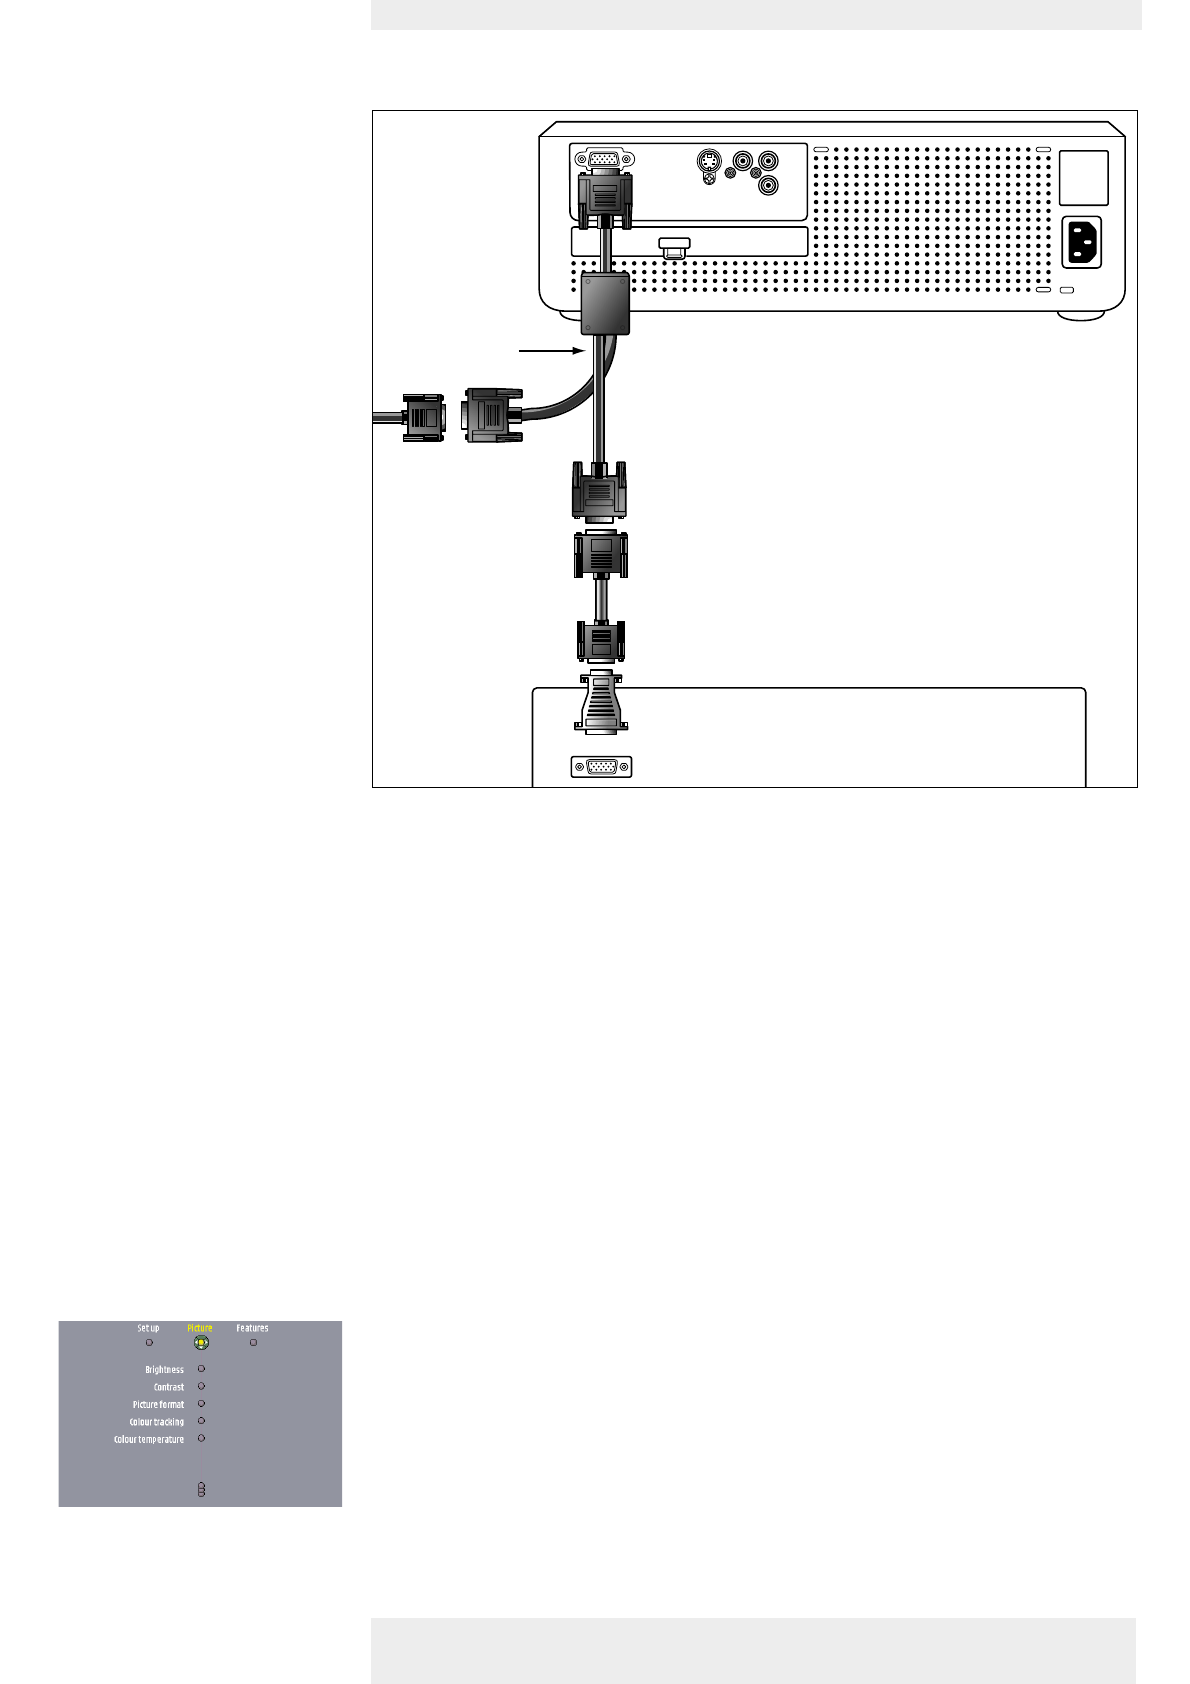
PC/Macintosh
1 Connect the Data (out) socket of the computer to the Data socket of the projector and
secure the plugs by tightening the thumb screws.
For this, use the VGA cable supplied (1).
2 Select ‘Data’ as input source using the Source button on the projector or the Source
selection buttons on the remote control.
You can also select ‘Data’ in the ‘Features’ menu. See ‘On Screen Display Menu’ - ‘General
explanation’ on how to navigate through the menu.
Connecting to an external monitor
1 Connect the VGA Y connector marked ‘Projector’ (2), of an optional VGA Y-cable, to the
Data socket of your projector.
2 Connect the VGA Y connector marked ‘Computer’ (3) to the VGA cable supplied (1).
3 Connect the VGA Y connector marked ‘Monitor’ (4) to the VGA cable of the external
monitor (5).
4 Switch on your Computer and projector.
5 Press the Data button on the remote control.
6 Press Menu.
– The menu bar appears on the screen.
The ‘Picture’ item is highlighted.
Philips Multimedia Projector 15 English User guide bClever SV1
4. Installation Connecting to a computer >
FILTER
Data S-VIDEO VIDEO AUDIO-L
AUDIO-R
Data out
Mac/PC
VGA/MAC adapter
1
PROJECTOR
PROJECTOR
COMPUTERCOMPUTER
MONITOR
MONITOR
For external monitor
connection only
2
2
2
3
2
4
5
5


