9
Owner’s Manual
Owner’s Manual
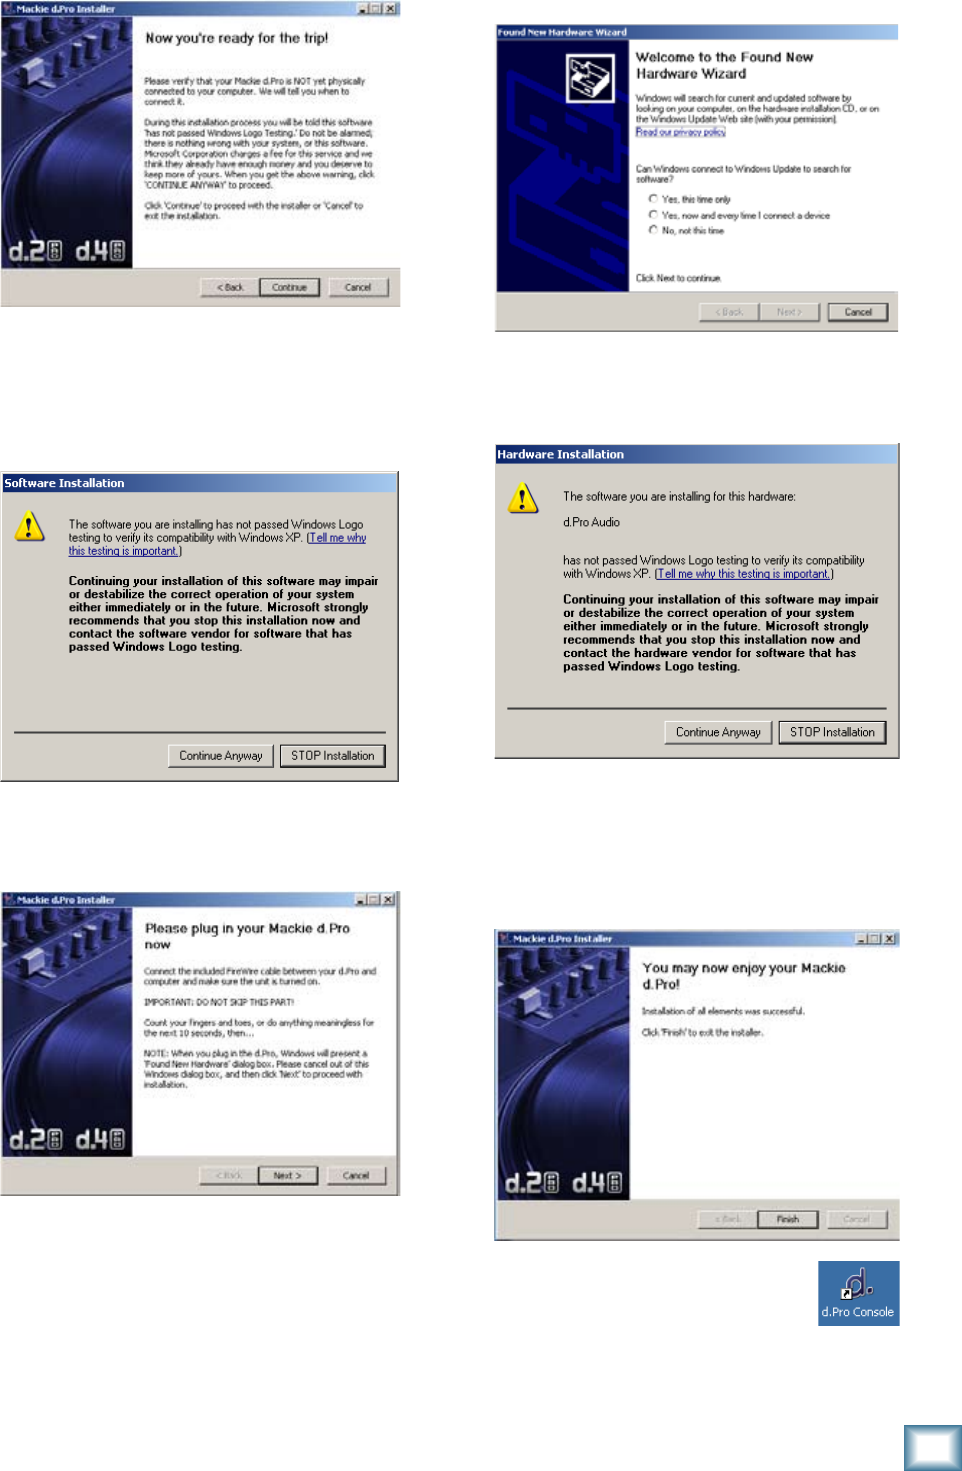
6. The next window reminds you to make sure the
d.2 Pro is NOT connected to your computer yet.
Read the instructions and click “Continue.”
7. You may get a warning about running the
installer because it hasn’t passed Windows
Logo testing. It’s okay. We’ve tested it and it is
compatible with Windows XP. Click “Continue
Anyway.”
8. Now it is time to connect your d.2 Pro FireWire
connection to your computer. Follow the in-
structions and then click “Next.”
9. Wait until the “Found New Hardware Wizard”
pops up. Do not select any options, just click
“Cancel” to continue. If the same screen comes
back up, click “Cancel” again.
10. You will get another impertinent warning, this
time about installing the hardware. It’s okay.
Click “Continue Anyway.”
11. The d.Pro drivers and control panel will be
installed on your computer.
12. When the installation is complete, a window
will pop up to let you know that the installation
was successful. Click “Finish” to er...well finish.
Now you are ready to use the
FireWire capabilities of your d.2 Pro.
The installer also places a shortcut
to the d.Pro Console on your desktop
(see next page).
