7
Chapter 4: Setting Up and Connecting the Wireless-G PCI Adapter with SRX400
Installing the Adapter
Wireless-G PCI Adapter with SRX400
3. Windows will begin copying the files onto your PC.
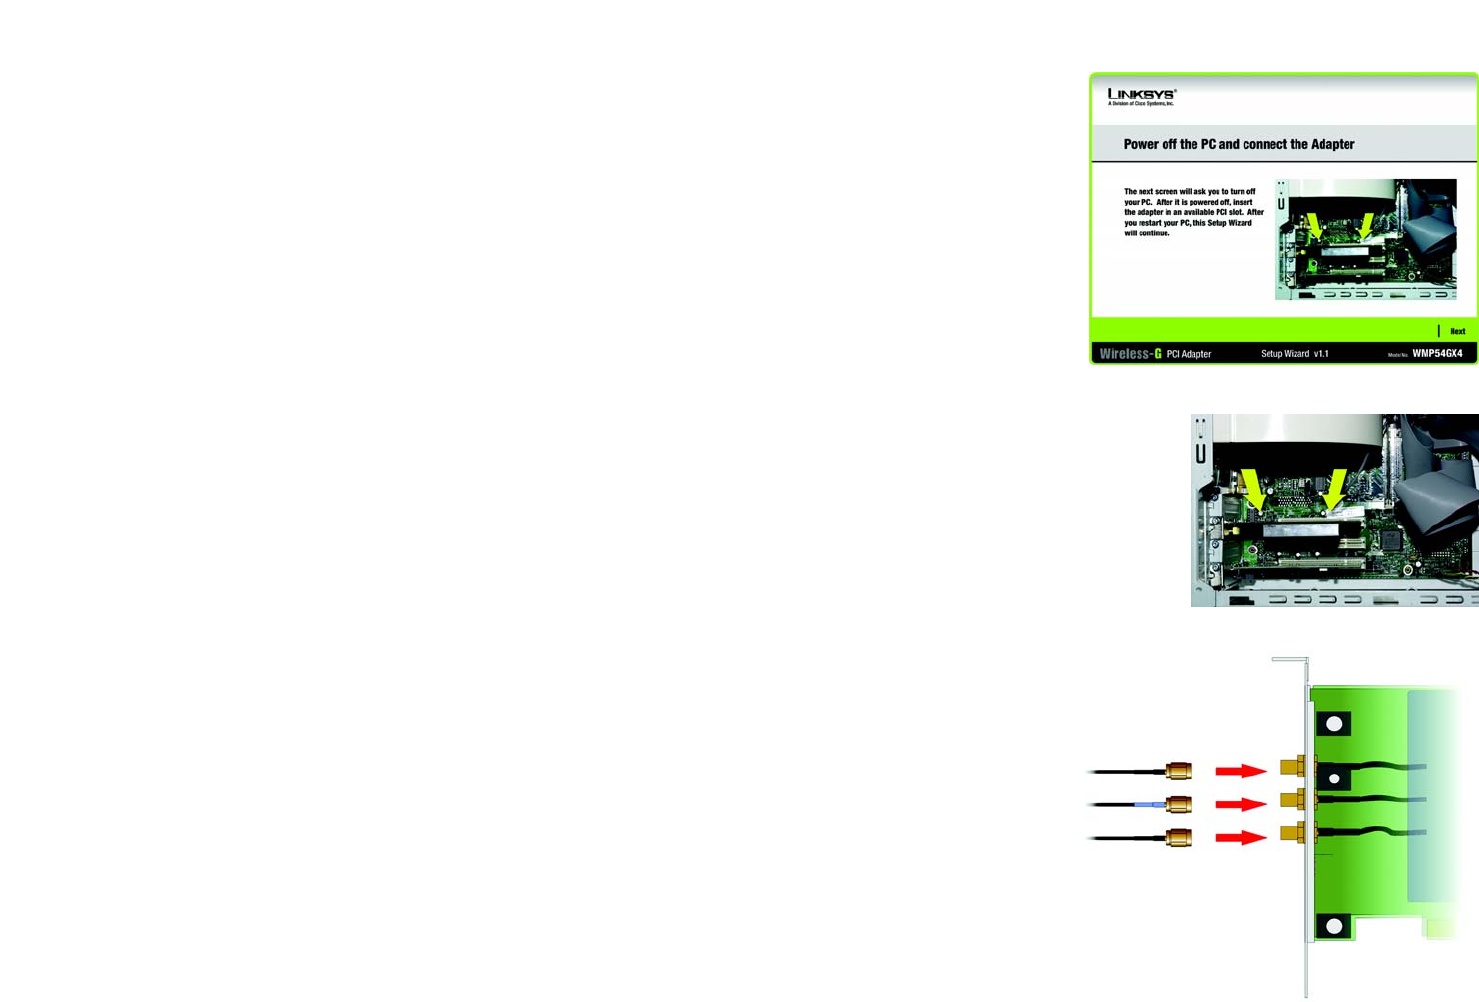
4. The Setup Wizard will now prompt you to install the Adapter into your PC. Click Next and power off your PC.
After installing the Adapter, as shown below, and restarting your PC, the Setup Wizard will continue.
Installing the Adapter
1. If you haven’t already done so, power off your desktop PC before installing the Adapter.
2. Open your PC case and locate an available PCI slot on the motherboard. Check with your computer
manufacturer for instructions.
3. Slide the Adapter into the PCI slot. Make sure that all of its pins are touching the slot's contacts. You may have
to apply a bit of pressure to slide the Adapter all the way in. After the Adapter is firmly in place, secure its
fastening tab to your PC's chassis according to your PC’s documentation. Then, close your PC.
4. Now you will connect the antenna stand’s cables to the PCI card part of the Adapter. Attach the remaining
cables to the Adapter’s ANT. ports.
5. Attach the antennas to the connectors on the antenna stand.
6. Power on your desktop PC.
Figure 4-3: Connecting the Adapter Screen
Figure 4-4: Installing the Adapter
Figure 4-5: Attaching the Antenna Cables


