4.2
4.1
4. Step-By-Step Instructions! ! ! ! !
! The SilverCloud™ Control Panel
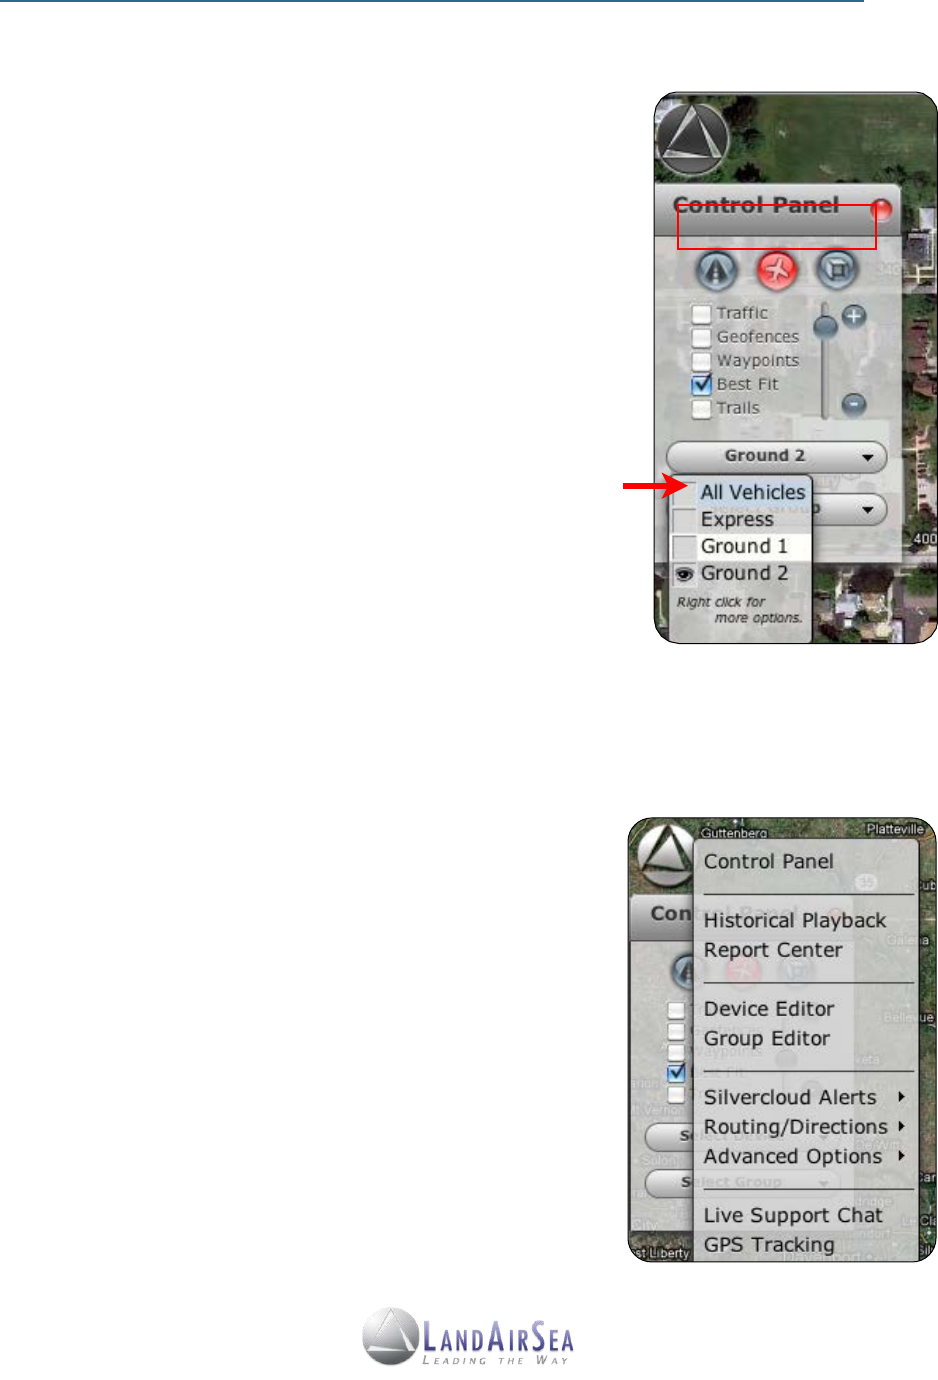
Once the SilverCloud online mapping interface loads, the
Control Panel will automatically appear on the upper left corner
of the screen.
From the Control Panel, users will be able to:
•
Select preferred view:
A. Displays Road Map
B. Displays
Aerial View
C. Displays 3-D View
•
Select which vehicle(s) they want to view on the map
or select multiple vehicles based created groups
(creating groups covered in next section).
•
Display regional traffic, view predetermined virtual zones
(“geofences”), navigational waypoints, adjust best fit for
multiple vehicles, and view vapor trails as the vehicle
moves along the map.
•
Zoom in (+) and out (-) by dragging the button up and down.
! The SilverCloud™ Main Menu
The SilverCloud Main Menu can be accessed by clicking on
the LandAirSea icon located on the upper left corner of the
screen. From the screen users will be able to:
•
Generate Historical Playback and printable Reports.
•
Edit and label icons for individual vehicles.
•
Specify and label Groups for multiple vehicles.
•
Set Speed, Battery
, Proximity and Geofence Alerts.
•
Determine and send best Routes/Directions.
•
Manage
Advanced user settings, including ShareSpot.
A
B C


