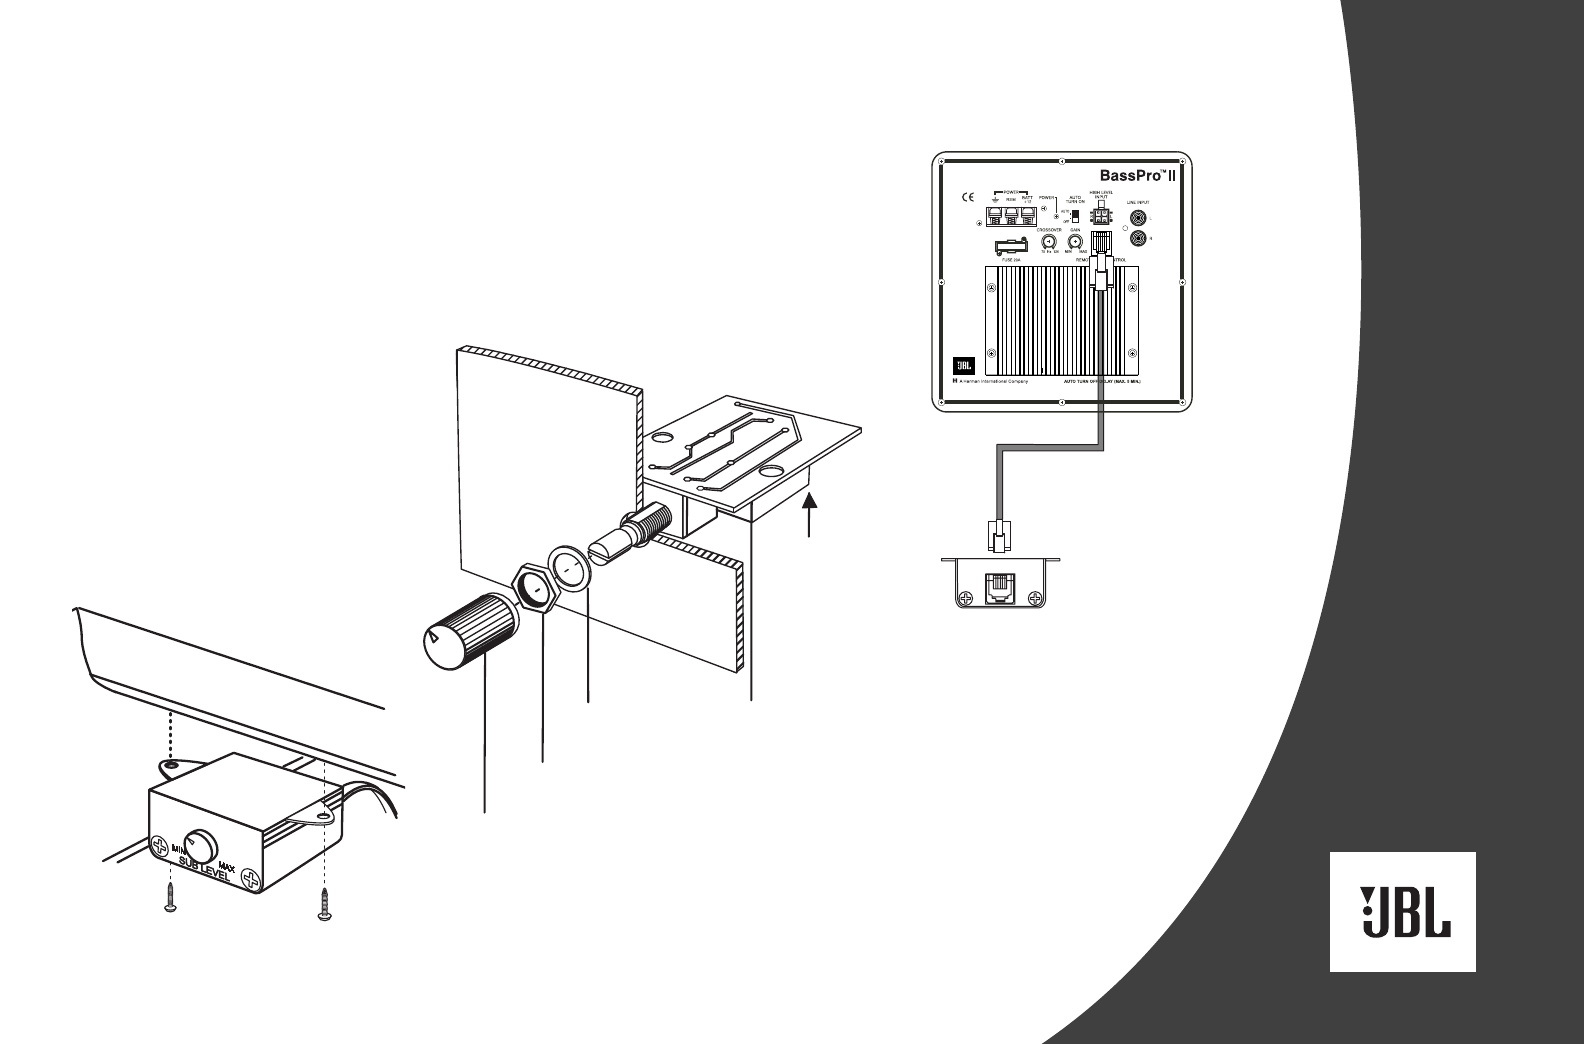
INSTALLING THE REMOTE
CONNECTING THE SUBWOOFER
LEVEL CONTROL TO BASSPRO II
The Subwoofer Level Control may be
mounted under the dash or dismantled
and mounted in the dash for a factory-
installed appearance.
UNDER-DASH MOUNTING
Select a mounting location that allows
easy access to the control while driv-
ing. Using the Subwoofer Level Control
as a template, mark and drill holes in
the mounting surface. Attach the
Subwoofer Level Control using the
mounting screws provided (Figure 4).
IN-DASH MOUNTING
Disassemble the Subwoofer Level
Control by removing the two Phillips-
head screws on the front panel,
rear panel and on top. Remove the
Subwoofer Level Control’s bottom and
side panels. Slide the Subwoofer Level
Control’s PC board forward to release
the RJ11 connector from the back
panel and remove the board along with
the potentiometer, knob and connector
as a single assembly.
Choose a mounting location that
allows easy access to the control,
and provides 1-3/4" clearance behind
the mounting surface. Drill a 9/32"
hole in the mounting surface. Feed
the Subwoofer Level Control’s
potentiometer shaft (with the knob
removed) through the hole and use the
nut and washer provided to hold the
control in place (Figure 5).
Route the cable behind the dash or
other interior panels and under the
carpet. Do not route the cable outside
the vehicle. Connect the RJ11 cable
between the RJ11 receptacle on the
BassProII and the receptacle on the
Subwoofer Level Control (Figure 6).