71
Display
(HP Authorized Service Providers Only)
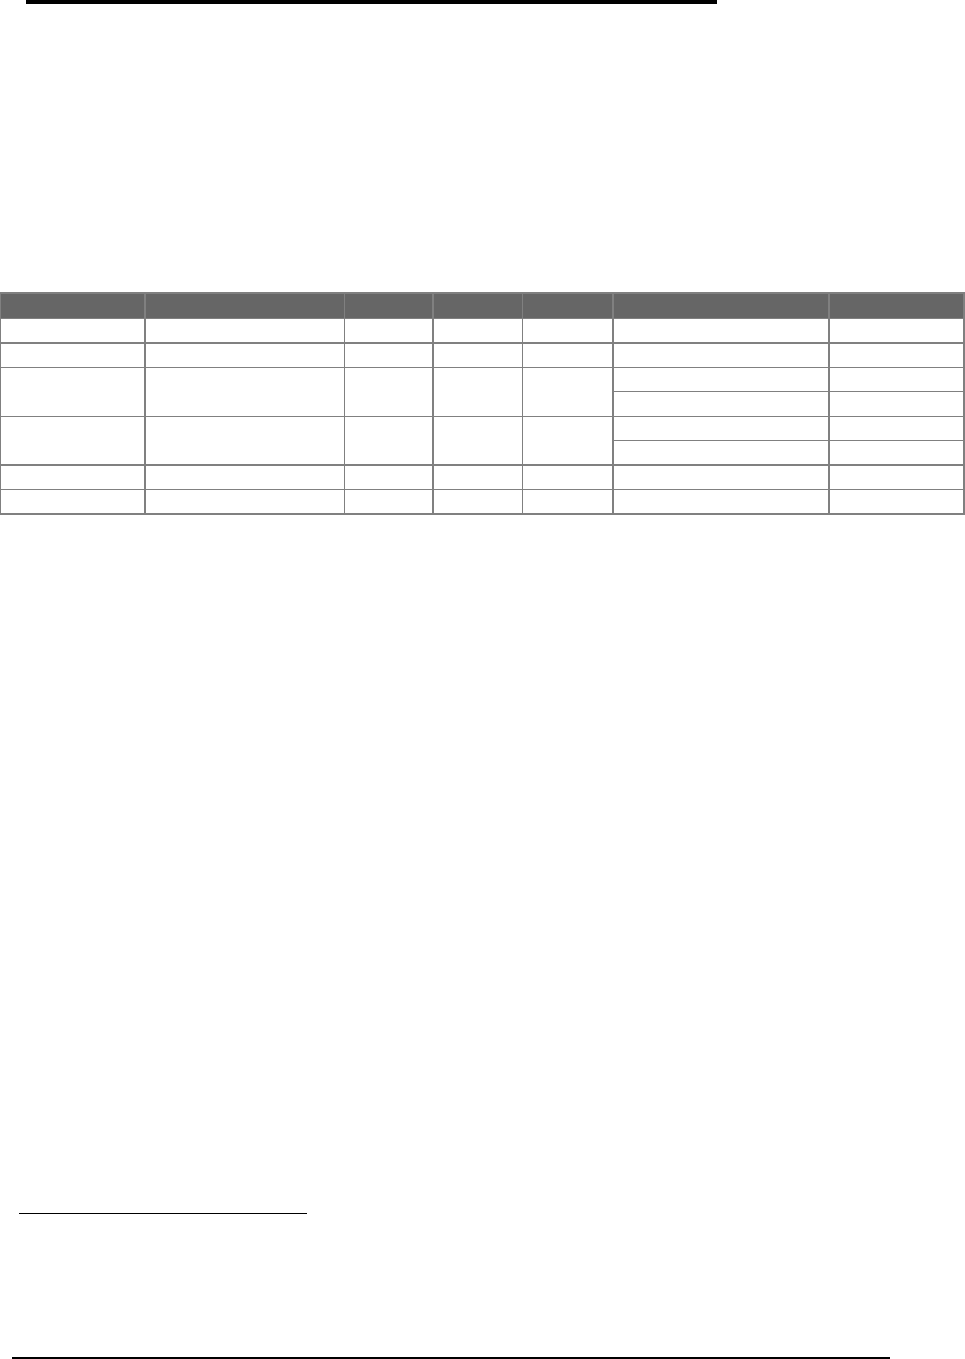
The below table summarizes the compatibility of displays between the OmniBook 2000, 5500,
and 5700. Please note, that the proper Icon Board must be matched with the corresponding
display type and manufacturer.
Table 18 - Display Compatibility Matrix
Display Type OB2000
Icon Board
1
10.4” TFT
ü
PCA PT-ICON
11.3” DSTN
ü
PCA PT-ICON
12.1” TFT Hitachi*
ü ü ü
PCA PT-ICON
2
PCA PB-ICON/SVGA
3
12.1” TFT Samsung*
ü ü ü
PCA PT-ICON/SMG
2
PCA PB-ICON/SVGA
3
12.1” TFT XGA
ü
PCA PB-ICON/XGA
12.1” DSTN
ü
PCA PB-ICON/DSTN
* At the time of this printing, Samsung is considered the primary supplier of 12.1” TFT displays. Unless
otherwise indicated, all 12.1” TFT SVGA orders should be placed against F1320-69094. However, this is
subject to change without notice.
Required Equipment
• Small phillips screwdriver
Removal Procedure
1. Exit all applications, including Windows.
2. Turn the OmniBook off and remove the battery and ac adapter.
3. Follow the Hard Disk Drive Removal Procedure on page 67.
4. Turn the unit over and remove the two display screws located under the plastic feet. See
Figure 25 on page 72.
5. Turn the unit back over and remove the Icon Assembly by applying pressure with the
thumbs. See Figure 26 on page 72. Note, it is helpful to lift up on the display slightly.
6. The Icon Assembly flex cable may be disconnected at this point to completely remove the
Icon Assembly, however, it is not necessary for the removal of the display.
7. With the Icon Assembly either removed or out of the way, disconnect the Display Cables
4
and the two Display Grounding Cables. See Figure 27 on page 73.
1
Refer to Table 20 - Icon Board Compatibility Matrix on page 79.
2
For the OmniBook 5500 only
3
For the OmniBook 2000 and 5700 only
4
The type of display cables (such as flex or wire harness) may vary depending on the type of display (such
as TFT or DSTN).


