149
Maintaining and Transporting the Printer | 149
3. Select the Nozzle Check icon and follow the instructions on the screen.
4. After the pattern is printed, use at least a 10
× eye loupe to examine it.
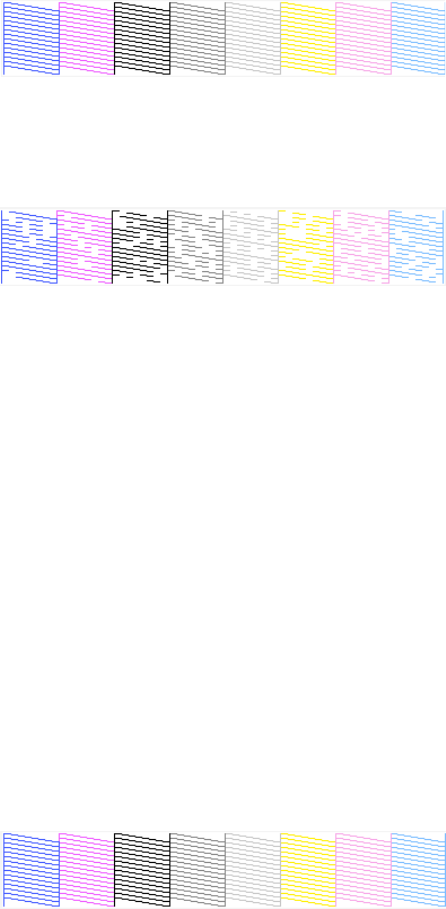
• If the pattern looks good, as shown below, the print head is clean.
• If any dots or segments are missing or deflected, as shown below,
run a cleaning cycle as described on page 151. Then print another
nozzle check pattern to make sure the nozzles are clean.
• If the nozzles are still clogged after three cleaning cycles, run a power
cleaning cycle as described on page 151.
Checking and Cleaning the Print Head Using the Control
Panel
You can print a nozzle check from the control panel and examine it to
determine whether any nozzles are clogged or deflected. Then you can run a
cleaning cycle if necessary.
1. Press r
Menu.
2. Press d until
TEST PRINT is selected, then press r. NOZZLE CHECK is
selected.
3. Press r
, then press OK to start printing the nozzle check pattern.
4. After the pattern is printed, use at least a 10
× eye loupe to examine it.
• If the pattern looks good, as shown below, the print head is clean.
Caution: Don’t run a
cleaning cycle while
thick media is loaded in
the printer.
