Installing and Configuring Hardware 51
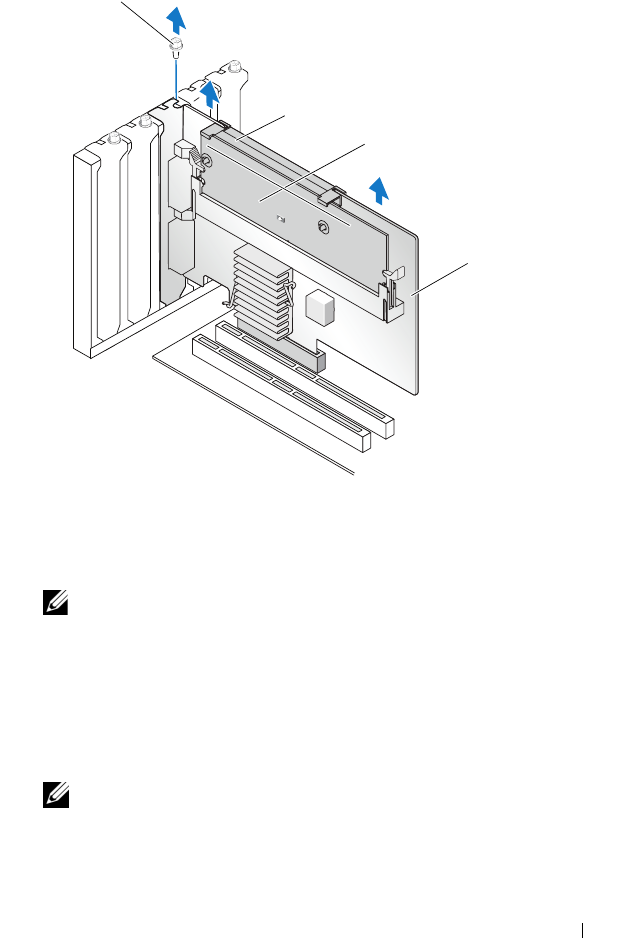
Figure 4-7. Removing the PERC 6/E Adapter
NOTE: For more information on removing peripherals installed in the system’s
PCI-E slots, see the Hardware Owner’s Manual that shipped with the system.
5
For removing a PERC 6/i adapter, determine whether the dirty cache LED
on the controller is illuminated.
• If the LED is illuminated, replace the system cover, reconnect the
system to power, turn on the system, and repeat step 1 and step 2. See
Figure 4-8.
NOTE: The location of the PERC 6/i varies from system to system. For
information on PERC 6/i card location, see the Hardware Owner’s Manual that
shipped with the system.
• If the LED is not illuminated, continue with the next step.
1 battery 3 PERC 6/E adapter
2 memory module 4 bracket screw
3
1
4
2
Dell_PERC6.1_UG.book Page 51 Wednesday, April 15, 2009 4:18 PM


