44 78-9000-0192-2 Rev C
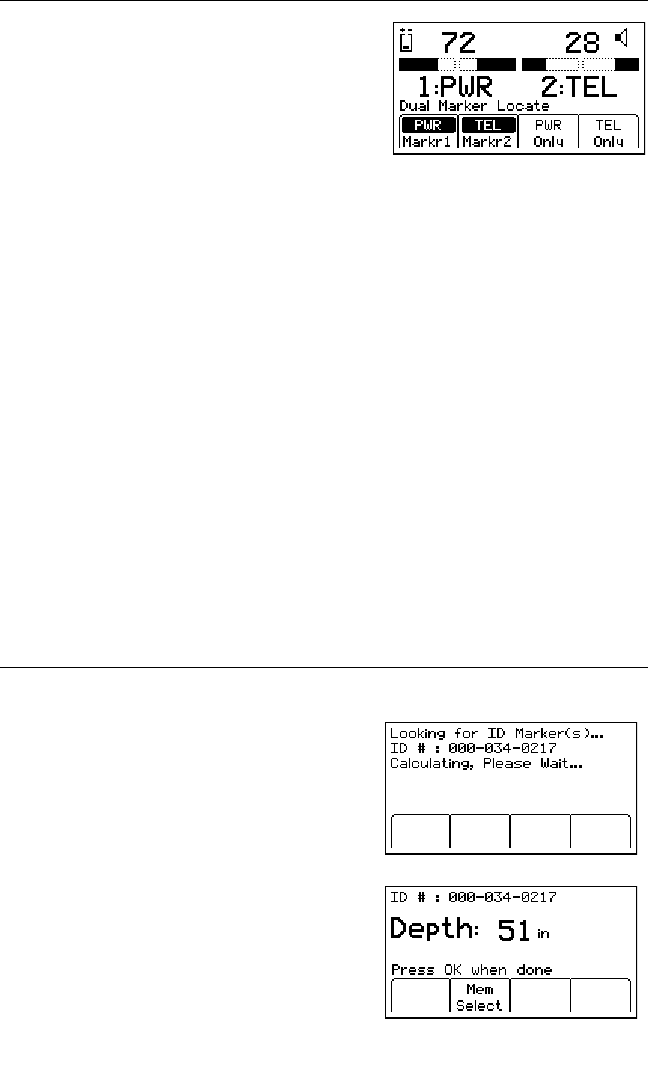
D. Dual Marker Locate
Step 1. Press Menu/OK [5:Toggle to LOCATE
MENU display].
Step 2. Press Marker [SK].
Step 3. Press Markr1 [SK Toggle] to select desired
Utility.
Step 4. Press Markr2 [SK Toggle] to select desired
utility.
Note: Only the marker types enabled in the setup menu will be shown. See 13.A.
Enabling/Disabling Marker Types. When scanning for markers, the Gain Level [7]
should be set high.
− The third and fourth soft key commands will populate with the types of
utilities selected for Marker 1 and Marker 2.
Step 5. Adjust the Gain [3] downuntil the Bar Graphs [11] ([10] for 2550 locator) open.
− The Bar Graph [11] ([10] for 2550 locator) will close, the audio will
increase, and the Signal Strength [9] ([8] for 2550 locator) will increase
when the receiver detects a marker of the specified utility.
− When one of the two markers is detected, press the “XXX Only” [SK] for
the detected utility marker. (“XXX” represents the marker types selected. In
the above example, PWR Only and TEL Only.)
− The receiver will switch to Single Marker Locate in order to pinpoint the
marker (maximize the Signal Strength [9] ([8] for 2550 locator).
Step 6. Press Markr2 [SK Toggle] to return to Dual Marker Locate.
E. 3M
™
iD Marker Depth
Step 1. Lower the tip of the receiver to the ground over the pinpointed marker.
Step 2. Press DEPTH [4].
− The receiver will examine the marker
(Calculating, please wait...)
− If the marker is a 3M
™
iD Marker, the
receiver will display the depth of the
marker, and its identification (serial)
number.


