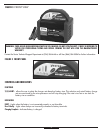
CHARGE RATE SELECTION
After charger clamps are correctly connected, plug in the charger to an AC outlet and the power indicator lights. Select
proper charge current rate based on battery size. Press the 2/4/6 AMP push button and the charger will begin charging
at 2 amps. Pressing the 2/4/6 AMP push button again will advance the charge rate to 4A, then 6A. Pressing the switch
again will turn OFF the charger output.
CHARGING THE BATTERY
1. Press 2/4/6 AMP button to begin charging at 2 amps rate; the charger sounds a beep and lights charging current LED.
WARNING: If Charger lights FAULT indicator, the connection to battery terminals is bad. Clean battery terminals then reconnect clamps.
If Rev Polarity indicator also lights, The Red (Positive) and Black (Negative) clamps are incorrectly connected to battery
terminals. Reverse the clamps.
2. Pressing the 2/4/6 AMP button again advances charging rate to 4 amps and pressing once more advances charging rate
to 6 amps.
NOTE: • If the battery is near full it will fall back to lower charge rate.
• Pressing the 2/4/6 AMP 4 times advances to standby mode; sounds a beep, turn off all LEDs and stops charging.
3. The Charging Complete LED lights when the battery is fully charged.
4. Disconnect the AC power cord first then the NEGATIVE clamp and finally the POSITIVE clamp.
Automatic Float Charging - Ideal for maintaining a fully charged battery.
1. Keep the AC power and battery connected after battery is fully charged.
2. The charger monitors the battery and tops it off as needed.
NOTE: • If charging cycle is interrupted, the charger will go to Standby mode.
• Automatic float can only be achieved after charging is complete and circuit has not been interrupted.
GENERAL BATTERY SAFETY
With minimal maintenance, the VEC1086B
2/4/6
AMP Smart Battery Charger will provide years of dependable
service. Follow these simple steps to maintain the charger in optimum condition:
• After each use, clean the battery charger clamps - be sure to remove any battery fluid that will cause corrosion of
the copper clamps.
• Clean the outside case of the charger with a soft cloth and, if necessary, a mild soap solution.
• Do not allow liquid to enter the charger. Do not operate when charger is wet.
• Keep the charger cords loosely coiled during storage to prevent damage to the cords.
• Do not use charger if cords or clamps have been damaged in any way - call Vector Technical Support Department
toll-free: (866) 584-5504 to replace cords and clamps.
TROUBLESHOOTING - FAULT LED LIT
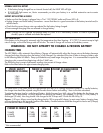
The following conditions may light the FAULT LED:
• Poor connection to battery (or frame).
• Charging too fast - Decrease Charge Rate - Press 2/4/6 AMP button to lower rate.
• Charging too slowly - Battery is large and did not complete charging in 24 hours - Press 2/4/6 AMP to charge at a faster
rate.
• Shorted battery cell - Replace battery.
• Open battery Cell - Replace battery.
• Reverse Polarity LED Lit - disconnect AC then reverse clamp locations on battery and frame.
• Internal overheat in charger- make sure fan is not blocked.
Tr y charging another battery, if the FAULT LED does not light, then one of the above problems exists with the initial battery.
Charger will not charge and the fan will not operate if there is a fault. Call Vector Technical Support toll free:
(866) 584-5504.
6


