


Transmitter
q Driving controls
w Stunt button
e Antenna
NOTE: Your transmitter is equipped with a special automatic ON
battery-saving feature. Just turn your vehicle ON. Then activate
the transmitter controls and you will be able to run and control
your vehicle.
BATTERY INSTALLATION
Vehicle
Transmitter
PROTECTION SYSTEMS
Your vehicle is equipped with advanced systems to
protect its electronic components.
SMART CIRCUITRY
Special “Smart Circuitry” is designed to cut your
vehicle’s power in the event it stalls or gets stuck. This
does not indicate a problem with the vehicle! Simply
release the transmitter controls for a few seconds, then
resume normal operation.
LED INDICATOR
The LED indicator can give you important information
about your vehicle’s status. In normal operation, the LED
is OFF.
• If the LED indicator comes on and glows steadily
(typically under extreme operating conditions), the
vehicle will stop running temporarily. This does not
indicate a problem with the vehicle! Simply release the
transmitter controls and wait until the LED indicator
goes off (this could take a couple of minutes). Don’t
remove or touch the vehicle battery while the LED
indicator is glowing steadily – the battery may be warm
to the touch.
• If the LED indicator comes on and flashes, you need to
recharge your vehicle’s battery. Simply turn the vehicle
switch OFF, remove the battery and recharge it. (You
may want to consider purchasing a spare battery for
non-stop driving action.)
1. To install the transmitter batteries, open battery door as
shown.
2. Install two LR6 (AA) batteries with polarity (+/-) as shown
inside battery compartment.
3. Close battery door.
BATTERY CHARGING/CARE
For detailed information regarding NiMH vehicle battery charging and safety, please follow the specific instructions
that came with your battery pack and charger.
2 x 1.5V d.c.
7.2V d.c.
1
2
q
q
e
w
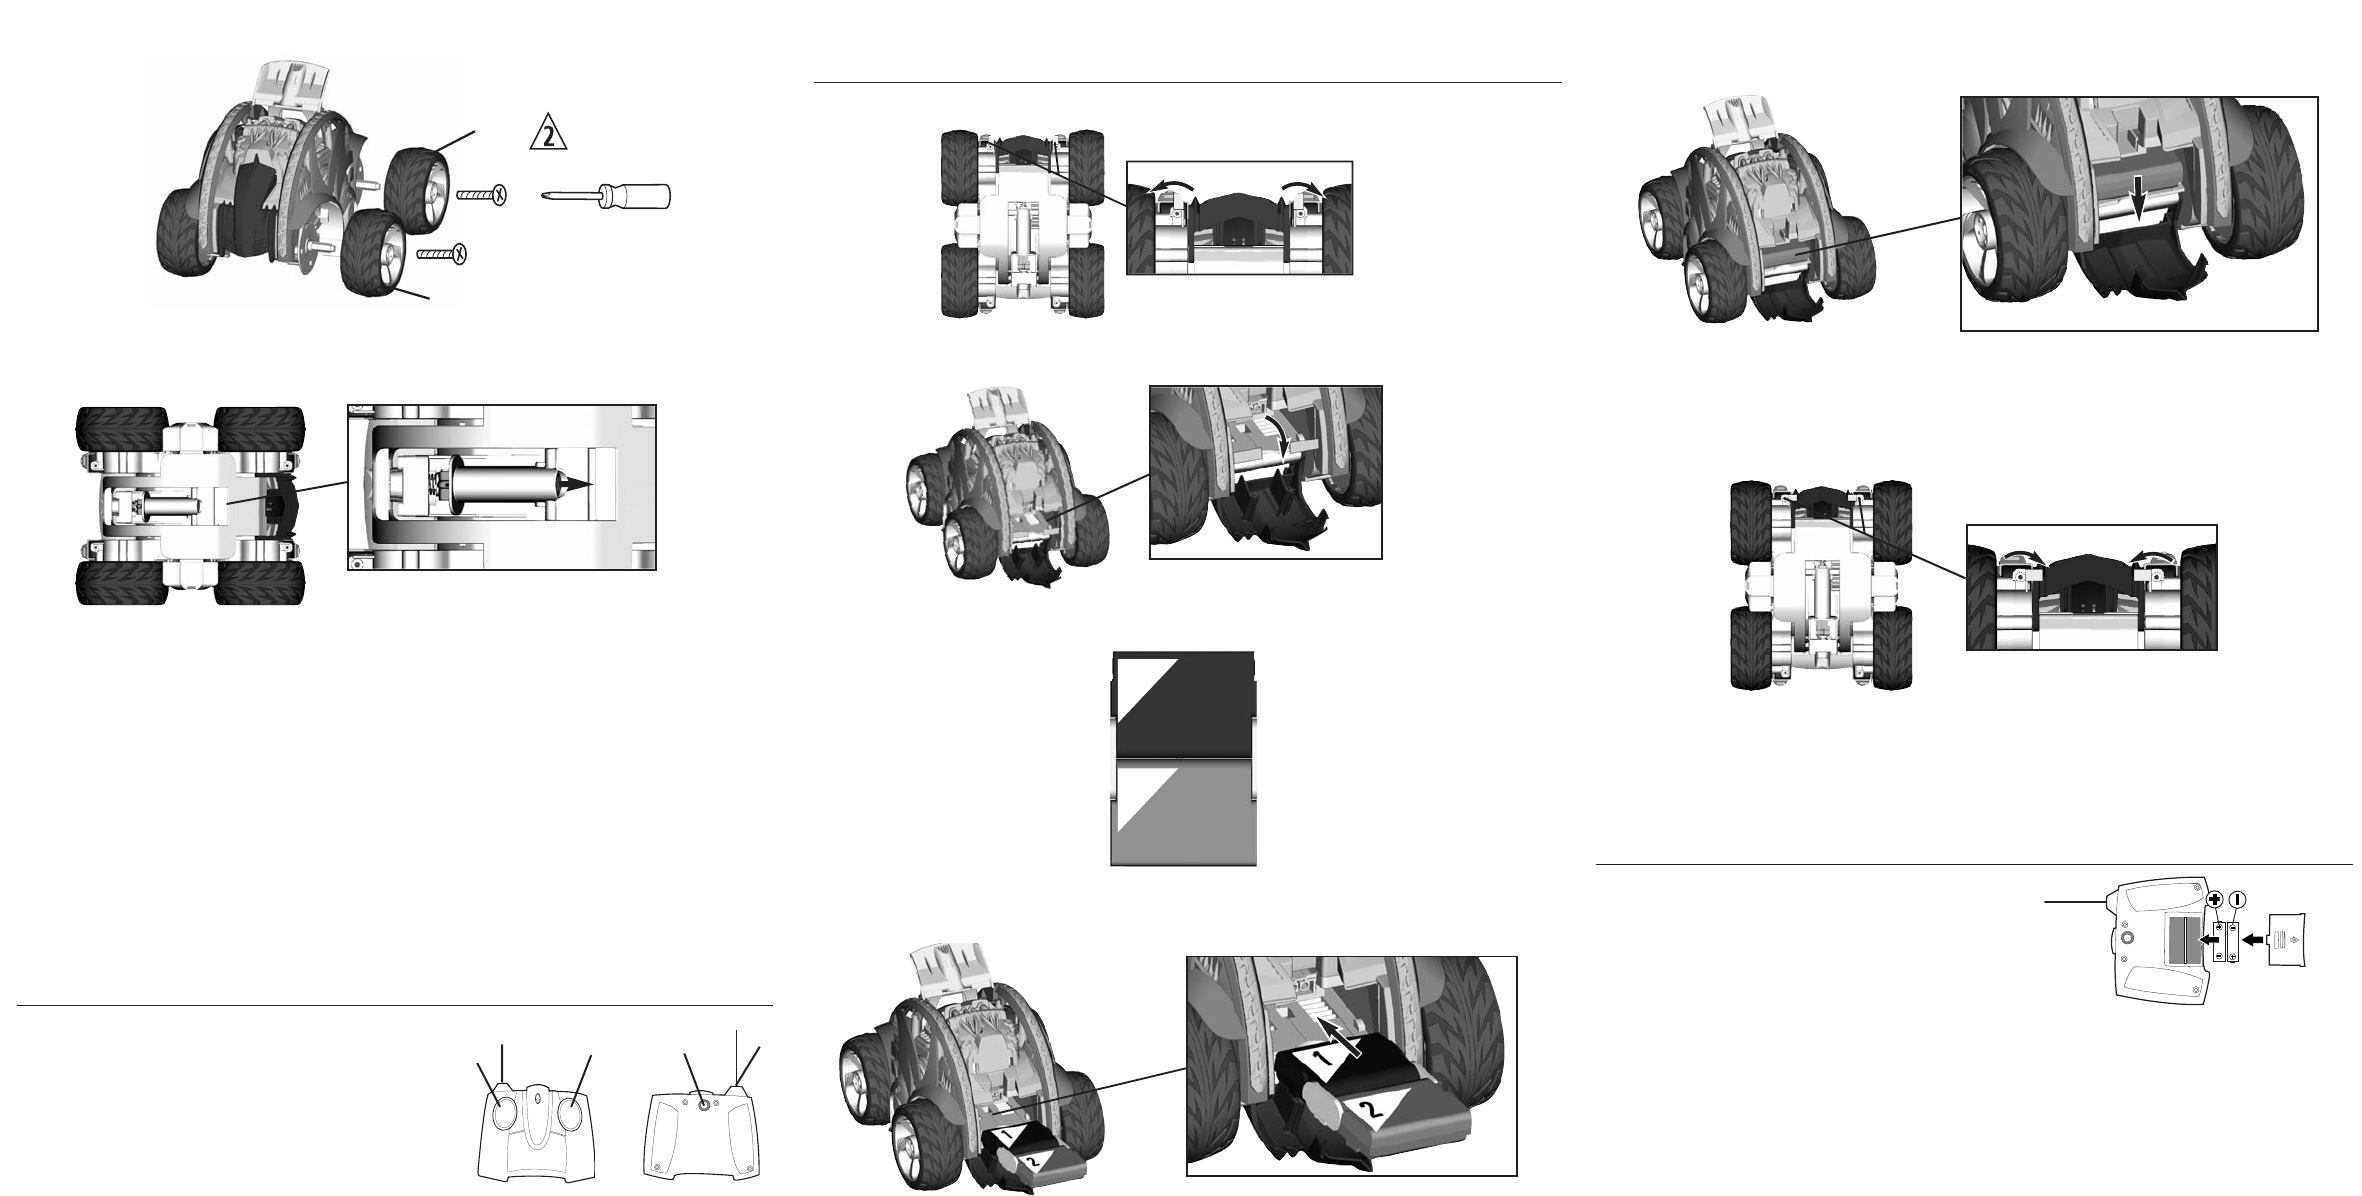
1. Rotate the 2 latches outward, as shown, to unlock the battery door.
2. Make sure the TMH® FlexPak® battery pack is fully flat, so that the labels marked 1 and 2 are facing up, as
shown.
3. Swing the battery door up and push to close. Rotate the 2 latches inward, as shown, to lock the battery door.
NOTE: The super stunt arm must be in the retracted position in order to access the vehicle’s battery compartment.
Swing the battery door down.
Insert the battery pack into the battery compartment as shown and slide it all the way into the battery compartment.
Press down to snap the battery pack into place.
First, match the symbol on the inside of the tire to the corresponding symbol on the chassis, as shown. Then slide
each wheel onto the axle and tighten the screw as shown (screwdriver not included).
Rear
Front
2. Snap the shock absorber onto the super stunt arm as shown. Carefully align the shock absorber with the steel bar,
and push to snap it into place.
NOTE: If the super stunt arm ever gets stuck in the extended position, simply turn the vehicle’s power switch OFF and
pull the arm away from the vehicle body until it unsnaps from the shock absorber. Before operating the vehicle
again, reattach the shock absorber as described in Number 2.
q