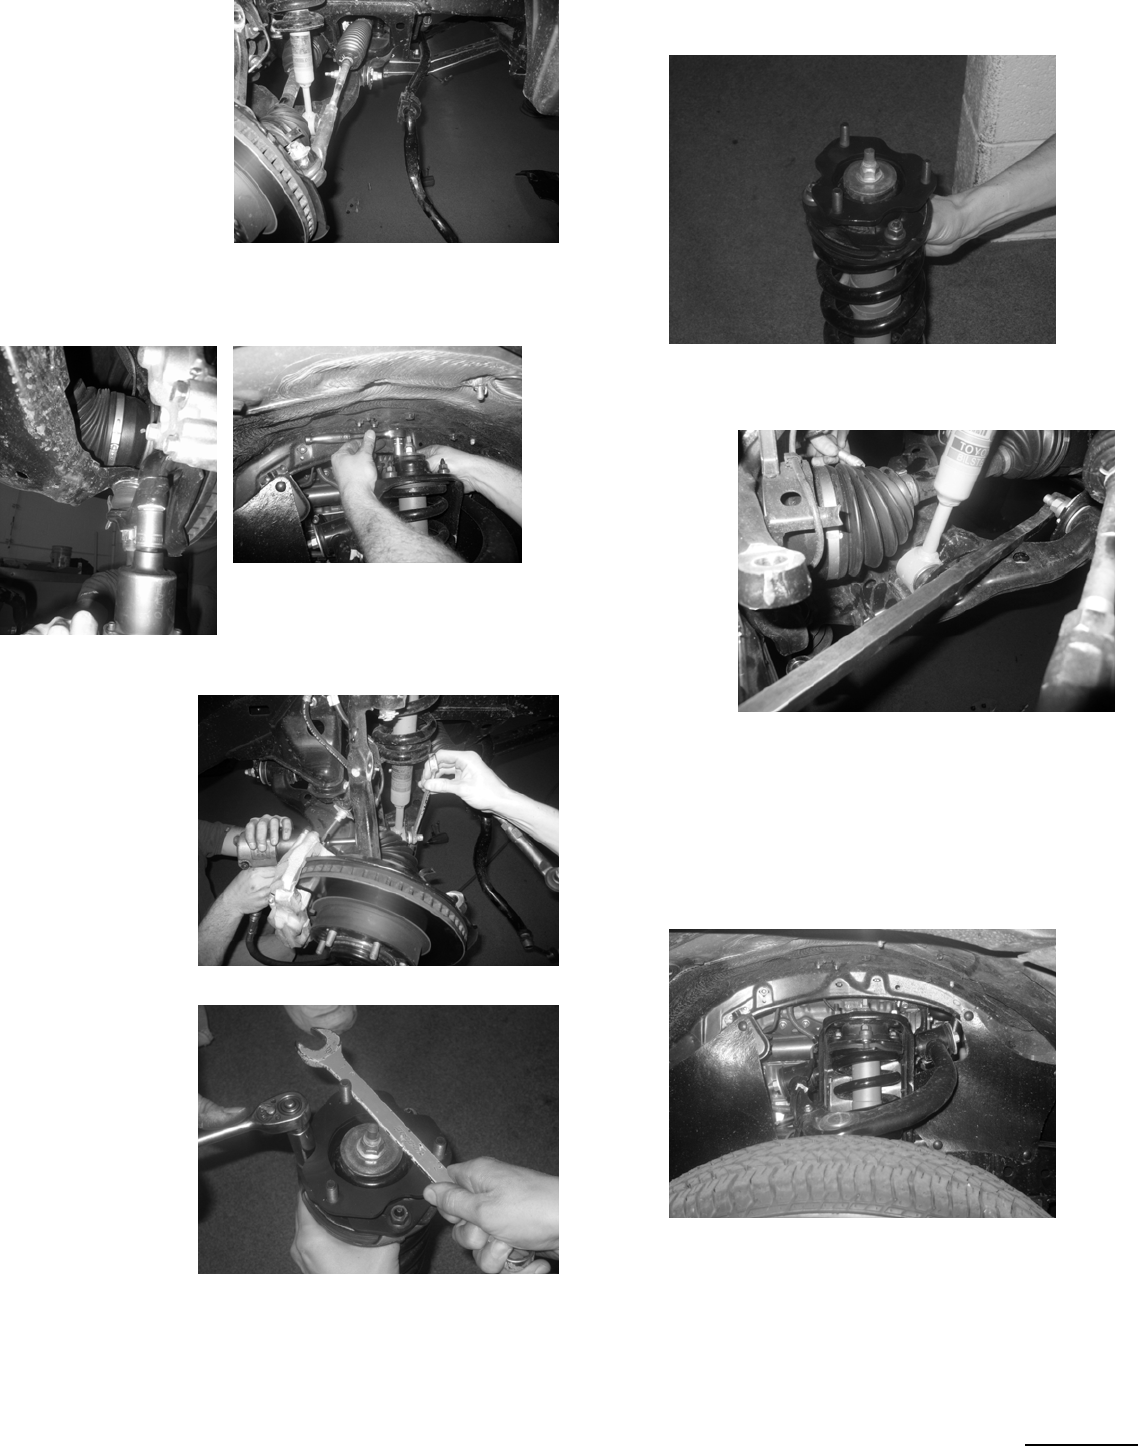
5. Let the sway bar
420-225-1001
04/07
swing down out of the
way. Failure to do this
will prevent the
removal of the
strut assembly.
____________________________________________________
6. Using a 19 mm ratchet, remove the lower two ball joint bolts.
7. Remove the three upper strut
mounting bolts with a 14 mm ratchet.
_______________________________________________________
8.
Next remove the
strut’s lower
mounting bolt with
a 19 mm ratchet a
wrench.
nd
actory
________________________________________________________
9.
Remove the strut
assembly from the
vehicle and mount it
in a bench vise.
Install the Hell Bent
Steel strut extension
on the top of the
strut, hold the part
up to start the f
nuts onto the factory
studs.
** Caution: Use the factory nuts with the factory studs**
10. Run down nuts snug with end wrench. Torque to OEM specs.
Note: Because of the shape of the Hell Bent Steel spacer the strut
will be rotated 180° when reinstalled.
11. Place strut back into upper strut mount. Tighten provided nuts
snug with wrench or ratchet (after install, you will torque to OEM
specs).
12. Use a pry
bar to position
the lower
control arm and
the strut mount,
and then
reinstall the
mounting bolt.
Torque to OEM
specs.
13. Place a jack under the lower control arm. Raise the lower
control arm to reattach the lower ball joint bolts. Torque the ball
joint nuts to OEM specs.
14. Repeat on opposite side.
15. Reattach the front sway bar and sway bar link assembly on both
sides of the vehicle. Torque to OEM specs.
16. Reattach the ABS line brackets and sensors. Torque to OEM
specs.
17. Reattach the wheel. Torque to OEM specs.
18. Lower vehicle to ground and torque strut mounts to OEM
specs.
19. Align the vehicle. A certified alignment technician that is
experienced with lifted vehicles is recommended to perform the
alignment.


