14
Setup
Note: Determine the left and right sides of the machine from the normal operating position.
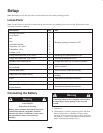
Loose Parts
Note: Use this chart as a checklist to ensure that all parts necessary for assembly have been received. Without these parts,
total setup cannot be completed.
Description Qty. Use
Locking hood switch
Lock washer
Nut
Key
Hood latch bracket
Capscrew, 1/4 x 3/4 in.
Flat washer, 1/4 in.
Locknut, 1/4 in.
1
1
1
2
1
2
2
2
Mounting locking hood latch for CE
Flange head capscrew, 5/16 x 5/8 in. 1 Replacing floor panel fastener for CE
Flange head capscrew, 5/16 x 3/4 in. 1 Securing access panel for CE
Hydraulic filter (transmission) 1 Change filter after first 10 hours of operation.
CE decal
CE certificate
1
2
Affix to machine.
Service decal, blank 1 Affix to machine (International only).
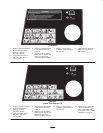
Diagnostic ACE display overlay 1
Diagnosing machine (store in service shop until
needed)
Video 1 View before operating the machine.
Parts catalog 1
Operator’s Manual (Traction Unit)
Engine Manual
2
1
Read before operating the machine.
Connecting the Battery
CALIFORNIA
Proposition 65 Warning
Battery posts, terminals, and related accessories
contain lead and lead compounds, chemicals
known to the State of California to cause cancer
and reproductive harm. Wash hands after
handling.
Warning
Connecting cables to the wrong post could result in
personal injury and/or damage to the electrical
system.
Warning
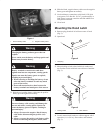
1. Open hood.
2. Ensure battery is securely fastened in place and check
battery charge with a hydrometer. If battery needs
charging, be sure at least one battery cable, preferable
the positive (+) cable, is disconnected from the battery
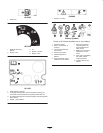
before connecting the charger (Fig. 1).


