


PAGE 5 OF 15
TN202-UG V1.2
TN-202
1. GETTING STARTED WITH TRIPNAV
These are only a few simple steps that you need to follow before using your TripNav PDA GPS
receiver:
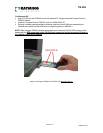
• Install the TN-202 into the Compact Flash port of your PDA.
• Install your own personal street mapping software (configuration settings within your software may
require you to select the Compact Flash port as the source of the GPS data).
• Your PDA should have a fully charged battery when using the TN-202, in addition to using an 12V
PDA charging cable (optional) while in a vehicle to keep the battery voltage constant.
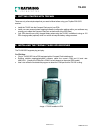
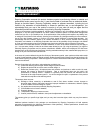
2. INSTALLING THE TRIPNAV TN-202 GPS RECEIVER
The TN-202 GPS supports plug and play.
For PDA Use:
• Plug in TN-202 GPS into a PDA equipped with a Compact Flash interface slot.
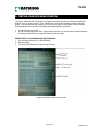
• Running suitable mapping/navigation software, select the correct COM port & baud rate:
4800,N,8,1. (Usually the COM port is COM2, but will depend on the actual PDA model).
• User’s can utilize the included test program to detect the COM port that the TN-202 is using.
Image 1: TN202 installed in PDA