


84
MAINTENANCE
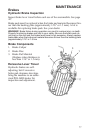
Clutch System
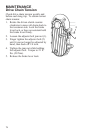
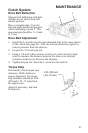
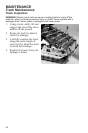
Drive Belt Installation
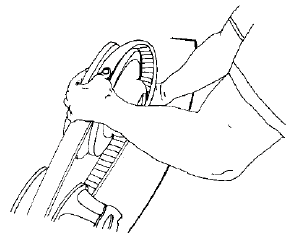
1. Drop the drive belt over the
drive clutch and pull back the
slack. The belt cord line
should be flush with, or
slightly above, the outer cir-
cumference of the driven
clutch sheaves. The belt will
seat itself in the driven clutch
during the break-in period.
Adjust the belt ride-out after
the break-in period by read-
justing belt deflection.
Tip: To ensure satisfactory belt life, install belts so they operate in the same
direction of rotation by positioning the identification numbers so that you
can read them. If required, separate the sheaves as outlined in the belt
removal procedures.
2. Rotate the L-wrench counter-clockwise to tighten the sheaves while
working the belt to the outer edge of the sheaves.
3. Remove the L-wrench and store it in the tool kit.
4. Reinstall the side panel.
5. Close and secure the hood.
6. Break in the new belt. See page 49.
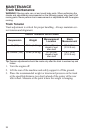
Drive Belt
Belt width and length must match the center distance of the clutches and
sheave width of the drive clutch. POLARIS recommends the use of
O.E.M. belts. Other belts may match the dimensions, but can drastically
change the shift pattern, resulting in poor performance.
Tip: A worn belt will continue to function, but will not deliver maximum perfor-
mance. Always carry a spare belt in case of an emergency.