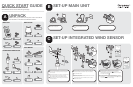
UNPACK
Make sure that you have all of the parts shown here before
the installation of the Advanced Weather Station.
A
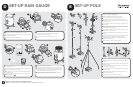
SET-UP MAIN UNIT
B
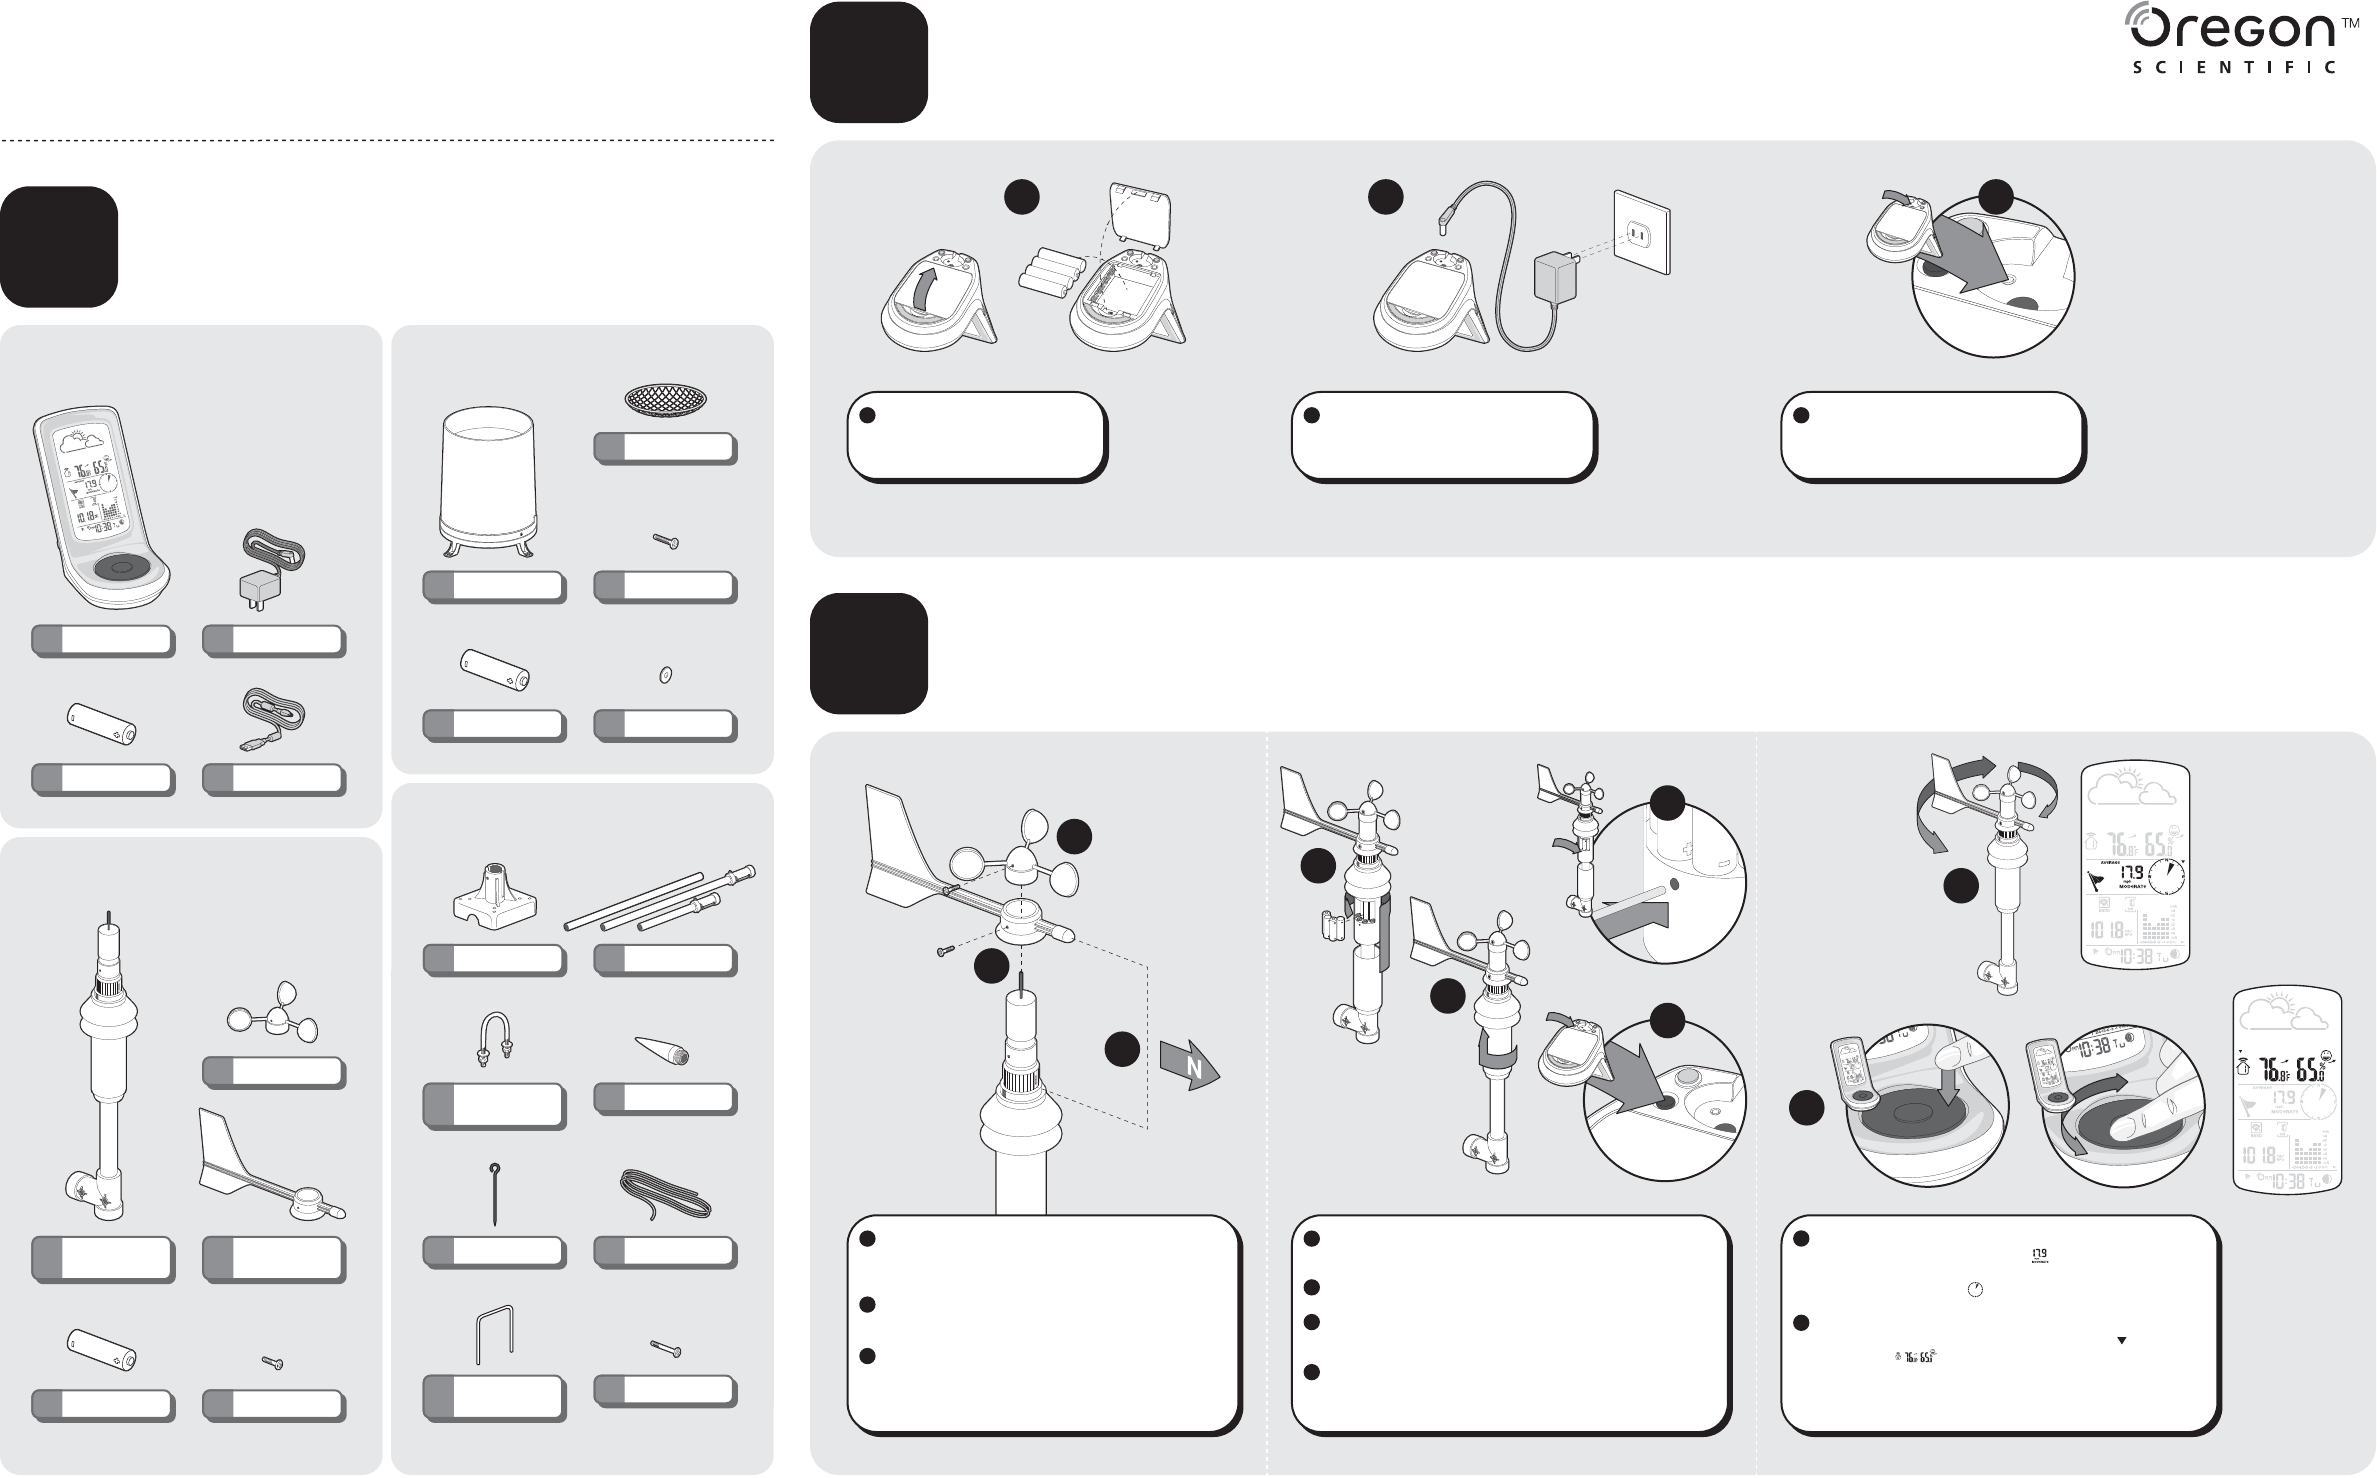
SET-UP INTEGRATED WIND SENSOR
C
MAIN UNIT
INTEGRATED WIND GAUGE
RAIN GAUGE
USB Cable
1×
Wind Vane
1×
Support Base
1×
Rectangular
Base Legs
2×
Round
U-Shaped Bolts
2×
Wind Direction
Indicator
1×
Wind Sensor
Stem
1×
Screws (Type B)
2×
Pole Sections
3×
Metal Pins
3×
Tension Strings
3×
Rain Collector
1×
Filter
1×
6V Adapter
1×
Screws (Type A)
4×
Washers
6×
1.5V AA Batteries
2×
Screws (Type C)
3×
WMR100 Base
1×
POLE MOUNT
1.5V AA Batteries
4×
1.5V AA Batteries
4×
Cone-Shaped End
1×
2
1
3
4
6
8
9
Slide wind direction indicator onto wind sensor and align
the screw holes. After aligning the holes, use a Type B
screw to secure.
Attach the wind speed vane on the top of the wind sensor,
align the holes, and use a Type B screw to secure.
When installing outside, rotate the NORTH Indicator
reference line to the “north” and align the wind indicator
in the same direction.
1
2
3
1
Install 4 AA batteries located
underneath the base unit.
3
Press the RESET button.
2
Install power plug into the base station
and insert the AV adapter into the wall
outlet.
Rotate the battery cover counter-clockwise and slide cover off
to expose the battery compartment. Insert 4 AA batteries.
Press the RESET button.
Rotate the battery cover clockwise and slide cover on to close
the battery compartment.
On the base station, press the SEARCH button to initiate a
wireless sensor search.
4
5
6
7
QUICK START GUIDE
WMR100 ADVANCED WEATHER STATION
with Wireless Sensor Set and Mounting Package
21
3
7
5
Wind Speed: Gently rotate the wind vane and confirm a
numerical reading on the base unit ( ). Wind Direction
Indicator: Move the direction of the wind indicator and verify the
icon moves in the same ( ).
To test the temperature reading, press the SELECT button on
the black rotating dial until the selected area icon ( ) is on the
second level ( ) of the LCD display. Rotate the dial clockwise
to channel 1 and verify a numeric reading.
8
9