


(3)
(4)
(5)
(6)
(7)
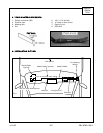
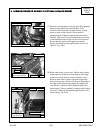
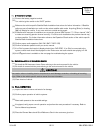
Before routing cable(s) into C-channel, route cable(s)
behind and above small mounting bracket for the glove
box. Route cable(s) up towards C-channel in the glove
box's cavity. [Optional: Route Satellite cable in the
same fashion.] Fig. 7
If routing the satellite radio bus cable ensure that they
are stacked vertically directly to the right of the glove
box mounting bracket to the point they are inserted into
the C-channel. Fig. 7
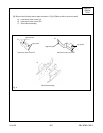
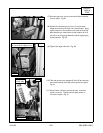
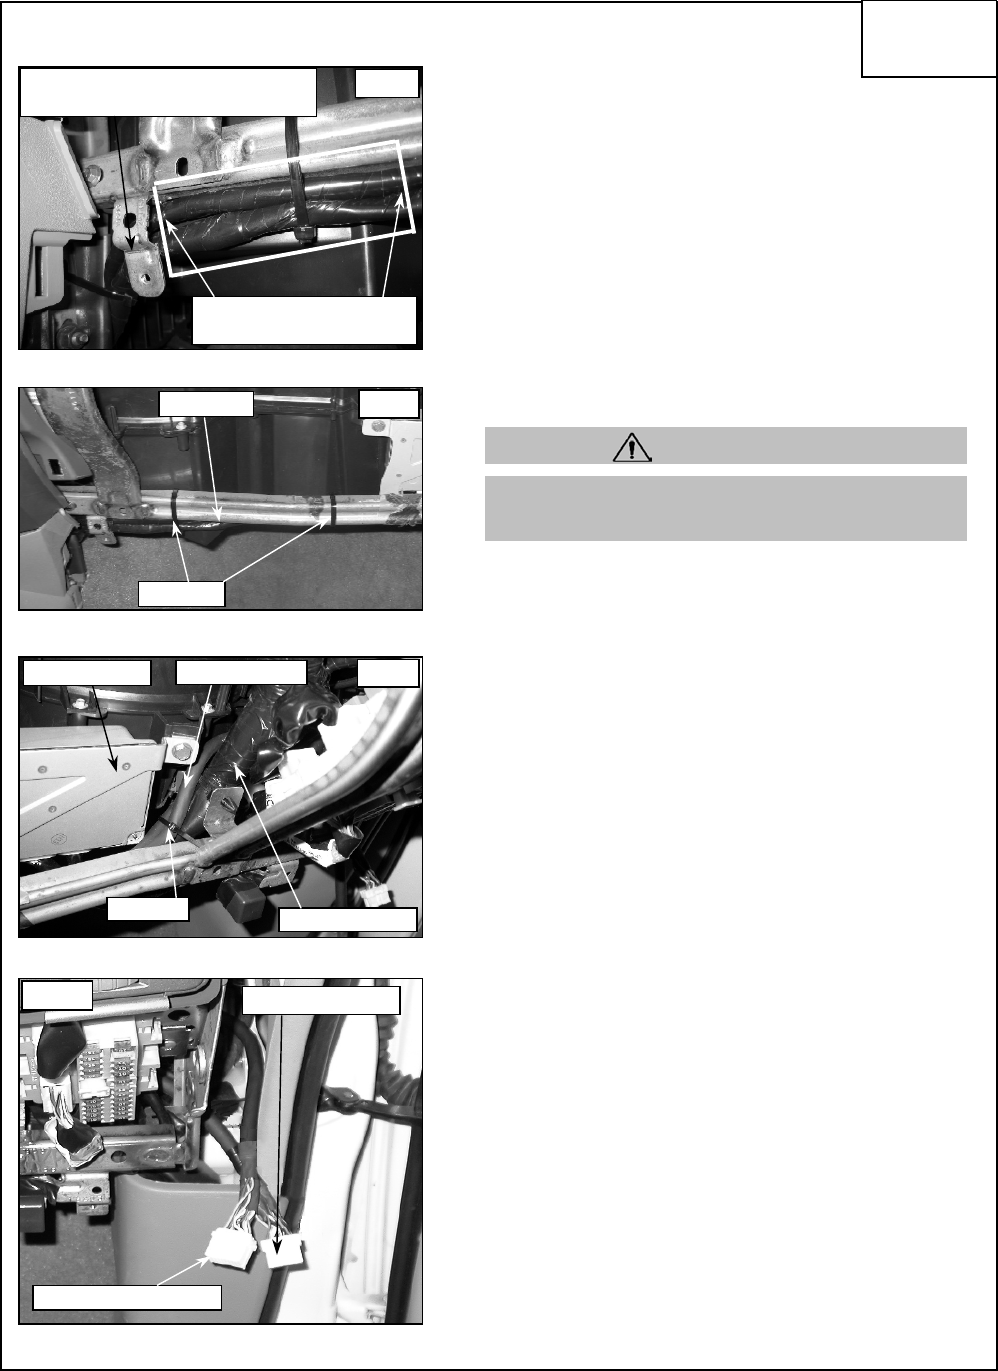
Route behind harness cluster and through rear of RH
dash frame. Continue to route cable towards the
opening in dash to the right of the fuse panel and leave
dangling until installing the module later. [Optional:
Route Satellite cable in the same fashion.] Fig. 10
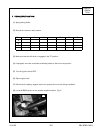
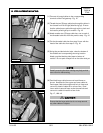
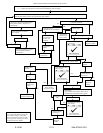
Route cable(s) out of C-channel between nearby
module and large harness cluster. [Optional: Route
Satellite cable in the same fashion.] Secure with one
(1) cable tie to the harness cluster. Fig. 9
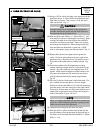
Add one (1) piece of foam tape to the sharp edge of
the lower part of C-channel where cable(s) will enter
the channel. Route cable into C-channel towards RH
door. [Optional: Route Satellite cable in the same
fashion.] Attach two (2) cable ties around C-channel.
While cinching the left most cable tie ensure that the
cables remain vertically stacked. Fig. 7 & 8
Fig. 7
Fig. 8
Ensure cables are stacked
vertically in this region.
Route cable(s) above small mounting
bracket for the glove box.
cable ties
Fig. 9
cable tie
nearby module
harness cluster
Fig. 10
[Optional Satellite bus]
iPod gateway bus
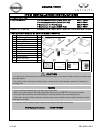
ARMADA,
QX56 &
TITAN
If cables are not orientated vertically the glove box will
not fit nor shut properly.
CAUTION
N-bus cable(s)
foam tape
3.14.06 6/11 284-9798-100-I1