


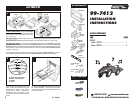
Disconnect the negative battery terminal to
prevent an accidental short circuit. Remove
the shifter cover and (4) Phillips screws
exposed. Remove (2) screws from the
driver's side knee bolster and lower.
Remove (1) screw from the left corner of the
radio triim bezel. Remove (2) screws above
the radio opening and unclip the bezel.
Remove (4) screws from the factory head
unit assembly and disconnect the wiring.
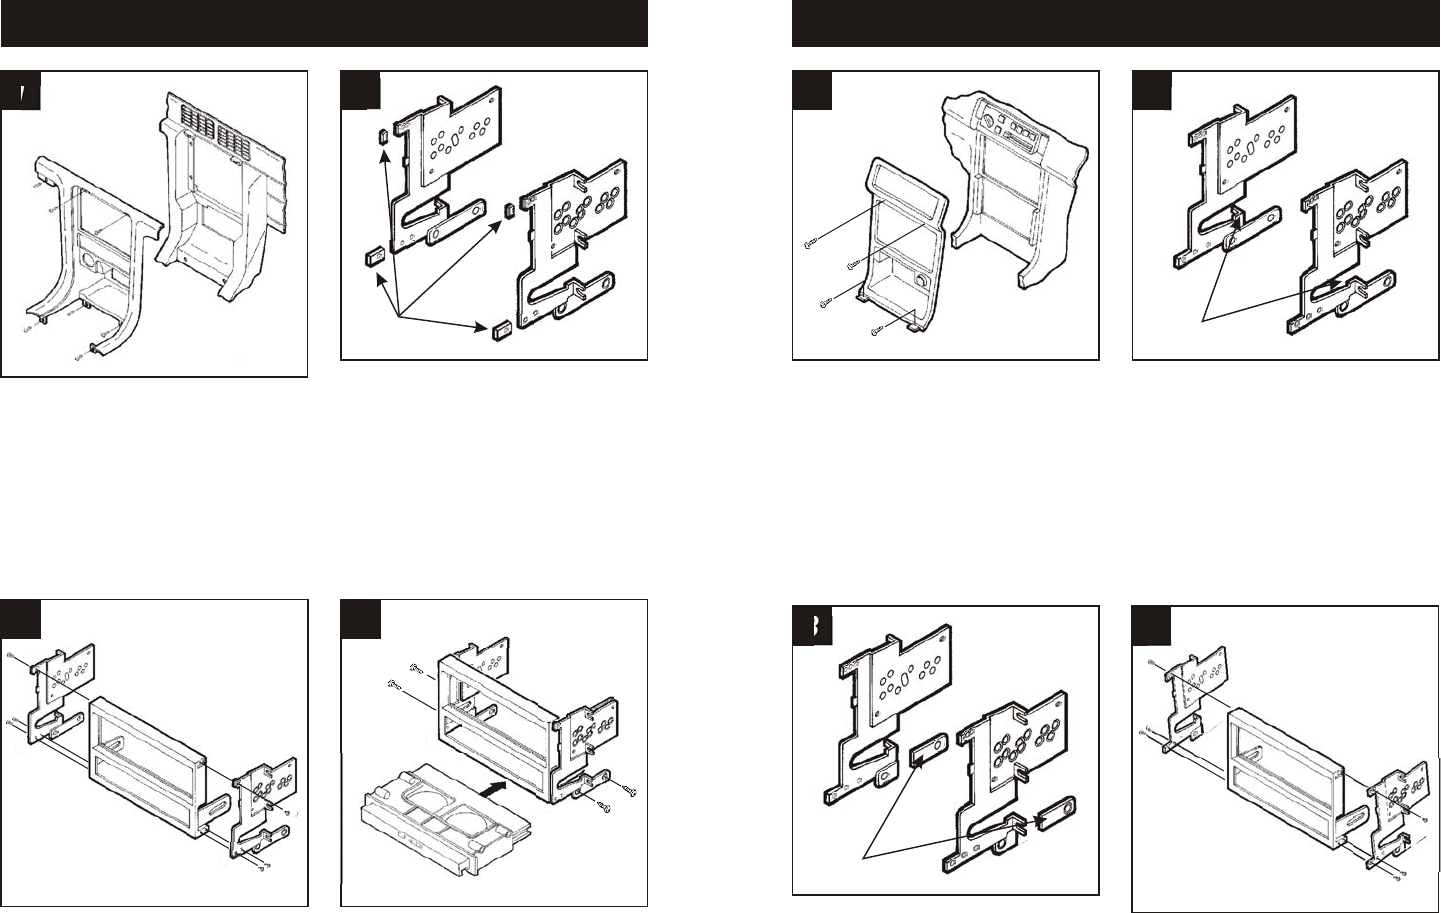
Disconnect the negative battery terminal to
prevent an accidental short circuit. Unclip
the gear shifter trim bezel and remove (2)
Phillips screws exposed. Remove (2)
Phillips screws above the radio opening.
Unclip the radio trim bezel. Remove (4)
Phillips screws from the factory head unit
and disconnect the wiring.
Using the raised lines as a guide, cut and
remove the ends of each Mounting Bracket
("A").
Locate the corner of each lower mounting
tab on the Mounting Brackets ("A").
Using the corner of each mounting tab as a
guide, cut and remove the ends of the
cupholder mounts from the Mounting
Brackets ("B").
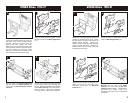
Align the holes in the Mounting Brackets
with the holes in the Radio Housing and
mount with (6) #6 Self-tapping Screws
supplied.
Remove (4) screws securing the cupholder
to the factory head unit assembly and
remove. Slide the cupholder into the bottom
of the Radio Housing and mount with the
same (4) screws. Skip to the Installation
Instructions for ALL VEHICLES on Page #3.
NISSAN Altima 1993-97 NISSAN Altima 1998-01
1 1
4
2 2
3
3
1
2
Align the OUTER holes in the Mounting
Brackets with the holes in the Radio
Housing and mount with (6) #6 Self-
tapping Screws supplied. (The Brackets
will mount on an angle). Skip to the
Installation Instructions for ALL VEHICLES
on Page #3.
4
"A"
"A"
"B"