


Exterior Lamps
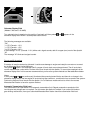
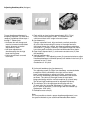
Headlamp Adjustment
Correct headlamp adjustment is extremely important. Check and readjust headlamps at regular intervals and
when a bulb has been replaced.
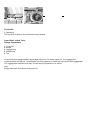
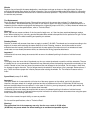
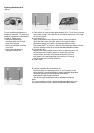
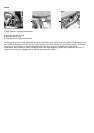
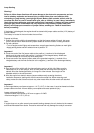
Headlamp Assembly
1. Cover for low beam headlamp bulb, fog lamp, and level for vertical adjustment
2. Latch for cover (1)
3. Cover for high beam headlamp bulb
4. Clamp for cover (3)
5. Headlamp vertical adjustment screw
6. Headlamp horizontal adjustment screw
7. Scale for horizontal adjustment
8. Electrical connector for low beam headlamp bulb
9. Electrical connector for fog lamp bulb
10.Electrical connector for high beam headlamp bulb
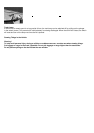
Replacing Bulb:
To prevent a possible electrical short circuit, switch off lamp prior to replacing a bulb. When replacing bulbs,
install only 12 volt bulbs with the specified watt rating. When replacing halogen bulbs do not touch glass
portion of bulb with bare hands. Use plain paper or a clean cloth.
Warning !
Halogen lamps contain pressurized gas. A bulb can explode if you:
• touch or move it when hot,
• drop the bulb,
• scratch the bulb.
Wear eye and hand protection.
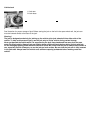
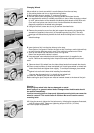
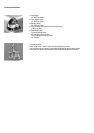
Bulb for Low Beam H7 (55 W) Bulb for Fog Lamp H1 (55 W)
Open hood.
Depress latch (2) and remove cover (1). Pull of electrical connector (8) or (9). Unhook clamping ring and
removes bulb. Insert new bulb (seating properly in cutouts of bulb socket), and mount clamping ring.
Reinstall and push electrical connector on securely. Reinstall bottom end of cover (1) and push against top
end of cover until properly seated. Check lamp for proper operation.
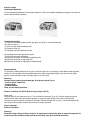
Xenon (optional)
Bulb for Low Beam
Warning !
Because of high voltage in Xenon lamps, it is dangerous to replace the bulb or repair the lamp and its
components. We recommend that you have such work done by a qualified technician.