CAMERA POWER CONNECTION
The camera is powered by plugging the camera connector into the vehicle’s towing plug.
The camera has a 4 position connector which will attach directly to many vehicles and
has a pass-though design that will allow it to be plugged between the vehicle and trailer.
Some vehicles may need a 7 position to 4 position adapter (figure 5) which is not included.
NOTE: A commonly available 4 position tow wire extension (not included) will allow the
camera to be mounted farther away from the vehicle plug for gooseneck or fifth wheel
trailer hitching up applications.
Notice: Depending on the make/model of the vehicle the running lights or headlights
may need to be turned on to power up the vehicle’s tow plug.
4843DATSEN Back-Up Camera Instructions
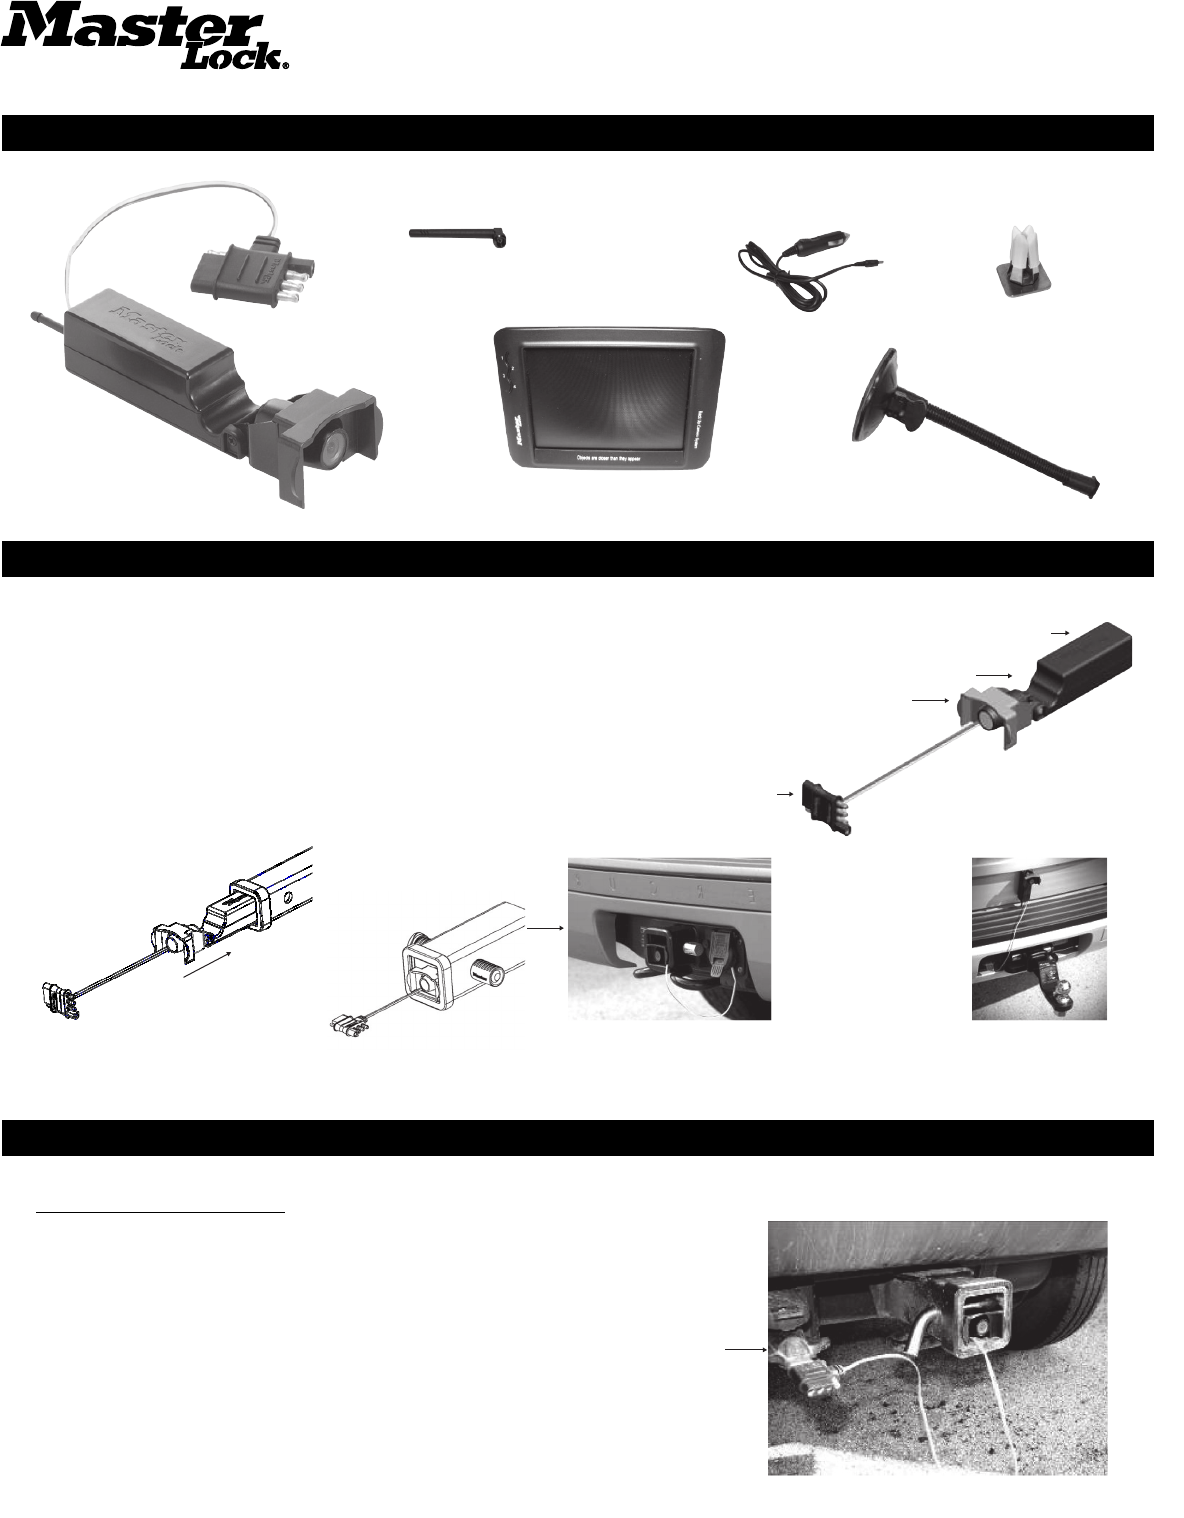
Mounting the Camera:
Connecting the Camera:
Hardware and Components Included:
The camera has two basic mounting options:
The camera 1. (figure 1) can be mounted inside a 1 ¼” (figure 2) or 2” (figure 3)
hitch receiver tube. Slide the camera assembly into the hitch tube. The magnet
in the camera base will hold it securely in place, however the plastic guide on the
camera bracket will help line the assembly up with the hitch pin opening and allow
a standard or locking hitch pin to be used for additional security.
The camera can also be mounted to any metal surface using the magnetic base. 2. (figure 4)
The soft pads on the base will prevent sliding or scratching and the camera bracket can
pivot up to 90° to allow the field of view to be adjusted.
Figure 5
7 Position
to 4 Position
Adapter
Shown
Antenna
Transmitter Housing
Figure 1
Figure 2
1-1/4" Tube
Wireless Antenna (1)
Power Cable (1)
Flexible Mounting Arm
w/ Suction Cup Base (1)
Figure 4
Figure 3
2" Tube
Camera with
Guide/Hood (1)
Monitor (1)
Vent Clip (1)
Pass thru/T-connector
Guide/Hood


