


12
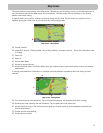
(F) Information display. Displays speed, time of day, elevation, compass direction. While routing it also can also
display distance to destination, estimated time of arrival (ETA), and time remaining. Tap on the information
field to change.
(G) Access the list of nearest Highway Exit POIs (available only when driving on a highway/freeway/interstate). Tap
to display options to start a new trip or, when routing, to make modifications to an existing trip.
(H) Zoom in and zoom out controls to change the map scale.
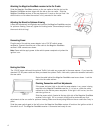
Accessing the Map Screen
1. On the Main Menu screen, tap View Map.
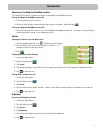
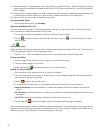
Setting the Map Modes (2D or 3D)
The map is normally displayed in 3D mode (perspective view) but you can set the map to 2D mode (top down
view) if so desired. Choose the mode that suits you best.
1. From the Map screen, tap anywhere on the map. Additional controls appear.
2. Tap 2D to switch the map to 2D mode from 3D mode, or tap 3D to switch the map to 3D mode
from 2D mode.
Tap .
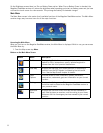
Setting Zoom Levels
Select the zoom level that best suits your needs. Note that zoom levels are limited in 3D mode. As you zoom out
in 3D, the display will switch to 2D at higher zoom levels.
1. Tap the '+' or '-' zoom level buttons at the bottom of the display to set the desired zoom level.
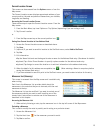
Panning on the Map
1. While viewing the Map screen, slide your finger or a stylus across the map.
2. The map screen changes to Pan mode.
3. When finished, tap and the map returns to your current position.
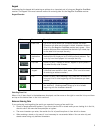
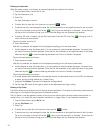
Routing to a Panned Position
1. Pan the map until the location you wish to route to is displayed.
2. Tap on the map at the point you go to. A red push pin will be displayed along with information about the
point chosen at the top of the screen.
3. Tap the button in the top left corner.
4. If an active route already exists, first you need to define what to do with this new route point:
•Replace Destination: the next destination is cleared and replaced with the one selected from the Pan
screen.
•Go There Now: the selected location is inserted in the route as an intermediate destination before the next
destination.
•Add To Trip: the selected destination is added to the end of the current trip.
5. Tap the large GO button on the right to return to the Map screen and begin navigating.
Note: if the panned position does not match an existing street address (i.e. the destination is not along a road or
street that is stored in the map database), the guidance will stop on the road that is closest to your destination. A
dashed line to your final destination will then be displayed on the map.