


2
Manual No. 322-121M 4/17/06
Land Pride
Assembly Instructions
■
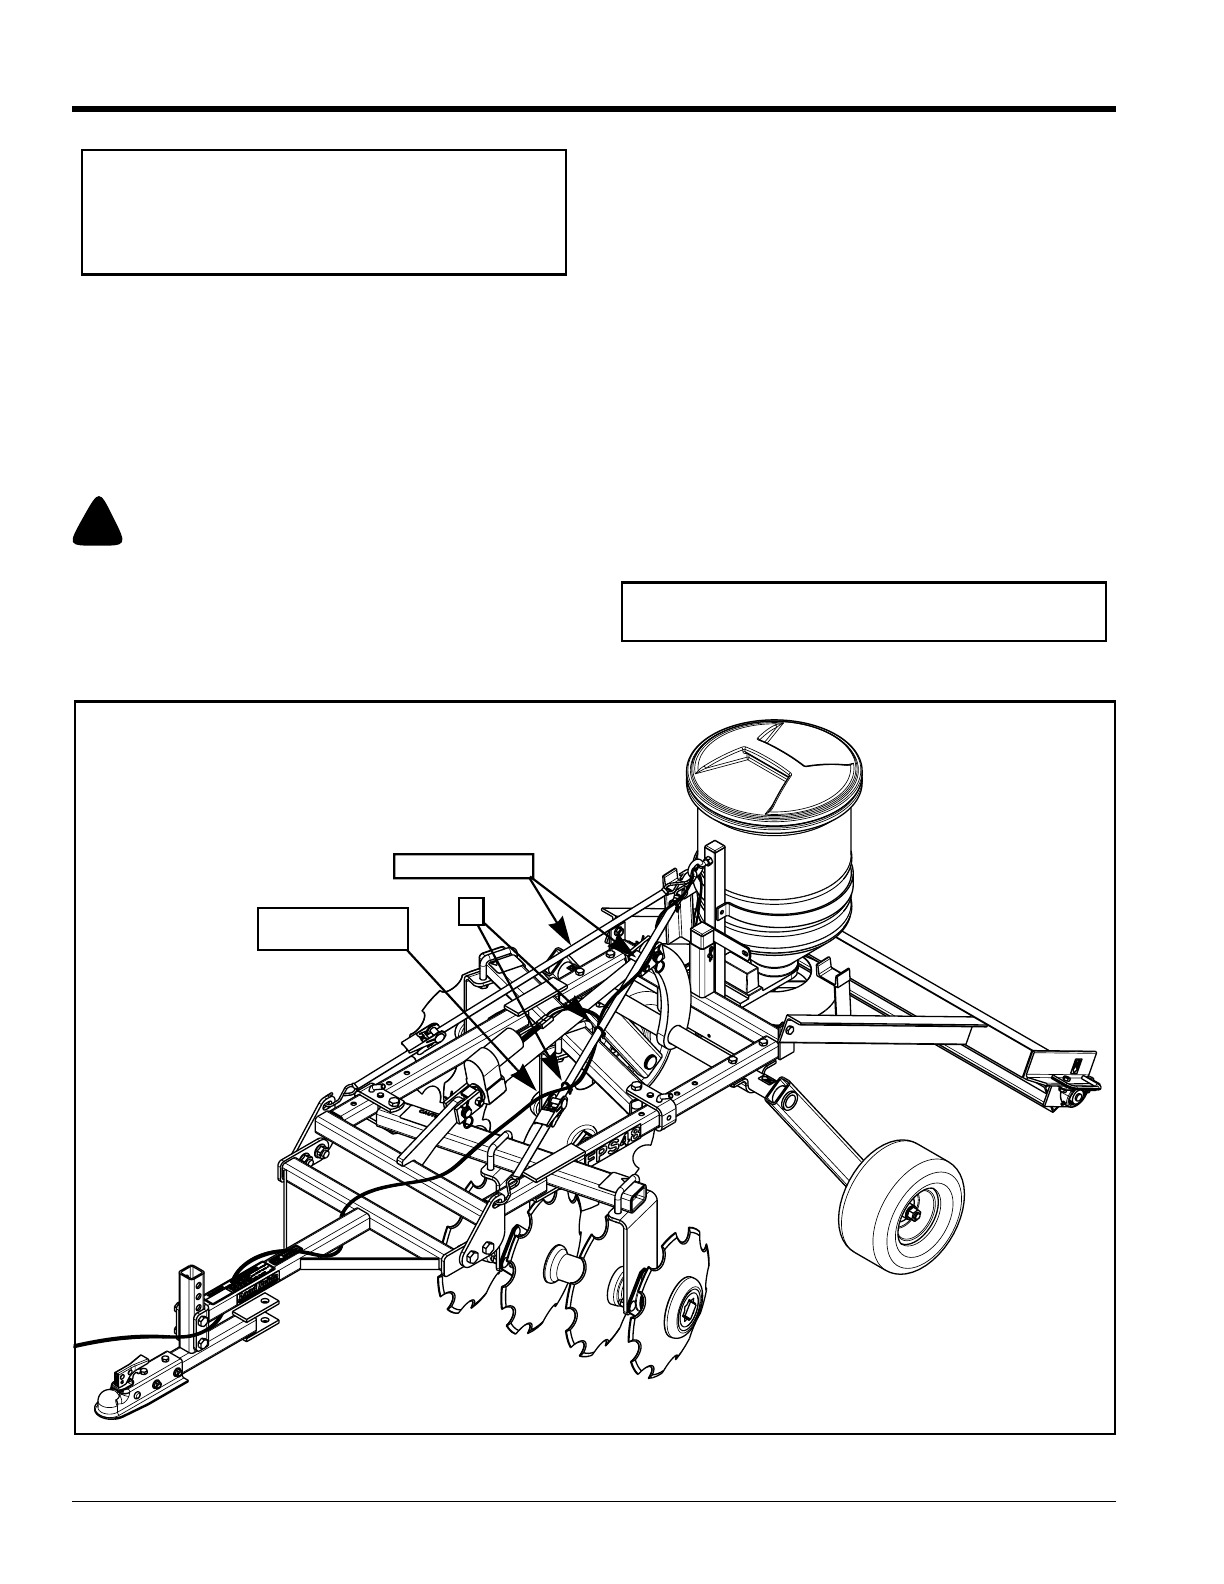
5. Wrap electrical wiring around one of the tie down
straps and along the hitch frame as shown in
Figure 1-2.
Refer to Figure 1-1 on page 1:
6. Attach white wire alligator clip (D) to the positive (+)
battery post.
7. Attach black wire alligator clip (C) to the negative (-)
battery post.
!
CAUTION
Extending and retracting the actuator creates pinch point
hazards. Keep fingers, hands and all extremities clear of all
moving parts when operating toggle switch (G).
NOTE: Ties (#5) may be used to help secure the
electrical wiring. If they are used, attach them
loosely or out of material that can be removed to
allow removal of electrical components for dry
storage.
8. Operate toggle switch (G) to move upper clevis end
of actuator until it aligns with the rear axle adjusting
lug hole (A).
9. Attach upper end of Linear Actuator (#3) to the rear
axle adjusting lug hole with hitch pin (#2) and secure
with hair pin clip (#1).
10. Operate the toggle switch at the control box to raise
and lower the disc gangs.
Unhooking the Electric Actuator
Refer to Figure 1-1 on page 1:
1. Unplug the connector at the actuator.
2. Disconnect the black wire alligator clip from the
negative (-) battery post.
3. Disconnect the white wire alligator clip from the
positive (+) battery post.
4. Unhitch Electric Actuator from vehicle.
IMPORTANT: Protect actuator controller from
moisture by storing it in a dry location.
Electric Actuator Assembly
Figure 1-2
23916
Tie Down Straps
5
Wrap Electrical
Wiring As shown