


8
KK-K9-F14-K-PT_INST_11-08
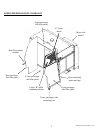
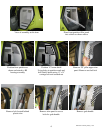
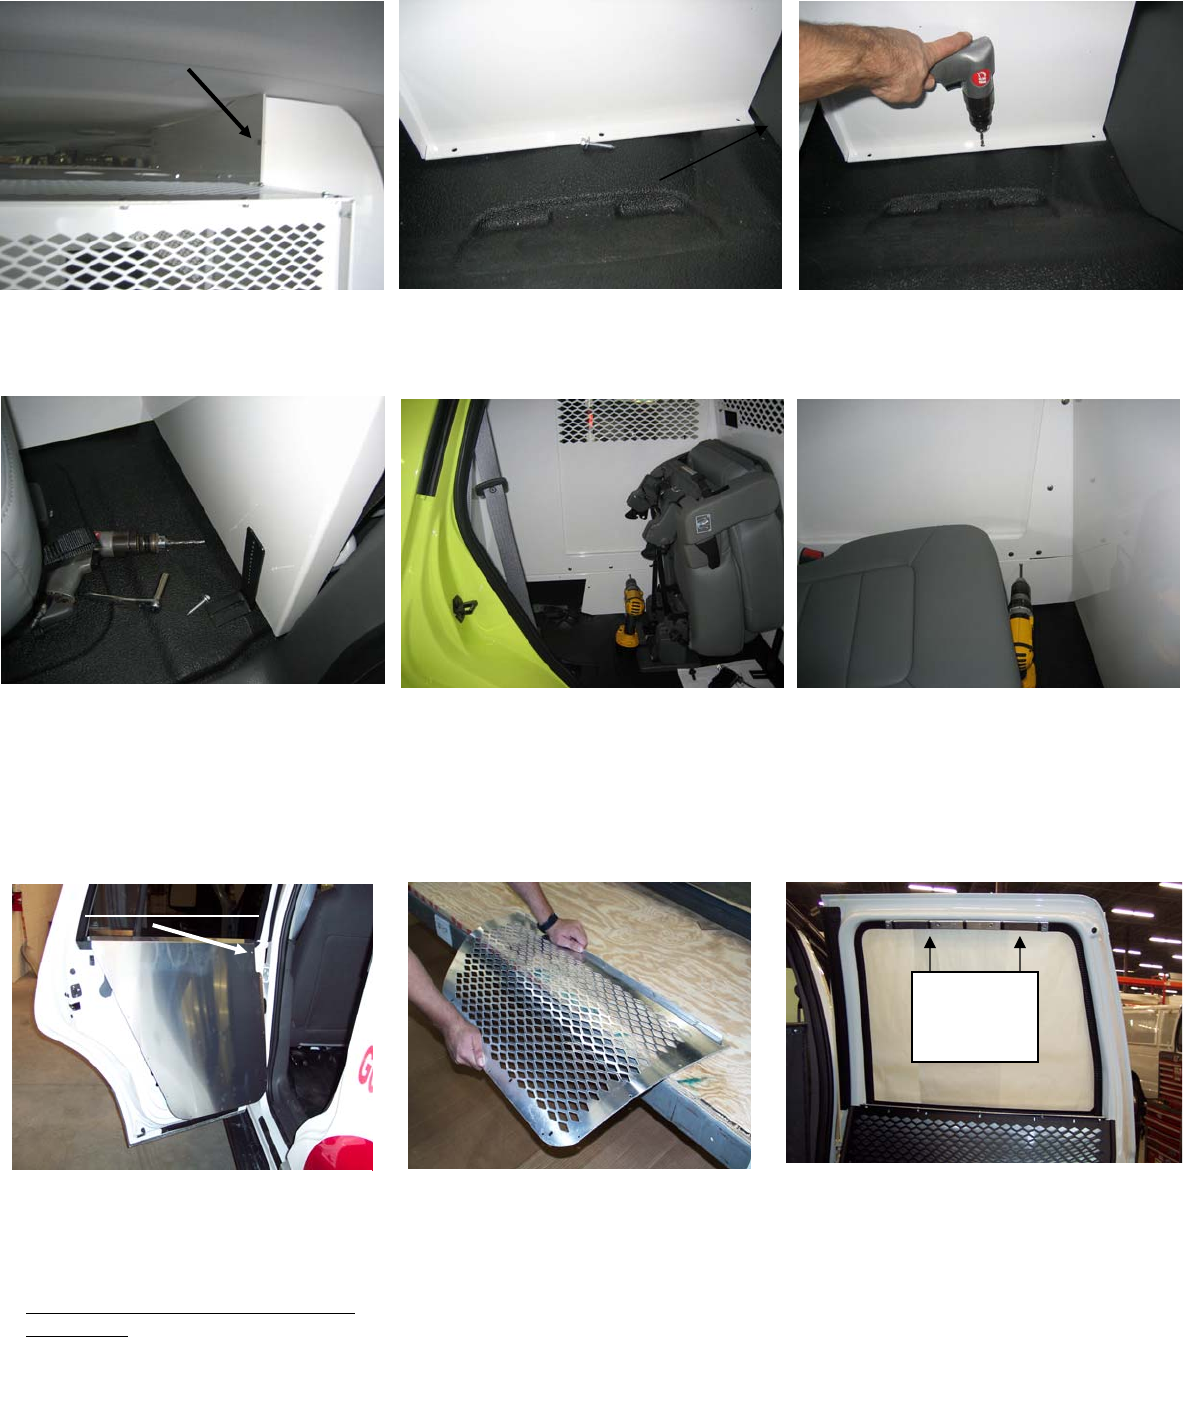
Pre-drill holes using 3/16” drill bit
and attach using ¼”x 1” Lag bolts
Attach rear partition to floor of
vehicle.
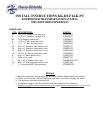
Location where ceiling filler bolts
to rear partition
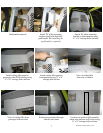
Position floor filler panel to K9
housing, mark holes and pre-drill
K9 housing using 1/8” drill bit
Attach to K9 housing using #10 x
¾” sheet metal screws.
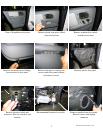
Attach front partition to vehicle using
6” L-mounting bracket. Bolt bracket
to partition using ¼” x ¾” carriage
bolts and nuts. Bolt “L” mounting
bracket to vehicle using ¼” x 1” Lag
bolts. Pre-drill w/ 3/16” hole
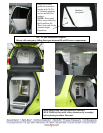
Top Inner Screw
Upper
Aluminum
Bracket
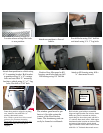
The window guard must be pre-
bent so it fits tight against the
contour of the door window
frame. The aluminum guard can
easily be formed at workbench.
Center door panels so edges do not hang
over. Attach to door with #10 x ½”
stainless sheet metal screws.
Hold window guard with pre-assembled
hinge and upper bracket onto window frame.
Make sure guard is centered on window.
Note: Window guards have holes around
perimeter for permanent mounting.
These holes are not used
with hinge style
window kits! They also come flat in
shipping.
Attach hinge to lower door panel with #10 x
½” stainless sheet metal screws. Mark upper
aluminum bracket location on window frame
and remove from window guard. Attach
upper aluminum bracket onto window frame
with #10 x ½” flat head sheet
metal screws.