


- 3 - C-3311-2^3311-18-2_INST_9-07
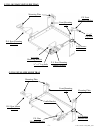
1. Attach forward mounting legs to the slide out tray.
• Attach forward mounting legs with provided 8-32 screws and hex nuts to slide track.
• The front legs will be square to the slide tray.
• On the front passenger side of the half tray, passenger side front mounting brackets
(CM001394) will attach to the front mounting legs.
2. Attach rear-mounting brackets to the slide out tray.
• Loosely attached the rear mounting brackets to the “Cradle Bracket” using ¼” x ¾”
hex head bolts, washers and serrated nuts.
•
On the rear passenger side of the half tray, passenger side rear mounting adapter
bracket (CM93712) will attach to the rear mounting brackets.
INSTALLATION:
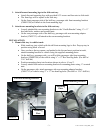
1. Mount slide tray in vehicle trunk.
• Slide trunk tray into vehicle with the tall front mounting legs in first. Prop up tray in
position using block of wood.
• Once you have the tray square, and pushed to the forward most position in trunk,
attach mounting brackets to vehicle using the supplied mounting plates.
• On the half tray, passenger side, you will bolt the passenger side front mounting
brackets (CM001394) to the vehicle using ¼” x ¾” Hex head lag bolts. (Pre-drill w/
3/16” drill bit)
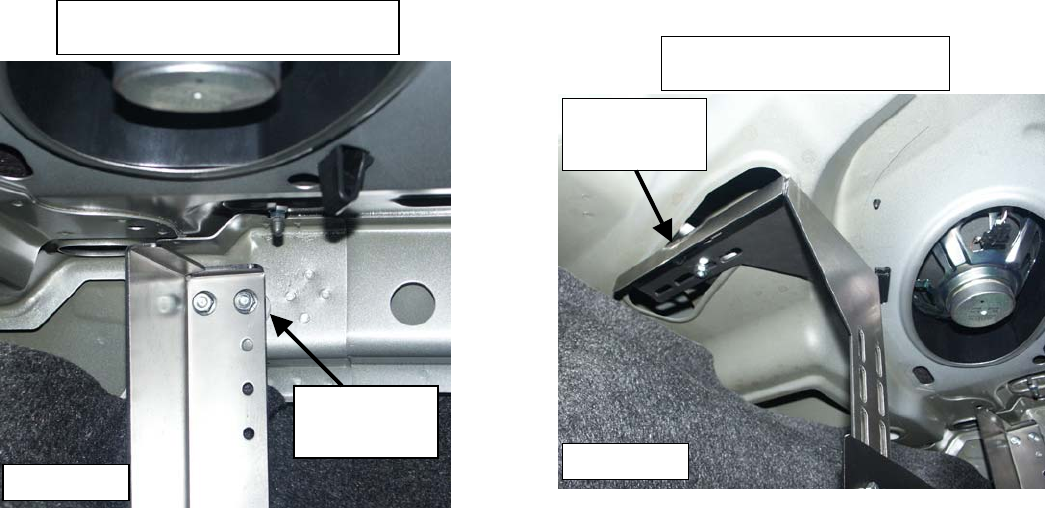
• Position mounting plates into locations shown in photos #1 and 2.
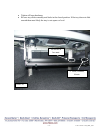
• Loosely attach front and rear mounting brackets to mounting plates using ¼” serrated
nuts.
• On the passenger side, attach passenger side rear mounting adapter brackets
(CM93712) to vehicle using ¼” x ¾” hex head lag bolts. (Pre-drill w/ 3/16” drill bit)
Mounting
Plate
Forward Mounting Brackets
Mounting
Plate
Rear mounting brackets
Photo #1
Photo #2