


CLOCK SETTING
This system incorporates a Day/Time stamp feature that lets you know exactly when a call or message is received.
The clock is preset at SUNDAY, 12:00 AM by the factory. Therefore, you must set the clock after powering up your
system.
To set the clock
1. Press and hold the CLOCK button for 2 seconds, You will hear a voice prompt SUNDAY, and the message display
shows "1," ("2" refers to Monday, "3" refers to Tuesday, and so on).
2. Press the FORWARD button or the REPEAT button until display shows "4" which refers to Wednesday. A voice
prompt WEDNESDAY will be heard.
3. Press the CLOCK button once to enter the day WEDNESDAY, and you will hear a voice prompt TWELVE AM with
the display shows "12" which guides you to the setting of the hour.
4. Press the FORWARD buttons or the REPEAT buttons until the display shows "10". Voice prompt "TEN AM" will
be heard.
5. Press the CLOCK button once to enter the hour "10" and you will hear a voice prompt "OH" with the display
showing "00" which guides you to the setting of the minutes.
6. Press the FORWARD button or the REPEAT button until the display shows "30". A voice prompt "THIRTY" will
be heard.
7. Press the CLOCK button once to enter the minute "30", you will hear a voice prompt "WEDNESDAY, TEN THIRTY
AM". Please note that the clock will start functioning once the system is powered up. As long as the system is
powered up with battery or AC power, the clock will function.
ANSWERING SYSTEM OPERATION
Prepare for use
It is important that you record the OGM before operating the Answering System. Otherwise, the default OGM will
be announced "PLEASE LEAVE YOUR MESSAGE AFTER THE TONE".
Turning the Answering System On and Off
When the Answering System is On, the display will show the "0" and the LED is on.
To Turn Off the Answering System
Press the "On/Off" button, the LED will be turned off and a beep tone will be heard. The display should read "OFF"
and then "0".
To Turn On the Answering System
Press the "On/Off" button, the LED will be turned on and a beep tone will be heard. The display should read "On"
and then "0".
Record Your Outgoing Message (OGM)
Your Answering System has the capability to hold one 60 second OGM.
To Record Your OGM
1. Press and hold the RECORD button for 2 seconds until a beep tone is heard and the display reads A1.
2. Speak clearly into the microphone from 6 to 8 inches away and the display will count up. Press STOP when you
have finished your message. A beep tone will be heard. The Answering System will play back your OGM and then
the display should read A1.
To Insert Sound Effects into Your OGM
Press any of the three sound effects keys while recording your outgoing message to insert phrases into your message.
You may insert as many as time allows. Watch the display to keep track of your remaining time.
CHECKING YOUR OGM AND DISPLAY
To check the OGM
1. Press and release the RECORD button, a beep tone is heard and display reads A1.
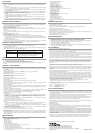
Checking the Message display
The Message Display provides a lighted digital readout to let you check the number of ICM and system's status at a
glance. Following are examples of how the display might look.
AUTOMATIC CALL TERMINATION
When a caller is leaving a message, there are certain conditions when the Answering System will terminate the call:
1. If the duration of the call exceeds 1 minute in length.
2. If the caller pauses (is silent) for 8 seconds or more while leaving a message.
3. If the answering machine's 14-minutes recording capacity becomes full.
Note: If the recording capacity becomes full, the display will flash four times with "FU" and then display the no of
messages.
LISTENING TO YOUR MESSAGES
If you have two messages, press the "MESSAGE" button, a voice prompt "YOU HAVE TWO MESSAGES" will be heard
and the Answering System will play back the messages. The message display will read the number of each message
during playback.
To Pause Message Playback
Message playback will pause by pressing the "MESSAGE" button. The display should read "PS".
To Stop Message Playback
Message playback will stop by pressing the "STOP" button.
To Skip Message Playback
Message playback will skip by pressing the "SKIP" button.
To Repeat Message Playback
Message playback will repeat by pressing the "REPEAT" button.
To Erase Message
Press and release the "ERASE" button during message playback will erase your message.
To Erase All Messages
Press and hold the "ERASE" button for 2 seconds, the display should read "ES". All messages will be erased. A beep
tone will be heard and the display should show "0".
To Save All Messages
If you have erased all messages by mistake, press and hold the "ERASE" button for 2 seconds again. The display will
show "SA" and erased messages will be saved after a long beep tone. The message display will show the number
of messages recorded.
Pin Security & Call Breakthrough (CBT) Codes
The PIN security code is the code you use to get access to your system when you are away. CBT code allows callers
to alert you to answer their call. This allows you to avoid answering calls that you are not expecting.
The factory preset PIN security code and CBT are "159" and "267" respectively.
To change the PIN Security Code and CBT code
PIN Security code
1. Press and hold the "SKIP" button for 2 seconds, a beep tone is heard and the display reads an original Security
code "SC, = 1, = 5, _ 9, = 1". Press the "SKIP" and "REPEAT" button until you choose the 1st digit.
2. Press the "On/Off" button once to enter the 1st digit. Display should read = 5. Press the "SKIP" and "REPEAT
button until you choose the 2nd digit.
3. Press the "On/Off" button once to enter the 2nd digit. Display should read "_ 9". Press the "SKIP" and "REPEAT"
button once until you choose the 3rd digit.
4. Press the "On/Off" button once to enter the 3rd digit
Note: If no key is pressed within 8 seconds, the setup procedure will be aborted.
CBT code
1. Press and hold the "REPEAT" button for 2 seconds, a beep tone is heard and the display reads an original security
code "Cc, = 2, = 6, _ 7, = 2". Press the "SKIP" and "REPEAT" button until you choose the 1st digit.
5. Press the "On/Off" button once to enter the 1st digit. Display should read "= 6". Press the "SKIP" and "REPEAT"
button until you choose the 2nd digit.
6. Press the "On/Off" button once to enter the 2nd digit. Display should read "_ 7". Press the "SKIP" and "REPEAT"
button once until you choose the 3rd digit.
7. Press the "On/Off" button once to enter the 3rd digit
Note: If no key is pressed within 8 seconds, the setup procedure will be aborted.
Power Failure Security
The memory of the system will be protected during an AC power failure if the 5x1.5V or G13A button cells are installed.
After power resumes, the system will return to its previous state. If there is no cell installed or the cells were dead,
once AC power resumes, all memory will be erased. You have to re-program all settings like Date/Time, OGM, PIN
Security and CBT codes.
REMOTE OPERATION
Remote Operation through Touch Tone Phone
You can operate your system remotely from any Touch Tone phone to:
- Turn the Answering System On and Off
- Play back ICM
- Save and erase ICM
- Record a new OGM
- Use Call Breakthrough
- Change of your PIN Security and CBT
Access to your Answering System using the Remote Security Code
1. Call your system and wait for the OGM.
2. Press the "*" button when your OGM. is played.
3. Enter your PIN SECURITY CODE after the tone.
4. Upon successful entry, the system will say "YOU HAVE NO MESSAGES" or "YOU HAVE X MESSAGES" and prompt
you with the Help Menu.
- To record outgoing message, press * 1.
- To monitor room, press 3.
- To play memo, press 4.
- To play all messages, press 5.
- To play new messages, press 6.
- To delete all messages, press star * 7.
- To stop functions, press 8.
- To play the message menu, press 0.
If you press "0", message play menu will be announced.
- To repeat message, press 4.
- To skip message, press 6.
- To delete message, press 7.
- To stop play, press 8.
Note: this remote comment will not be announced
- To record OGM, press * 1.
- To record MEMO, press * 3.
- To change CBT, press * 4.
- To change security code, press * 6
- To erase all messages, press * 7
- To end of remote operation, press #.
Note: If you press the Touch Tone button by mistake during remote operation, press "8" to erase the pervious
comment.
PROBLEM SOLVING GUIDE
No sound during ICM playback or call monitoring.
Adjust the speaker volume control
Cannot record an outgoing message ( OGM ).
Make sure you press and hold the OGM button for 2 seconds until the message display counts up.
The OGM changed after a power failure.
Backup batteries were not installed or need replacing.
Answering System takes calls on the wrong number of rings.
Extension phones operating on the same line of your Answering System weaken the signal received by the system.
This may cause your answering system to take longer to answer.
Answering System does not record ICM.
Make sure the message Display is not showing "FU"
CARE AND MAINTENANCE
Treat this product as you would any fine electronic equipment.
1. Keep your telephone Answering System away from sources of excessive heat and moisture.
2. Keep liquids from spilling onto or into any of your Telephone Answering System components.
3. Periodically clean the exterior surface by wiping with clean cloth. Do not use solvents, abrasive, glass cleaners,
etc. These may scratch the surface and damage the external finish of your equipment.
4. Do not let the cords become knotted or twisted.
5. Never open the telephone Answering System housing
6. Locate your telephone Answering System in a safe place. Place it on a solid flat surface where its cords will be
out of the way and where it is not likely to be knocked off.
FCC REQUIREMENTS
Federal Communications Commission Requirements
This equipment complies with Part 68 of FCC Rules. A label on the Base Unit of this equipment contains, among
other information, the FCC Registration Number and the Ringer Equivalence Number (REN) for this equipment. You
must, upon request, provide this information to your telephone company.
The REN also is useful in determining the quantity of devices that you may connect to your telephone line and still
allow all of these devices to ring when your telephone number is called. In most areas, but not all, the sum of the
RENs for all devices connected to one line should not exceed five (5.0). To be certain of the number of devices that
you may connect to your line, you should contact your local telephone company.
If your equipment should cause harm to the telephone network, the telephone company may temporarily disconnect
your service. If possible, they will notify you in advance that temporary discontinuance of service may be required.
However, when advance written notice is not possible, the telephone company may temporarily discontinue service
without notice if such action is necessary under the circumstances. The telephone company may make changes in
its communication facilities, equipment, operations, or procedures where such action is reasonably required in the
operation of its business and is not inconsistent with the rules and regulations of the Federal Communications
Commission.
Do not attempt to repair or modify this equipment. Changes or modifications not expressly approved by the party
responsible for its compliance could void the user's authority to operate the equipment.
This equipment should not be used on coin telephone lines. Connection to party line service is subject to state tariffs.
If trouble is experienced, disconnect this equipment from the telephone line to determine if it is causing the malfunction.
If the equipment is determined to be malfunctioning, its use should be discontinued until the problem has been
corrected.
Current FCC Regulations specify that any direct connections to a telephone company line be done using only standard
phone jacks and plugs that meet FCC Regulations.
This equipment has been tested and found to comply with the limits for a Class B digital device, pursuant to Part
15 of the FCC Rules. These limits are designed to provide reasonable protection against harmful interference in a
residential installation. This equipment generates, uses, and can radiate radio frequency energy and, if not installed
and used in accordance with the instructions, may cause harmful interference to radio communications. However,
there is no guarantee that interference will not occur in a particular installation. If the equipment does cause harmful
interference to radio or television reception, which can be determined by turning the equipment off and on, the user
is encourage to try to correct the interference by one or more of the following measures:
- Increase the separation between the equipment and receiver.
- Connect the equipment into an outlet on a circuit different from that to which the receiver is connected.
- Consult the dealer or an experienced radio / TV technician for help.
If you experience trouble with this equipment, please contact the following address and phone number for information
on obtaining service or repairs.
Company: Tiger Electronics, Ltd., Repair Dept.
Address: 980 Woodlands Parkway
Vernon Hills, IL 60061, U.S.A.
Tel. No.: 847-913-8100
90-DAY LIMITED WARRANTY
Tiger Electronics, Inc. (Tiger), warrants to the original consumer purchaser of this product that the product will be
free of defects in material or workmanship for 90 days from the date for original purchase. This warranty does not
cover damages resulting from accident, negligence, improper service or use or other causes not arising out of defects
in materials or workmanship.
During this 90-day warranty period, the product will either be repaired or replace (at Tiger's option) without charge
to the purchaser, when returned with proof of the date of purchase to either the dealer or to Tiger.
Product returned to Tiger without proof of date of purchase or after the 90-day warranty period has expired, but prior
to one year from the original date or purchase, will be repaired or replace (at Tiger's option) for a service fee of
$35.00. Payment must be by check or money order payable to Tiger Electronics, Ltd.
The foregoing states the purchaser's sole and exclusive remedy for any breach of warranty with respect to the product.
All products returned must be shipped prepaid and insured for loss or damage to:
Tiger Electronics, Ltd.
980 Woodlands Parkway
Vernon Hills, Illinois 60061 U.S.A.
The product should be carefully packed in the original box or other packing materials sufficient to avoid damage
during shipment. Include a complete written description of the defect, a check if product is beyond the 90-day
warranty period, and your printed name, address and telephone number.
THIS WARRANTY IS IN LIEU OF ALL OTHER WARRANTIES AND NO OTHER REPRESENTATIONS OR CLAIMS OF ANY
NATURE SHALL BE BINDING ON OR OBLIGATE TIGER IN ANY WAY. ANY IMPLIED WARRANTIES APPLICABLE TO
THIS PRODUCT, INCLUDING WARRANTIES OF MERCHANTABILITY AND FITNESS FOR A PARTICULAR PURPOSE,
ARE LIMITED TO THE NINETY (90) DAY PERIOD DESCRIBED ABOVE. IN NO EVENT WILL TIGER BE LIABLE FOR
ANY SPECIAL, INCIDENTAL OR CONSEQUENTIAL DAMAGES RESULTING FROM POSSESSION, USE, OR MALFUNCTION
OF THIS TIGER PRODUCT.
Some states do not allow limitations as to how long an implied warranty lasts and/or exclusions or limitations of
incidental or consequential damages, so the above limitations and/or exclusions of liability may not apply to you.
This warranty gives you specific rights, and you may also have other rights which vary form state to state.
Display reads "0" Answering System is On, but there is no message.
Display reads "08" There are eight messages in the Answering System.
Display reads "FU" Answering System's 14-minute recording capacity is full and
there are messages waiting. In this instance, all subsequent calls
will be answered, but no messages will be recorded.
PRINTED IN CHINA
®, TM, & © 1999 Tiger Electronics, Ltd. All rights reserved.
980 Woodlands Parkway, Vernon Hills, Illinois 60061, U.S.A.
®, TM, & © 1999 Tiger Electronics UK Ltd. All rights reserved.
Belvedere House, Victoria Avenue, Harrogate, North Yorkshire HG1 1EL, England.
www.tigertoys.com
© Lucasfilm Ltd. & TM. All rights reserved. Used under authorization.