


7. Take the tail/back handle
and align so that the screws
face the back of the giraffe
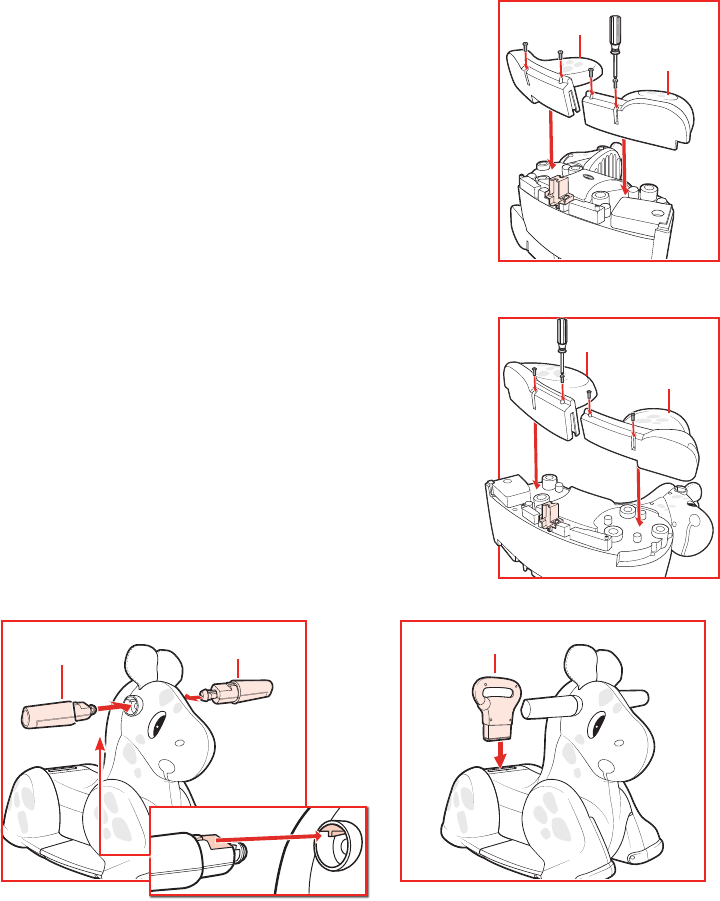
head. Press down firmly until
the tail/back handle snaps
into place.
3. Take the front leg piece (marked “1”) and
align with the section marked “1” on the
giraffe body.
Slide the leg piece over the side lip of the
connector plug and firmly press into place
on the area of the spots (you should hear
audible snaps).
Affix 2 screws into place as shown
4. Take the back leg piece (marked “2”) and align
with the section marked “2” on the giraffe
body.
Slide the leg piece over the side lip of the
connector plug and firmly press into place
on the area of the spots (you should hear
audible snaps).
Affix 2 screws into place as shown.
5. Turn the giraffe body onto its left side.
Remove label, install connector plug, and then
repeat steps 3 and 4 on the left side with
the front leg (marked “4”) and the back leg
(marked “3”).
2
1
tail/back handle
4
3
handle
6. Align the notched part of
one handle with the round
opening on the giraffe
head so that it interlocks as
shown, and push into place.
Repeat on the opposite side.
handle