


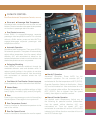

On/Off/Volume Control
Push to turn ON or OFF. Turn to
increase or decrease volume. If
the volume is set above a
certain level and the ignition is
turned off, the volume will
come back on at a “nominal”
level when the ignition switch is
turned back on.
Tune/Disc Selector
Press to go up or down the
radio frequency band or to
select a desired disc. Also
use in MENU mode to select
various settings.
Bass/Treble
Press MENU until Bass/Treble
settings are displayed. Adjust
using the SEEK control.
Balance/Fade
Press MENU until Balance is
displayed. Press to adjust
the audio between the left
and right speakers using the
SEEK control. Press MENU
again to display Fade. Press
to adjust audio between the
front and rear speakers
using the SEEK control.
MP3 Track/Folder Mode
In Track mode, pressing
SEEK will scroll through all
tracks on the disc. In Folder
mode, pressing SEEK will
scroll only through tracks
within a selected folder.
CD
Press to enter CD mode. If
a CD is already loaded into
the system, the CD will begin
playing where it last ended.
LOAD
Press LOAD to begin the CD
load sequence. When the
display prompts to select a
slot, use the desired slot to
load the CD. Press and hold
LOAD to autoload up to
6 CDs, one at a time, when the
display prompts to load a CD.
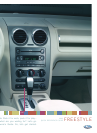
AM/FM
Press to select AM or FM
frequency bands.
Setting Memory Presets
To set a station: Select
AM/FM frequency band,
tune to a station, then press
and hold a preset button
until the sound returns.
SCAN control
Press for a brief sampling of
radio stations or CD tracks.
Press again to stop.
SEEK control
Press to access the
next/previous strong station
or track.
Setting The Clock
Press MENU until SELECT
HOUR or SELECT MINS is
displayed. Use the up/down
arrows and SEEK control to
adjust the hours/minutes.
Dual Play/Single Play
If the vehicle has a DVD
system, simultaneously press
preset buttons 2 and 4 to
switch between Dual Play and
Single Play. Please consult
your Owner's Guide for DVD
system operation.
12
11
10
9
8
7
6
5
4
3
2
1
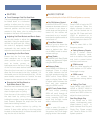
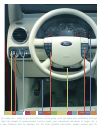
SEATING
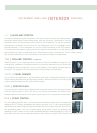
Front Passenger Fold Flat Seat Back
The front passenger seat back can
be folded down to a horizontal
position to allow room for a long
load. Ensure that the seat is in the
rearmost position and the head
restraint is fully down, prior to pulling the strap
located on the back of the seat back.
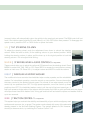
Adjusting 2nd Row Bucket and Bench Seats
Lift the side handle to adjust the
seat back. Using the same control
will fold the seat back flat. Lifting
the control (if equipped) located
underneath the seat cushion will
adjust the seat forward or backward.
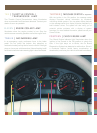
Accessing the 3rd Row Seats
Ensure that the 2nd row seat
head restraints are in the full
down position and no objects
such as books, purses, or
briefcases are on the floor in front
of the 2nd row seats before folding them down.
Place the front row seat in a forward position to
allow the 2nd row seat to be fully ”tumbled.” Lift
the handle once to fold the seat back flat. Lift the
same handle a second time to “tumble” the seat
forward to allow access to the 3rd row seat.
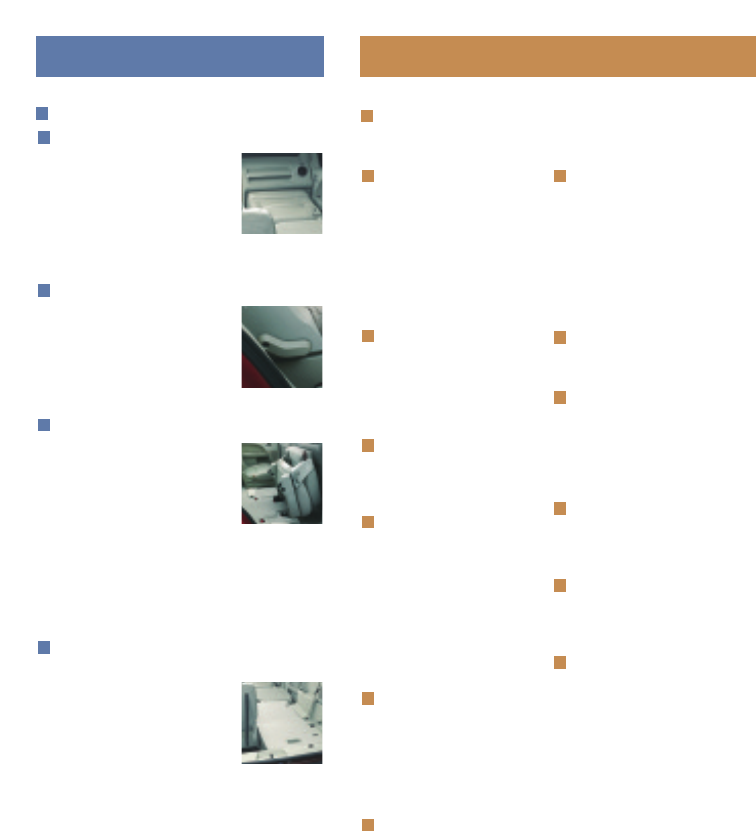
Stowing the 3rd Row Bench or
Split Bench Seat in Tub
Move the head restraint fully down.
Ensure that the stowage tub is
clear of objects prior to cycling.
From the rear of the vehicle, fold
the seat back by pulling and
holding the number 1 strap while pushing the seat
back forward. Release the strap after the seat
back starts rotating forward.
Release the cushion latches by pulling the
number 2 strap while pulling on the long strap
located on the seat back, to rotate the seat all the
way into the tub in the floor.
AUDIO SYSTEM
Premium/Audiophile In-Dash 6-CD Sound System (IF EQUIPPED)