©
2006 Edelbrock Corporation
Brochure No. 63-694300
Catalog #694300 & #694330
Rev. 6/06 - BC/mc
Catalog #694300 & #694330
Russell DOT Brake Hose Kit
for 1995-1999 Dodge / Plymouth Neon
INSTALLATION INSTRUCTIONS
Please study these instructions carefully before installing your new Brake Line Kit. If you have any questions, please call our
Technical Hotline at: 1-800-416-8628, 7:00 am to 5:00 pm, Monday - Friday, Pacific Standard Time or e-mail us at
Edelbrock@Edelbrock.com.
INSTALLATION PROCEDURE
IIMPORTANT NOTE: Do not allow the master cylinder to completely drain of brake fluid at any time during this process. Doing so
may require removing the master cylinder from the vehicle for bench bleeding. Also, use care when handling brake fluid, as it can
quickly damage finished surfaces (paint, plating, etc.).
1. Remove factory brake hoses, noting routing. Cap hard lines and
calipers/wheel cylinders.
2. Install banjo end of Russell front brake hose (Left or Right as marked),
with inboard hose end oriented correctly, onto caliper pointed up using
factory banjo bolt and supplied crush washers.
3. Route hose behind strut and attach inboard bracket on hose end to
factory location with factory screw. Install hardline into inboard hose
end.
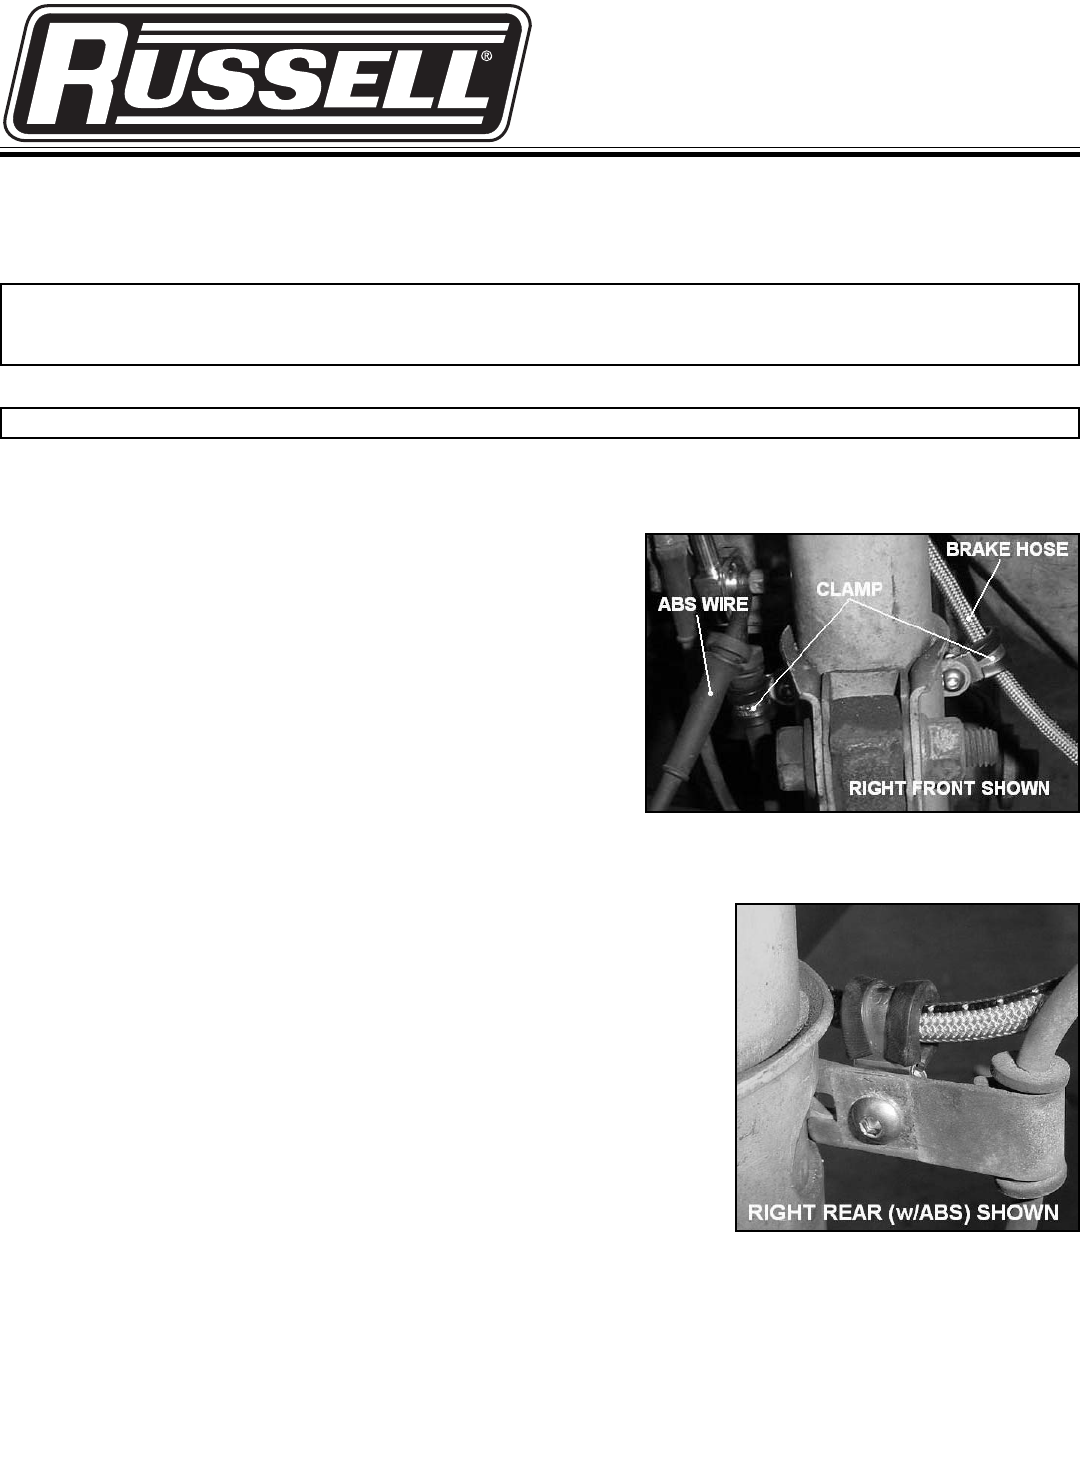
4. Use supplied cushion clamp, nut, and bolt to secure hose to front tab
on strut. If equipped, secure ABS wire to rear tab on strut with
supplied cushion clamp, nut, and bolt
(See Fig. 1).
5. FOR REAR DISC MODELS, SKIP TO STEP #7. FOR REAR DRUM MODELS: Install male-threaded hose end into wheel cylinder,
oriented similar to factory.
6. Attach inboard bracket on hose end to factory location with factory screw. Install
hardline into inboard hose end. SKIP TO STEP #10.
7. FOR REAR DISC MODELS: Install banjo end of Russell rear brake hose onto
caliper, with bend on the bottom, using factory banjo bolt and supplied crush
washers.
8. Route hose behind strut and attach inboard bracket on hose end to factory
location with factory screw. Install hardline into inboard hose end.
9. Secure hose to front tab on strut with supplied cushion clamp, nut, and bolt
(See
Fig. 2).
10. If equipped, secure ABS wire to rear hose with supplied cable ties.
11. Check hose clearance throughout entire steering and suspension travel range.
12. Bleed the system and check for leaks while applying pressure.
Edelbrock Corporation, 2700 California St., Torrance, CA 90503
Tech Line: 800-416-8628
Office: 310-781-2222
E-Mail: Edelbrock@Edelbrock.com
IMPORTANT NOTE:
Proper installation is the responsibility of the installer. Improper installation will void warranty and may result in
poor performance and engine or vehicle damage.
Fig 1
Fig 2


