


Catalog #66022, #66023
©2006 Edelbrock Corporation
Page 3 of 3
Brochure #63-66022
Rev. 8/06 - DA/mc
Edelbrock Corporation, 2700 California St., Torrance, CA 90503
Tech Line: 1-800-416-8628
E-Mail: Edelbrock@Edelbrock.com
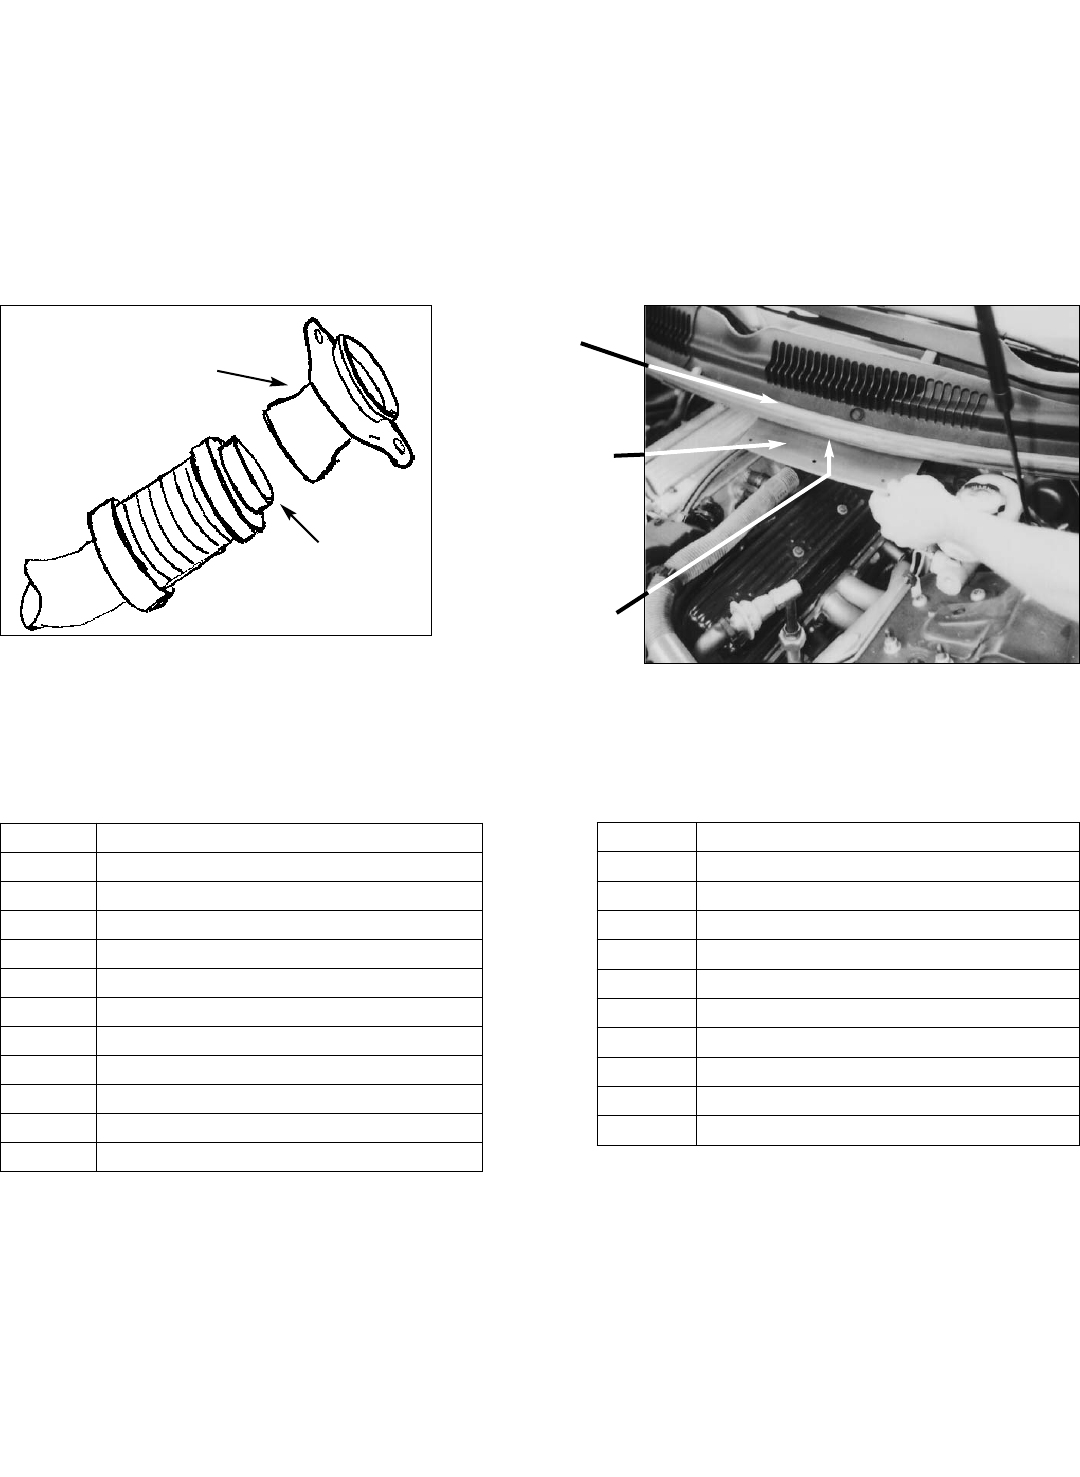
Fig. 2
Cowl Heat Shield Installation
Fig. 1
Cut right side bellows as shown
• COWL HEAT SHIELD
1. Push out three plastic pushpins (to the left of center)
holding seal to plastic cowl, and attach heat shield
using three 10-24 screws and nylock nuts provided.
Install cowl heat shield directly over left header. Be
careful not to overtighten as screws could pull
through rubber seal (see Figure 2).
• FINAL INSPECTION
1. Check all hydraulic, vacuum, and fuel lines to ensure
there is adequate clearance to T.E.S. components.
2. Re-connect battery.
3. At this point, it is a good idea to look everything over
and make sure that nothing was missed in assembly.
4. Start vehicle and bring up to normal operating
temperature. Check for possible leaks.
5. Turn engine off and let cool. Tighten all bolts again.
KIT CONTENTS
Catalog #66022 (Ceramic-Coated), #66023 (Ti-Tech Coated)
Qty. Description
❑ 1 Header left side #25-9311 (#66022)
❑ 1 Header right side #25-9312 (#66022)
❑ 1 Header left side #25-9082 (#66023)
❑ 1 Header right side #25-9083 (#66023)
❑ 1 Extension pipe right #25-9596
❑ 12 Hex header bolts; 3/8” - 16 x 1”
❑ 1 12-point Bolt; 3/8” - 16 x 2-14”
❑ 2 Chevrolet V8 port gaskets
❑ 1 Donut gasket; 2-1/4”
❑ 1 Catalytic converter gasket
❑ 3 Hex nuts; 3/8” - 16
Qty. Description
❑ 3 Hex bolts; 3/8” - 16 x 1-1/2”
❑ 2 Hex bolts; 3/8” - 16 x 2”
❑ 1 Tie wrap; 11”
❑ 1 Spacer tube; 5/8” O.D. x 1-1/8”
❑ 3 Flat washers; 3/8”
❑ 17 Lock washers; 3/8”
❑ 4 Hardened washers; 3/8” I.D. x 1/8”thick
❑ 1 Heat shield
❑ 3 Screws; heat shield
❑ 3 Nylock nuts; heat shield
Short extension (from
T.E.S. kit) will be welded
onto stock bellows pipe
Cut stock pipe
1/2” away from
weld
Plastic Wiper
Cowl
Heat Shield
Heat shield
attaches here