


2
MAN#650333:A
FLTR (ROAD GLIDE)
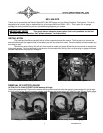
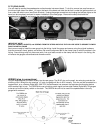
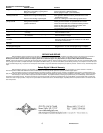
You will need to remove the speedometer and tachometer instrument bezel. To do this, remove two small screws on
the left and right side of the bezel. Lift up on the back of the bezel and slide the tab that is under the ignition switch out
from under the switch cover (see Photo A below). Unplug the gauge connections and unplug the indicator lights so the
bezel can be completely removed for easier installation of the new gauge. Remove the clamp that holds the
speedometer to the bezel and remove the gauge and gasket.
Photo A Bezel removed Gauges/Grommets removed
IMPORTANT NOTE!
SAVE ALL CLAMPS, GASKETS, and SCREWS FROM THE STEPS ABOVE AS THEY WILL BE USED TO SECURE THE NEW
DAKOTA DIGITAL GAUGE
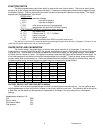
Next you are ready to install the new gauge into the fairing. Install the gauge and secure using the original hardware
that was removed: clamp, gasket, and screws. Be sure the alignment tab on the clamp lines up with the notches in the
fairing. Some fairings may only have one notch, line up at least one tab on the clamp with the notch in the fairing, this
will ensure the gauges are centered and aligned correctly.
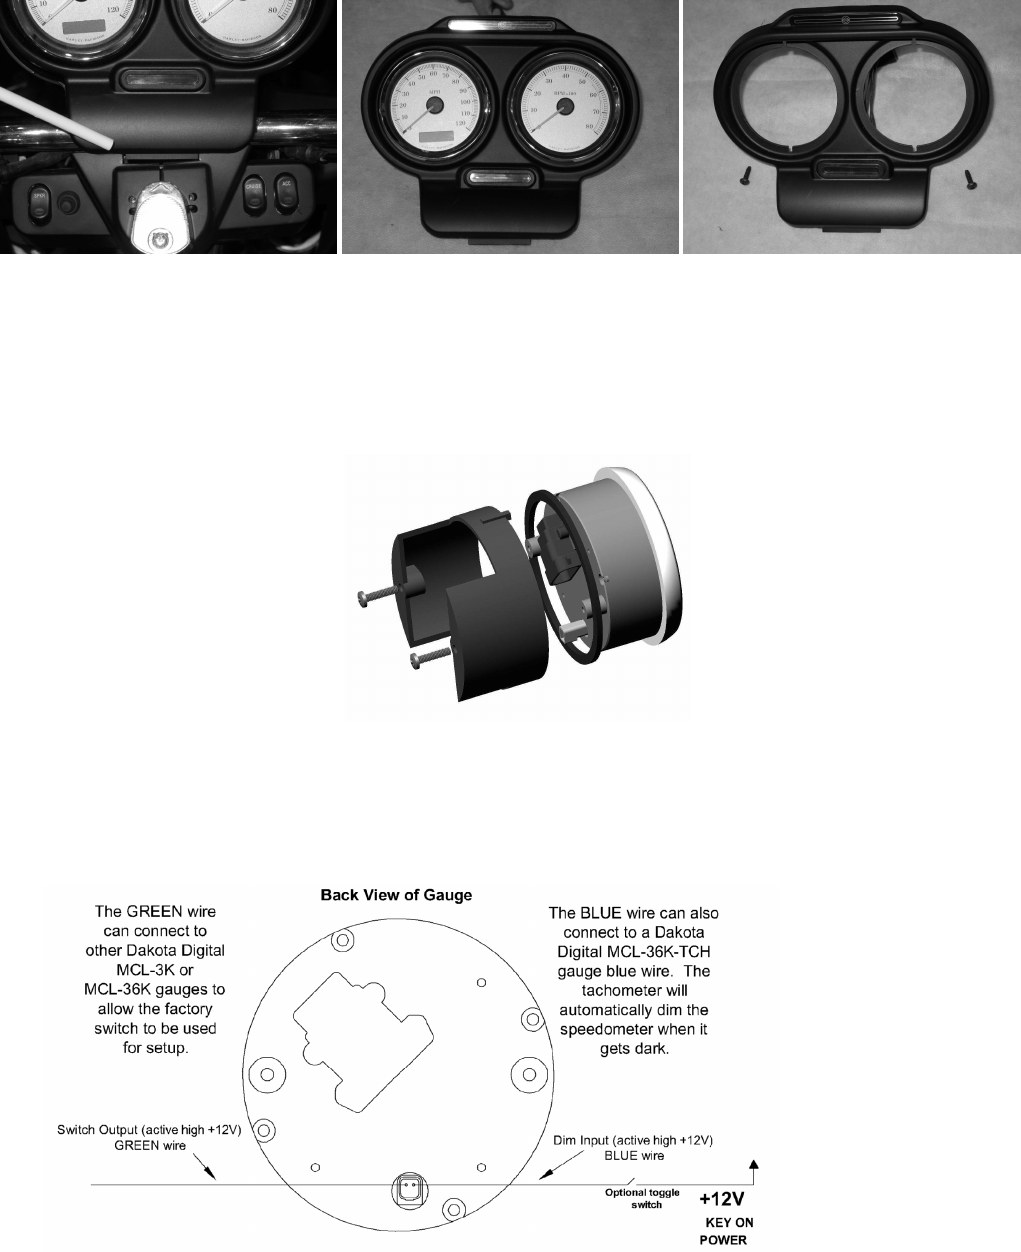
WIRING (plug in connections)
Plug the original speed connector directly into the new gauge. The BLUE wire on the small, two-wire plug controls the
dimming circuit. When this wire receives +12 volts, the gauge will dim to 50% intensity. This wire can be connected to a
toggle switch, or to a Dakota Digital MCL-36K-TCH (the tachometer has a sensor that activates the dimming feature
when ambient light is low). The GREEN wire can provide a switch signal to allow other Dakota Digital MCL-3K gauges
to be set up from the factory switch on the dash. The GREEN wire will not be used if the speedometer is the only
gauge being replaced.