


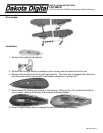

6. Remove the round mounting plate from the bottom of the LED assembly. It is attached with
two lock nuts. Note that there are 4 different assemblies. The left and right side sets are
mirrored.
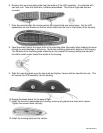
7. Pass the wires through the housing where the original bulb and socket were. Set the LED
assemblies into the housing so the two studs extend out the hole in the bottom of the housing.
8. Feed the wires through the larger hole in the mounting plate. Be careful when feeding the wires
through to avoid damage to the wiring. Guide the mounting plate to the bottom of the housing.
The flat side of the mounting plate should be on the outside of housing making the side with
the slight raised center toward the inside of the housing.
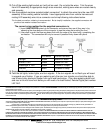
9. Slide the mounting plate over the two studs and tighten it down with the two #6 lock nuts. This
will secure the LED assembly into the housing.
10. Repeat the steps above for the second light.
11. Install the lens and reassemble the housing, ensuring all gaskets are intact and in place.
Tighten the screws down carefully.
12. Install the housing back into the vehicle.
MANUAL 650212