Nothing Comes Close to a Cobra
®
Installation
7
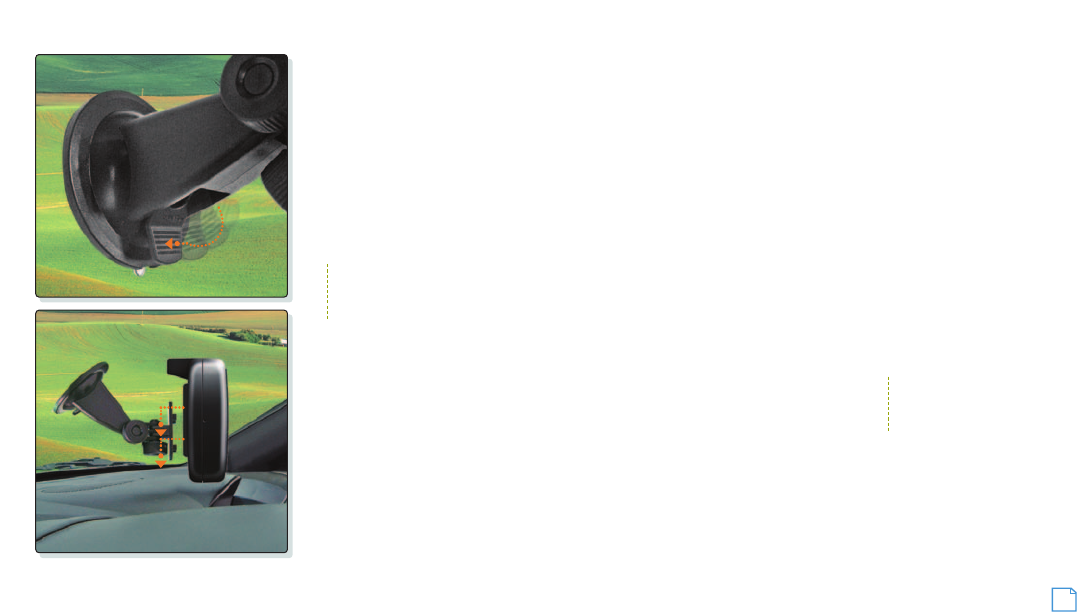
To secure and connect the NAV ONE:
1. Select a suitable location where the unit can be mounted.
2. Separate the mounting bracket from the unit.
3. Press the suction cup against the windshield.
4. Rotate the lock lever down toward the base.
5. Test suction cup adhesion by pulling on the bracket.
6. Attach the unit to the bracket. Put the slots on the back
of the unit over the prongs and slide the unit down.
7. Adjust the unit position using the knobs and
tighten securely.
8. If the unit will rest on the dash or might contact it,
apply the foam strip to the bottom of the unit to
protect the dash.
9. Plug the power cord into the unit and the vehicle’s
12-volt power port.
CHECKING GPS SIGNAL
Once the NAV ONE is installed and the vehicle is in an open area, turn the unit on
and observe the GPS signal indicator while the Map (or any other mode that shows
GPS signal strength) is displayed. If the indicator is either yellow or red, the NAV ONE
may not be “seeing” the sky and may need to be repositioned.
START-UP TIME
When the NAV ONE is new (or has been idle for more than seven days or has moved more than 500 miles while off),
it can take up to five minutes for the system to lock onto the GPS satellites. After such a start-up, the system can be
left turned on for 20 minutes or more to download GPS satellite data. This data will allow much faster satellite
acquisition and lock — typically less than a minute — when the system is subsequently turned on.
NOTE
It is best to temporarily remove the NAV ONE unit when the vehicle is parked to prevent theft or component damage
due to temperature extremes. The bracket can be left attached to the windshield for quick reinstallation of the unit.
NOTE
To check GPS reception in
detail, select S More S GPS.


