5
BASIC SETUP
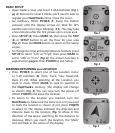
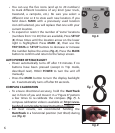
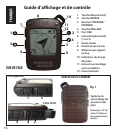
• Openbatterycoverandinsert3AAAbatteries(Fig 1,
pg 4).Recordtheserial#inside-you’llneeditlaterto
registeryourHuntTrackonline.Closethecover.
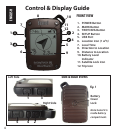
• Go outdoors. HOLD POWER(1) (keep the button
pressed) until the display comes on. Wait for GPS
satellitelock(iconstopsblinking)(11).Thismaytake
afewminutesafterthefirstpower-upinanewarea.
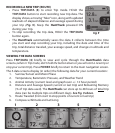
• PressSETUP(4).PressMARK(2),thenpresstheTRIP
(3) or SETUP button to set theHour for yourarea
(Fig. 2).PresstheMARKbuttontoreturntotheSetup
screen.
• Tochangethetimeandtemp/distanceformats,press
SETUPtoselect“12h”or“
0
F/yd”,thenpressMARKto
setto“24h”or“
0
C/m”.(Fig. 3).Thearrow’sfunctionis
explainedonpage 6.PressPOWERtoexitSetup.
MARKING/RETURNING to a LOCATION
• Press POWER to select one of five Location icons/
or 5-20 numbers (6) (Tent, Truck, Tree, Treestand,
Deer, #1-20). While standing at the Location you
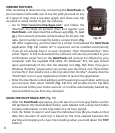
want to mark, HOLD MARK to save its position in
the HuntTrack’s memory (the display will change
asshown)(Fig. 4).Youcannowturnthepoweroff
(HOLDPOWER)andleavethelocation.
• To return to the location you marked, turn the
HuntTrack on.Makesurethesameiconor#youused
tomarkthelocationisshown(ifnot,pressPOWER
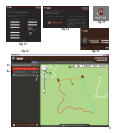
toselectit).Thedisplayindicatesthedirectionand
distance back to the location (Fig. 5). Move in the
directionofthearrow,watchingforthedistanceto
decrease.When you reach thelocation, the“Mark”
iconwillflashinthecenterofthedisplay.
Fig. 2
Fig. 4
Fig. 5
Fig. 3


