2
Plug in Connectors
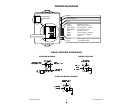
2-Pin Red Connector: Plug-in connector port
for LED. Mount LED in an area where it may be
easily seen from either side of the vehicle.
3-Pin White Connector: Plug-in connector port
for dual stage shock sensor.
2-Pin Blue Connector: Plug-in connector port
for valet switch. Mount switch in an area that is
easily accessible from the driver’s seat.
Programming Jumpers
Note: Before changing any jumper settings,
completely remove power from the unit by
disconnecting the main harness.
To change the jumper settings, carefully slide
out the removable jumper cover on the
module. Make the appropriate adjustments
noting that a jumper covering two pins is “On”
and a jumper covering one pin is “Off”.
Jumper Settings
1. Arming Mode. Select between manual
arming (Active) or automatic arming (Passive)
with Automatic Rearming.
2. Passive Locking. Enables the doors to auto
lock with Auto Rearm and Passive Arming.
3. Door Lock Pulse Width. Selects between a
1-second or 3-second output for vehicles
equipped with vacuum door locking systems.
4. Ignition Locking. Automatically locks and
unlocks the doors with the ignition.
Sensor Test Mode
The Sensor Test Mode allows shock sensitivity
adjustment without arming the system.
To enter Sensor Test Mode:
1. Turn the ignition on.
2. Press the Valet switch 5 times and hold on
the last press for 3 seconds.
• The parking lights will flash once.
3. Turn off the ignition.
4. Test the shock sensitivity.
• The system’s LED will flash each time the
sensor detects an impact.
5. Adjust sensor as desired.
6. Press transmitter Button 1 to exit when
finished.
Adding Transmitters
To add a new transmitter to the system have
the desired transmitters ready (maximum two)
and follow the Code Learning sequence.
To enter Code Learning Mode:
1. Turn the ignition on.
2. Press the Valet switch 3 times and hold on
the last press for 3 seconds.
• The parking lights will flash twice.
3. Press transmitter Button 1.
• The parking lights will flash four times.
4. Repeat step 3 for each additional transmitter.
5. Turn off the ignition.
Jumper Settings
#
Function Jumper “Off” Jumper “On”
1. Arming Mode Active Passive
2. Passive Locking Disabled Enabled
3. Door Lock Pulse Width 1 second 3 seconds
4. Ignition Locking Disabled Enabled


